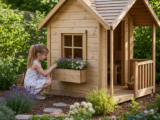
Planning exterior timber treatment for sheds, fences and play structures

You have put up a new shed, replaced a tired fence panel or assembled a children’s wooden playhouse, and the timber looks clean, fresh and ready for the garden. It is tempting to leave it until “later”, especially if it has arrived dip treated or pressure treated. In practice, planning exterior timber treatment early is one of the simplest ways to prevent premature weathering, swelling, cracking, greying and rot. Good treatment is not just about colour; it is about choosing the right product, preparing the surface properly and maintaining the coating at sensible intervals.
This guide explains how to plan exterior timber treatment for garden sheds, fences and play structures in a practical, UK-weather-aware way. It covers what to check before you start, how to estimate coverage, when to treat new timber, how to work safely around children’s play equipment, and the common mistakes that lead to patchy results or shortened timber life.
Inhaltsverzeichnis
Why exterior timber treatment matters
Outdoor timber is exposed to rain, frost, UV light, algae, dirt and daily temperature changes. Even robust garden buildings and fencing can suffer if the surface is left unprotected or if the coating is not maintained. Treatment helps to reduce water absorption, slow UV-related fading, improve appearance and support the long-term durability of above-ground timber.
The level of protection you need depends on the timber, its exposure and its use. A back fence in a shaded, damp corner will usually need more attention than a south-facing shed wall with good air circulation. A children’s playhouse also has extra considerations: surfaces are touched frequently, children may lean on rails or shutters, and coatings should be fully dry before use.
Start by identifying what you are treating
Before buying a treatment, look closely at the structure and the timber finish. Sheds, fences and play structures often use different timber profiles and may have different factory treatments.
Sheds
Sheds commonly have shiplap, overlap or tongue and groove cladding. Smooth-planed cladding may absorb less treatment than rough-sawn boards, so colours can appear lighter and coverage may differ from the label estimate. Pay close attention to lower boards, corners, door frames, windows, barge boards and any areas where water can sit.
Fences
Fence panels are often rough-sawn, which usually accepts treatment readily. Posts, gravel boards, panel edges and horizontal rails are the most vulnerable areas. If panels are close to plants or soil, clear vegetation before treating so the timber can dry and the coating can be applied evenly.
Play structures
Wooden playhouses, climbing frames and similar structures need particular care. Check the manufacturer’s instructions, especially if the product is supplied dip treated and has an anti-rot guarantee that depends on annual retreatment. If the structure includes styrene glazing, opening windows, ladders, loft areas, shutters or window boxes, take time to mask or protect parts that should not be coated. Never treat a play structure while children are using it, and keep it out of use until the coating is fully dry and any odour has dispersed.
Choose the right type of treatment
Exterior timber treatments vary. Some are mainly decorative coatings, while others are preservative treatments designed to help protect the wood. Some are water-based, some are solvent-based, and some are enriched with resins or pigments to improve water repellence and colour durability. Always read the product label and confirm suitability for the exact surface.
For sheds, fences and play structures, the key decision is whether the treatment is suitable for exterior, above-ground timber and whether it can be used on rough-sawn, smooth-planed or pressure treated wood. If you are working on a pressure treated shed or fence, check whether the manufacturer recommends a waiting period before coating. Some products advise waiting until the timber has weathered or dried sufficiently after assembly.
Decision criteria before you buy
- Timber surface: rough-sawn timber usually absorbs more and gives a stronger colour; smooth-planed timber may need additional coats.
- Existing treatment: check whether the timber is dip treated, pressure treated, previously painted, stained or bare.
- Use of the structure: for play structures, prioritise products suitable for garden timber and follow all safety and drying instructions.
- Exposure: shaded, damp, north-facing or plant-covered areas may need more regular maintenance.
- Finish: decide whether you want a natural look, opaque colour, matt or satin finish, or a visible wood texture.
- Coverage: calculate the surface area and allow for two coats where recommended.
- Drying conditions: plan for a dry, mild spell with no rain forecast before or soon after application.
- Cleaning: water-clean-up products are convenient for brushes and minor splashes, but you must still follow the label instructions.
Measure the timber and estimate coverage
Underbuying treatment is a common reason for rushed or uneven work. Overbuying can also be wasteful, particularly if you are using a colour you may not need again. Start with a simple area estimate.
For a rectangular shed wall, multiply width by height. Do this for each wall, then subtract large openings if you want a more accurate figure. For fences, multiply panel width by panel height, then multiply by the number of panels. Remember that treating both sides doubles the area. For playhouses and more detailed structures, include doors, shutters, railings, window boxes, fascia boards and exposed edges where appropriate.
Coverage rates are always approximate because the timber surface, dryness and application method make a difference. Rough-sawn timber can use noticeably more product than smooth-planed boards. End grain also absorbs heavily, so do not ignore cut ends and lower edges.
Practical example: interpreting product information
As a practical example, a 5 litre shed and fence treatment may state that 1 litre covers around 4 to 8 square metres for one coat. That means a 5 litre tub could cover approximately 20 to 40 square metres for one coat, depending on absorption and surface texture. If two coats are recommended, the realistic finished area may be closer to 10 to 20 square metres. This is why it is better to calculate your area and then allow a sensible margin rather than relying on the best-case coverage figure.
Some treatments are suitable for both rough-sawn and smooth-planed timber, but the final colour may look different. On smooth-planed timber, the colour can be paler because less product is absorbed. If the instructions recommend two coats for best results on smooth-planed timber, plan the time and quantity accordingly.
Prepare properly before applying treatment
Preparation has a major effect on the final appearance and the durability of the finish. Treatment should not be applied over dirt, loose material, green algae, heavy dust or wet timber. If the coating cannot bond properly, it may look patchy, wash off sooner or fail to protect vulnerable areas.
New timber
For newly assembled garden timber, check whether it is bare, dip treated or pressure treated. Dip treated structures often need a suitable top-up treatment soon after installation and then periodic retreatment in line with the manufacturer’s instructions. Pressure treated timber may need time to dry before a coating is applied. If the treatment product advises waiting, follow that advice rather than rushing.
Previously treated timber
If the old coating is sound, clean it thoroughly and lightly abrade glossy or uneven areas if the product instructions allow. If the surface is flaking, peeling or heavily weathered, remove loose coating first. Do not simply coat over failing layers and expect the new treatment to perform well.
Weathered or grey timber
Grey timber can often be treated, but it should be clean, dry and free from surface growth. If you want a more even decorative finish, you may need to clean and sand the timber first. Heavily cracked or rotten timber should be repaired or replaced before treatment.
Exterior timber treatment checklist
- Check the structure manufacturer’s guidance and any guarantee conditions.
- Confirm the treatment is suitable for exterior above-ground timber.
- Check whether it is suitable for rough-sawn, smooth-planed or pressure treated timber.
- Measure the area and calculate the quantity needed for the required number of coats.
- Choose a dry, mild day with no rain forecast.
- Clean the timber and allow it to dry fully.
- Remove algae, loose dirt, cobwebs and flaking coatings.
- Protect glazing, metalwork, handles, hinges, paving and nearby plants where needed.
- Stir the treatment thoroughly before and during use.
- Apply evenly, working the treatment into edges, joints and end grain.
- Allow the recommended drying time between coats.
- Keep children and pets away until the treated surface is fully dry.
Step-by-step application method
1. Clear the working area
Move pots, toys, tools, furniture and stored items away from the structure. Cut back plants touching fences or shed walls. If you are treating a playhouse, remove loose play items and make sure children cannot access the area while you work.
2. Clean the timber
Brush down the surface with a stiff hand brush. Remove moss, algae and dirt. For stubborn grime, use a suitable exterior wood cleaner if appropriate, then rinse and allow the timber to dry thoroughly. Do not trap moisture under a coating.
3. Protect adjoining surfaces
Use dust sheets or cardboard to protect paving, decking and artificial grass. Mask windows, styrene glazing, door furniture and decorative parts if needed. Be careful near neighbouring property when treating boundary fences.
4. Stir the product thoroughly
Pigments and resins can settle in the tub. Stirring helps achieve a consistent colour and finish. Continue stirring occasionally during use, especially if the job takes a while.
5. Apply the first coat evenly
Use a brush suitable for exterior timber treatment. A brush helps work the product into grain, joints, laps and corners. Sprayers can be useful for some fence products, but only if the product is suitable for spraying and wind drift can be controlled. For play structures, brushing is often more precise.
6. Pay attention to vulnerable areas
End grain, lower edges, joints, door bottoms, window ledges, railings and exposed horizontal surfaces usually need extra care. Water tends to collect in these areas, so thin or missed coverage can lead to early deterioration.
7. Apply additional coats where needed
Follow the manufacturer’s guidance for drying time and number of coats. Smooth-planed timber may need two coats to achieve a stronger and more even colour. Do not apply a thick single coat as a shortcut; it may dry poorly and leave an uneven finish.
Special considerations for children’s play structures
Playhouses and climbing frames must be treated with safety in mind. Use products according to the label and avoid coating surfaces that the manufacturer says should not be treated. Keep treatment away from glazing and moving parts, and do not let it pool on steps, ladders or handholds.
Once treated, allow the structure to dry fully before children use it. “Touch dry” does not always mean ready for play. Check that there is no tackiness, residue or strong odour. If the playhouse has enclosed areas, open doors and windows to ventilate it well.
Also inspect the structure while you work. Look for loose fixings, splinters, cracked boards, lifted felt, damaged glazing or any signs of water ingress. Treatment is only part of maintenance; structural safety checks are equally important.
Common practical mistakes to avoid
Treating timber that is too wet
Applying treatment to damp timber can reduce absorption and adhesion. After rain or cleaning, give the wood enough time to dry. Shaded fence panels may take longer than they appear.
Ignoring the underside and lower edges
Many people coat the visible faces but miss door bottoms, board ends and lower rails. These areas are often most exposed to splashback and trapped moisture.
Using the wrong product for the surface
A product intended for rough-sawn fencing may not give the desired result on smooth-planed playhouse cladding. Always check suitability rather than assuming all shed and fence products behave the same.
Rushing a second coat
If the first coat has not dried properly, the second may drag, streak or dry unevenly. Follow the stated drying guidance and adjust for cooler or damper weather.
Forgetting annual maintenance
Exterior timber treatment is not a one-off job. Many garden buildings supplied with a guarantee require regular retreatment. Keep a record of when you treated the structure and what product you used.
Choosing colour from the tub alone
The final colour depends on timber type, surface texture, previous coating and number of coats. Test a small, inconspicuous area if appearance is important.
Planning an annual maintenance routine
A simple yearly inspection can prevent small problems becoming expensive repairs. Spring is a good time to assess winter damage, while late summer can be ideal for retreatment because timber is often drier and the weather is still mild.
Check for peeling coating, green growth, open joints, soft patches, water stains, damaged roof felt and vegetation touching the timber. Clean the surface and recoat where required. Fences in exposed positions may need more frequent attention than sheltered sheds. Playhouses should be checked more often because they are actively used by children.
Short FAQ
How often should you treat a shed or fence?
Follow the product and structure manufacturer’s instructions. Many dip treated garden buildings require retreatment after installation and then at regular intervals, often annually, to maintain protection and guarantee conditions.
Can you treat pressure treated timber straight away?
Not always. Some treatments advise waiting until the timber has dried or weathered after assembly. If a product states a waiting period, follow it.
Do you need two coats?
It depends on the product, timber and desired finish. Smooth-planed timber may need two coats for better colour and coverage. Rough-sawn timber may absorb more product but often shows colour more strongly.
Is exterior timber treatment safe around plants and pets?
Only use products as directed and keep pets and children away during application and drying. If a product states it is harmless to plants and pets when used as directed, you should still avoid unnecessary splashing and allow it to dry fully.
Can you apply treatment in cold weather?
Cold, damp conditions slow drying and can affect the finish. Choose a dry, mild day and avoid application if rain, frost or heavy dew is likely.
Conclusion
Planning exterior timber treatment is about more than choosing a colour. You need to understand the timber surface, check any existing factory treatment, measure the area, allow for the right number of coats and work in suitable weather. Preparation, careful application and routine maintenance will help sheds, fences and play structures stay attractive and serviceable for longer.
Before you start, read both the timber structure guidance and the treatment label. Clean and dry the surface, protect vulnerable fittings and give particular care to joints, edges and end grain. For children’s play structures, add an extra level of caution by keeping the area out of use until everything is fully dry and safe to touch. With a sensible plan, exterior timber treatment becomes a straightforward maintenance task rather than a last-minute repair job.