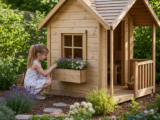
Practical Interior Layout Ideas for a Children’s Wooden Playhouse
You have chosen a children’s wooden playhouse, it has been installed in the garden, and the first few days are full of excitement. Then reality arrives: toy food ends up under the seating, crayons roll into corners, cushions get damp near the door, and every game seems to require emptying the whole playhouse onto the lawn. A good interior layout prevents this. By dividing the playhouse into simple zones for sitting, storing toys, imaginative play and quiet activities, you can make the space safer, easier to tidy and more enjoyable for your child.
This article explains practical ways to organise toys, seating and activity zones inside a children’s wooden playhouse. The advice applies to compact wooden playhouses as well as slightly larger models, and uses the 7×6 Shire Wigwam Kids Wooden Playhouse as a practical example of the sort of small garden play space you may be working with. The product is not the focus; the aim is to help you make sensible layout decisions whatever similar playhouse you own.
Inhaltsverzeichnis
Start by assessing the actual usable space
Before adding furniture or storage, look carefully at how much usable floor area you have. Children’s playhouses are often described by their nominal external size, but the internal space will be reduced by wall thickness, framing, the door swing and the shape of the roof or walls. A playhouse may feel generous when empty and cramped once a bench, toy box and play kitchen are added.
Stand inside the playhouse and note three things:
- Where the door opens: keep this area clear so children can enter and leave easily.
- Where the windows are: use natural light for reading, drawing or pretend shop counters.
- Where adults can reach: you should be able to tidy, supervise and remove items without awkward bending or climbing.
If you are working with a playhouse around 7ft by 6ft, such as the 7×6 Shire Wigwam Kids Wooden Playhouse described as 2.1m by 1.8m, the interior should be treated as a small room rather than a shed to be filled. Every item should have a purpose, and open floor space is valuable. Children need room to turn, kneel, sit and move toys around.
Plan the interior around activity zones
The easiest way to avoid clutter is to divide the playhouse into zones. These do not need physical partitions. A mat, a low shelf, a cushion or a small table can signal where one activity ends and another begins.
Zone 1: The entrance and clear floor area
The area immediately inside the door should remain open. This is where children step in, take off muddy shoes, carry toys and move between indoor and outdoor play. If this space is blocked, the playhouse quickly becomes awkward and unsafe.
Keep large storage boxes, tables and chairs away from the doorway. If you need somewhere for shoes, use a shallow tray or a small washable mat placed to one side, not directly in the route of the door. Avoid hanging bags or dressing-up clothes where they can catch on the handle or trail onto the floor.
Zone 2: A seating and quiet corner
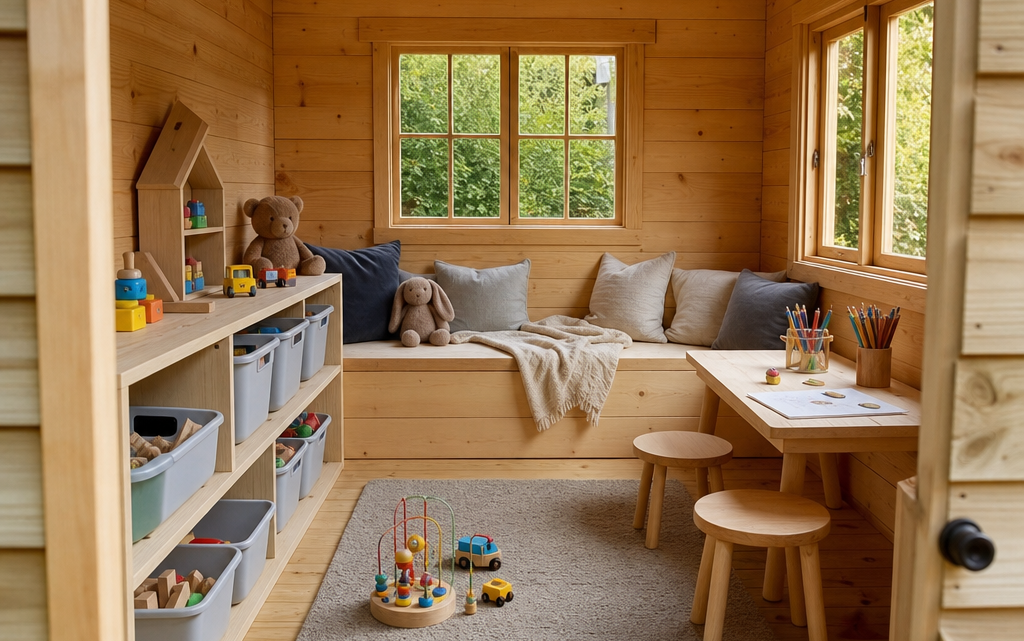
A seating corner gives the playhouse a calm, welcoming feel. It can be used for reading, chatting, pretend tea parties or simply resting between active games. In a compact wooden playhouse, built-in-style seating is often more efficient than freestanding chairs.
Good seating options include:
- One low bench placed against a wall.
- A storage bench with a soft cushion on top.
- Two small stackable stools that can be moved outside when needed.
- Washable floor cushions stored in a basket when not in use.
Choose seating with rounded edges, stable bases and washable covers. Avoid tall chairs, wobbly stools or anything heavy that a child could pull over. If the playhouse has small windows, placing seating near one of them can create a pleasant reading spot without needing electric lighting.
Zone 3: Imaginative play area
Most children’s playhouses naturally become cafés, shops, dens, homes, castles or camps. Rather than trying to include every possible prop, choose one adaptable imaginative play area. A low shelf can become a shop counter, kitchen worktop, ticket desk or nature table depending on the game.
Keep the furniture simple. A small wooden crate, a low table or a narrow unit against the wall is usually enough. Store themed toys in removable boxes, for example one box for play food, one for toy animals and one for dressing-up accessories. Rotating these boxes is more effective than cramming the playhouse with every toy at once.
Zone 4: Creative activity area
If your child enjoys drawing, sticker books, puzzles or craft, place a small activity table near natural light. In a playhouse with two small windows, the brightest wall is usually the best location. However, be realistic about mess and weather. Paper, felt pens and craft supplies should not live permanently in a damp or unheated garden building unless they are kept in sealed containers.
A practical creative area might include:
- A small wipe-clean table.
- One or two lightweight chairs.
- A lidded plastic box for paper and colouring materials.
- A clipboard or lap tray if there is not enough room for a table.
Do not overload the creative zone with paint pots, glue, glitter and small loose pieces unless an adult is supervising. A playhouse should be easy to reset after use.
Use storage that children can manage themselves
The best storage system is one your child can actually use. If boxes are too heavy, shelves are too high or lids are difficult to open, toys will end up on the floor. Aim for low, visible and simple storage.
Low open shelves
Low shelves are useful because children can see what is available. Keep heavier toys on the bottom shelf and lighter items above. Avoid tall freestanding shelves unless they are secure and appropriate for the space. In small playhouses, shallow shelving is usually better than deep shelving because toys do not disappear at the back.
Labelled boxes and baskets
Use picture labels for younger children and word labels for older children. Instead of vague categories such as “miscellaneous toys”, use clear groups: “play food”, “animals”, “cars”, “books” and “dress-up”. Smaller boxes are easier to lift and tidy than one large toy chest.
Wall hooks with care
Hooks can be useful for lightweight items such as aprons, small bags or hats, but keep them low and avoid sharp or protruding fittings. Do not hang heavy items on thin cladding or where they could be pulled down. Always follow the playhouse manufacturer’s guidance before fixing anything to the structure.
Practical example: planning a compact 7×6 playhouse
As an example, the 7×6 Shire Wigwam Kids Wooden Playhouse is described as a 2.1m by 1.8m children’s wooden garden playhouse with a single entrance door and two small windows. It is built from 12mm tongue and groove cladding supported by a 34mm frame, with an 11mm OSB floor, styrene safety glazing and compliance with BS EN 71-1:2014 safety standards. Those details matter for layout because the building is clearly intended as a child’s play space, but it remains a compact interior where low, light and flexible items are preferable to bulky furniture.
In a playhouse of this kind, a sensible arrangement would be to keep the doorway completely clear, place a low bench or cushion corner along one side, use the window area for a small table or pretend shop counter, and reserve the opposite wall for shallow toy storage. The centre of the floor should remain open so children can sit, turn and change activities without constantly moving furniture.
When you are using any similar playhouse, resist the temptation to copy a full indoor playroom layout. Garden playhouses work best when they contain fewer items that can serve several purposes. A storage bench can be seating, a reading nook and a place for soft toys. A small table can be a café table in the morning and a drawing table in the afternoon. A basket of fabric pieces can become picnic blankets, costumes, curtains or den-making materials.
Choose furniture that suits a wooden garden building
A children’s wooden playhouse is not the same as a heated indoor bedroom. The contents may be exposed to temperature changes, moisture from shoes, condensation and garden dust. Choose furniture and accessories accordingly.
Best materials for playhouse interiors
Painted wood, sealed plywood, plastic tubs, wipe-clean fabrics and outdoor-friendly cushions are generally practical. Avoid delicate upholstered chairs, untreated cardboard storage and expensive soft furnishings. If you use rugs, choose washable, quick-drying mats rather than thick carpets that can trap moisture and dirt.
Keep furniture light but stable
Lightweight furniture is easier to move and clean around, but it still needs to be stable. A small table with a wide base is safer than a narrow, top-heavy unit. Avoid furniture with glass, sharp metal corners or folding mechanisms that can trap fingers.
Think about height
Children should be able to reach their toys without climbing. Keep everyday items between floor level and child chest height. Higher shelves, if used at all, should be reserved for adult-controlled items such as spare craft supplies or seasonal decorations.
Checklist: setting up the interior before your child uses it
Use this checklist before you hand the playhouse over for everyday play:
- Is the doorway clear, with no furniture blocking entry or exit?
- Can your child move around the centre of the playhouse without tripping?
- Are heavy toys stored low down?
- Are shelves, boxes and seating stable during normal play?
- Are cushions, mats and fabrics washable or easy to dry?
- Are craft supplies stored in lidded containers?
- Are small parts suitable for the age of the child using the playhouse?
- Are hooks, shelves or accessories fitted safely and in line with manufacturer guidance?
- Can your child understand where each type of toy belongs?
- Can an adult easily inspect, clean and tidy the space?
How to keep the playhouse tidy day to day
A tidy playhouse is not about perfection. It is about making the next play session easy to start. The best approach is to create a short routine that children can follow.
At the end of play, ask your child to do three simple jobs: put soft items into one basket, return small toys to their labelled boxes, and leave the floor clear. This is more achievable than asking them to “tidy the playhouse”, which can feel too vague.
Limit the number of toys kept inside at any one time. A useful rule is one box per activity type. For example, one box of play food, one box of cars, one box of animals and one box of craft materials. If a new box goes in, another box comes out. This keeps the space fresh and prevents the playhouse becoming a storage overflow for the house.
Common practical mistakes to avoid
Adding too much furniture
The most common mistake is treating the playhouse like a miniature sitting room. A sofa, table, chairs, kitchen unit, toy chest and bookcase may look charming in theory, but they can make the interior hard to use. Start with the minimum and add only what is genuinely needed.
Using one large toy box for everything
A big toy chest seems efficient, but children often empty the whole box to find one item. It can also become heavy and untidy. Several smaller containers are usually better.
Ignoring the door swing
If the door cannot open fully or children have to squeeze around a table, the layout will be frustrating. Always plan from the doorway first.
Leaving soft furnishings inside all year
Cushions, blankets and soft toys can become damp or musty if left in an unheated garden building. Use washable covers and bring soft items indoors during wet, cold or unused periods.
Storing unsuitable craft materials
Paint, glue and felt pens may dry out, leak or stain surfaces. Keep messy supplies in sealed boxes and only bring them out when supervised.
Forgetting adult access
You need to be able to check corners, clean the floor and remove toys. If the layout only works for a small child, maintenance becomes difficult.
Seasonal layout adjustments
The best playhouse layout may change through the year. In spring and summer, children may move between the garden and playhouse frequently, so keep the entrance area especially clear and use washable mats. A pretend shop or café counter near a window can work well when outdoor play is active.
In autumn, add a reading corner with a small basket of books and a dry cushion that can be taken indoors after use. In winter, reduce the contents and avoid leaving fabrics, paper and soft toys outside for long periods. If the playhouse is used less often, store toys in sealed boxes so they remain clean and easy to inspect.
Make the layout grow with your child
A good playhouse interior should be easy to adapt. Younger children may need large, simple toys and plenty of open floor space. Older children may prefer a den, a drawing desk, a nature observation area or a pretend office. Avoid permanent, highly specific installations unless you are confident they will be used for several years.
Flexible items are the safest investment: low shelves, storage boxes, washable mats, small stools and plain cushions. These can be rearranged as your child’s interests change.
FAQ
How much floor space should be left clear?
As a general rule, keep the central floor area as open as possible. In a compact playhouse, avoid filling more than the edges with furniture and storage. Children need space to sit, kneel, turn and play safely.
Should toys stay in the playhouse overnight?
Durable plastic, wooden and outdoor-suitable toys can usually stay in lidded boxes, provided the playhouse is dry and well maintained. Soft toys, books, paper and craft items are better brought indoors or stored in sealed containers.
Is a table necessary?
Not always. A small table is useful for drawing, puzzles and pretend cafés, but it can dominate a small playhouse. A lap tray, folding table or low crate may be more practical if space is limited.
Can I fix shelves to the walls?
Only do so if it is suitable for the structure and in line with the manufacturer’s guidance. Keep shelves shallow, low and lightly loaded. Freestanding low storage may be simpler and safer in many playhouses.
What is the easiest layout for younger children?
Use one seating corner, one low toy storage area and a large clear floor space. Keep categories simple and avoid too many small accessories.
Conclusion
A well-organised children’s wooden playhouse is not created by adding more toys or furniture. It is created by making clear decisions about how the space will be used. Keep the entrance open, place seating against a wall, use windows for quiet or creative activities, store toys low and visibly, and leave the centre of the floor free for play.
Whether you are arranging a compact 7×6 playhouse or another similar garden model, the same principles apply: choose flexible furniture, limit clutter, use child-friendly storage and review the layout as your child grows. With a practical interior plan, the playhouse becomes easier to tidy, safer to use and far more inviting for everyday imaginative play.