How to Build a Garden Bench Yourself

Are you looking to enhance your outdoor space with a personal touch? Building a garden bench is a fantastic way to add character and functionality to your garden or yard.
You can create a beautiful and sturdy outdoor furniture piece that suits your style and meets your needs. With some basic woodworking skills and materials, you can construct a bench that provides a comfortable seating area for relaxation and entertainment.
Inhaltsverzeichnis
Key Takeaways
- Learn the benefits of creating your own outdoor furniture
- Understand the basic requirements for building a garden bench
- Discover how to customise your bench to suit your garden style
- Find out how to choose the right materials for your project
- Get an overview of the construction process
Why Building Your Own Garden Bench Is Rewarding
Creating a garden bench yourself offers numerous benefits. Not only can it be a fun and engaging DIY project, but it also allows you to create something tailored to your specific needs and preferences.
By building your own garden bench, you can ensure that it complements your outdoor decor perfectly. Whether you have a modern, minimalist garden or a more traditional, lush setup, a custom-made bench can enhance the overall aesthetic of your outdoor space.
Cost Benefits Compared to Store-Bought Options
One of the primary advantages of building your own garden bench is the potential for cost savings. Store-bought garden benches can be expensive, especially if you’re looking for high-quality materials and craftsmanship. By sourcing your own materials and building the bench yourself, you can save a significant amount of money.
The table below illustrates a rough estimate of the cost comparison between building your own garden bench and purchasing one from a store:
| Component | Cost of Building Your Own | Cost of Store-Bought |
|---|---|---|
| Lumber | £50-£100 | £100-£200 | Hardware | £10-£20 | – |
| Total Cost | £60-£120 | £150-£300+ |
Customisation Possibilities for Your Garden Space
Another significant benefit of building your own garden bench is the ability to customise it to your exact specifications. You can choose the type of wood, the design, and the size to ensure that your bench fits perfectly into your garden space.
With custom garden furniture, you can create a cohesive look that ties in with your existing outdoor decor. This can be particularly beneficial if you have a specific theme or style in mind for your garden.
Planning Your Garden Bench Project
Before you start building your garden bench, it’s essential to plan the project carefully. A well-planned project ensures that your garden bench fits perfectly into your outdoor space and meets your needs.
Determining the Right Size and Style
To determine the right size and style for your garden bench, consider the available space in your garden and the purpose of the bench. Will it be used for seating, storage, or as a decorative piece? Measure the area where you plan to place the bench to ensure it fits comfortably. Think about the garden bench design that will complement your garden’s aesthetic. You can choose a modern, minimalist design or a more traditional style, depending on your preferences.

Consider the materials and colours that will be used in your garden to ensure the bench blends in or stands out as desired.
Choosing the Best Location in Your Garden
Choosing the best location for your garden bench involves considering both practicality and aesthetics. Look for a spot that is level and stable, as this will ensure the bench remains sturdy. Consider the view you want to enjoy from the bench and whether you want it to be in a sunny or shaded area. Your garden bench can become a focal point for outdoor seating, so place it in an area that encourages relaxation and enjoyment of your garden.
Effective garden planning will help you identify the perfect spot that is both functional and beautiful.
Essential Tools You’ll Need for the Project
Before you begin constructing your garden bench, it’s essential to have the right tools at your disposal. Having the correct equipment will not only make the process smoother but also ensure that your final product is sturdy and well-crafted.
Power Tools Requirements
You will need a few power tools to efficiently cut and shape the wood for your garden bench. A circular saw is necessary for making straight cuts in lumber, while a drill is required for driving screws and drilling pilot holes. If you have access to a jigsaw, it can be useful for curved cuts, although it’s not essential for a basic garden bench design.

Hand Tools and Measuring Equipment
In addition to power tools, you’ll need various hand tools and measuring equipment. A tape measure is crucial for ensuring accurate measurements, while a square will help you verify that your corners are properly aligned. Clamps are necessary for holding pieces together while you glue and screw them in place. You will also need a hammer for tapping pieces into position and a set of chisels for removing small amounts of wood.
Alternative Tools for Beginners
If you’re new to woodworking, you might not have all the specialized tools required for the project. In such cases, consider alternatives or simplifications. For example, you can use a hand saw instead of a circular saw for cutting lumber, although it will require more effort. Additionally, you can rent power tools or borrow from friends if you don’t plan on using them frequently.
| Tool Type | Essential Tool | Alternative |
|---|---|---|
| Power Tools | Circular Saw | Hand Saw |
| Hand Tools | Tape Measure | Ruler |
| Measuring Equipment | Square | Combination Square |
Materials Selection Guide
When building a garden bench, selecting the right materials is crucial for durability and aesthetic appeal. The materials you choose will directly impact how well your bench withstands various weather conditions and how long it lasts.

Best Types of Wood for Outdoor Furniture
The type of wood you choose for your garden bench is critical for its durability and resistance to outdoor elements. Hardwoods and softwoods are the two main categories to consider.
Hardwoods vs Softwoods for Durability
Hardwoods, such as oak and teak, are generally more durable and resistant to rot and insect damage compared to softwoods. Softwoods, like pine and spruce, are often less expensive but may require more maintenance.
Pressure-Treated Options
Pressure-treated wood is another viable option for outdoor furniture. It is treated with chemicals to resist rot and insect damage, making it a cost-effective choice for garden benches.
Hardware and Fasteners Needed
In addition to the wood, you’ll need appropriate hardware and fasteners to assemble your garden bench. Stainless steel or galvanized screws and nails are recommended for their resistance to corrosion.
Ensure that all hardware is compatible with the type of wood you’ve chosen to avoid any adverse reactions.
Safety Precautions When Building Outdoor Furniture
As you embark on building your garden bench, it’s vital to consider safety measures to prevent accidents and achieve professional results. Working with wood and power tools can be hazardous if you’re not properly prepared. Therefore, understanding and implementing safety precautions is crucial for a successful DIY project.
Proper Tool Handling
Handling tools correctly is fundamental to safety in woodworking. You should always read the manufacturer’s instructions for each tool and understand its specific safety features. Keep your tools well-maintained, as dull or damaged tools can be more hazardous than well-sharpened ones. Additionally, ensure you’re using the right tool for the task at hand to avoid accidents.

Personal Protective Equipment
Wearing personal protective equipment (PPE) is essential when working with power tools and wood. This includes safety glasses to protect your eyes from debris, ear protection to prevent hearing damage, and a dust mask to avoid inhaling wood dust. Moreover, wearing gloves can protect your hands from splinters and cuts, while a hard hat can safeguard against falling objects.
By prioritizing safety through proper tool handling and the use of personal protective equipment, you can significantly reduce the risk of injury and ensure a safe and enjoyable woodworking experience.
How to Build a Garden Bench Yourself: Step-by-Step Process
If you’re looking to add a personal touch to your garden, building your own bench is a great place to start. This project allows you to create a piece of furniture that perfectly suits your outdoor space. To begin, you’ll need to understand the basic structure of a garden bench and how to interpret the plans.
Understanding the Basic Bench Structure
A typical garden bench consists of a seat, legs, and sometimes a backrest. The seat is usually made up of several slats attached to a frame, which is then supported by the legs. The backrest, if included, is typically attached to the seat frame and provides additional comfort. Understanding these components is crucial to building a sturdy and comfortable bench.

Reading and Interpreting the Plans
Before you start building, it’s essential to read and understand the DIY bench plans you’re using. Look for plans that include detailed measurements and instructions. Pay particular attention to the materials list and the tools required. Understanding the plans will help you avoid mistakes and ensure that your bench turns out as expected.
When interpreting the plans, consider the scale of the project and the complexity of the design. Make sure you have all the necessary tools and materials before you begin. If you’re new to woodworking, start with simpler plans and gradually move on to more complex projects as your skills improve.
Preparing and Cutting the Lumber
As you embark on building your garden bench, preparing and cutting the lumber is a crucial step that requires attention to detail. “Measure twice, cut once” is a mantra that resonates deeply with woodworkers, emphasizing the importance of accuracy in this phase. Proper lumber preparation ensures that your bench is sturdy, well-proportioned, and safe to use.

Measuring and Marking Your Wood
To begin, you’ll need to measure and mark your lumber according to the dimensions specified in your plan. Using a high-quality tape measure and a sharp pencil, carefully mark the cut lines on each piece of wood. It’s essential to double-check your measurements to avoid errors that could lead to wasted material or a poorly fitting joint. Consider using a marking gauge for consistent and precise markings.
As you measure and mark your wood, keep in mind that precise measurements are critical to the overall quality of your garden bench. Take your time to ensure that each mark is accurate and clearly visible.
Making Precise Cuts for Each Component
With your lumber accurately marked, it’s time to make the cuts. Depending on the tools you have available, you may use a circular saw for straight cuts or a jigsaw for curved cuts. Regardless of the tool, ensure that it’s properly maintained and that you’re wearing appropriate safety gear, including safety glasses and a dust mask.
For each component of your garden bench, carefully follow your cut list, making sure to cut on the waste side of the line to avoid oversizing your parts. “A good craftsman is always precise,” and precision in cutting will pay dividends in the assembly and final appearance of your bench.
By focusing on wood cutting and lumber preparation, you’ll be well on your way to creating a beautiful and durable garden bench that will provide years of enjoyment.
Building the Bench Seat Frame
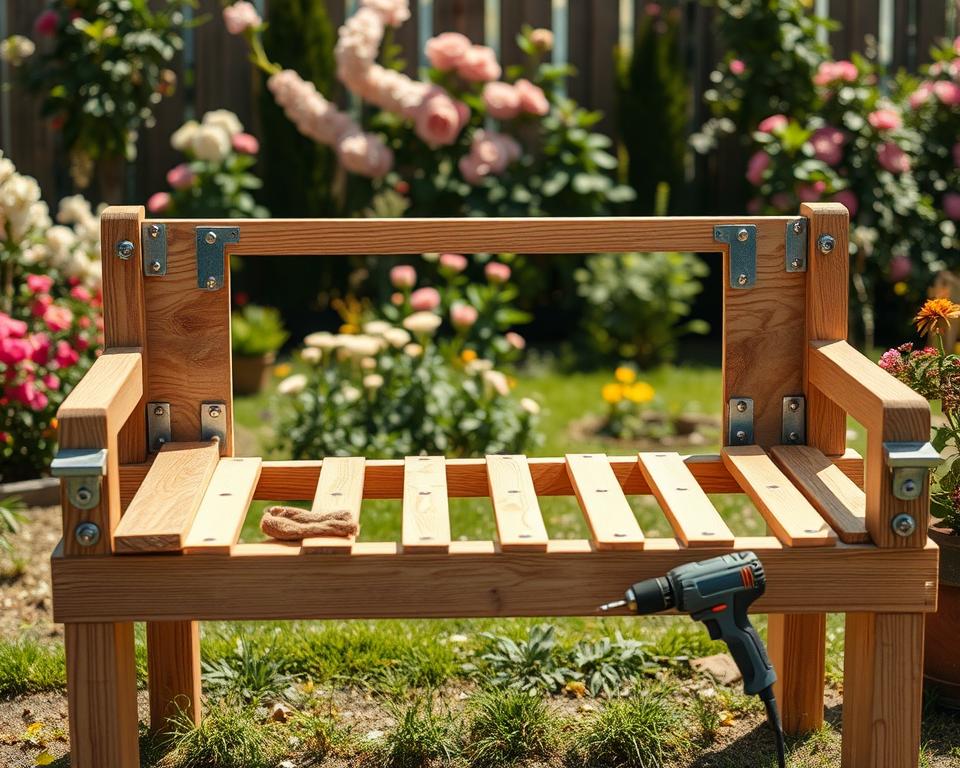
As you progress with your garden bench project, building the bench seat frame is a crucial step that requires precision and attention to detail. The seat frame serves as the foundation for the entire bench, supporting the weight of the users and providing the structural integrity necessary for durability.
Assembling the Seat Support Structure
To assemble the seat support structure, you will need to carefully follow your plan, ensuring that all components are correctly measured and cut. Begin by laying out the seat frame components on a flat surface, double-checking that they are properly aligned. Use clamps to hold the pieces together temporarily before securing them with screws or nails. Make sure the corners are square and the frame is level to provide a stable base for your bench.
Securing Joints for Maximum Stability
Securing the joints is critical for the overall stability and longevity of your garden bench. Use appropriate fasteners such as screws, nails, or dowels, depending on the design and type of wood you’re using. For added strength, consider using wood glue in conjunction with your chosen fasteners. Ensure that the joints are tight and the frame is rigid, as this will directly impact the bench’s ability to support weight and withstand outdoor conditions.
By focusing on joint security and a well-assembled seat support structure, you will create a sturdy bench seat frame that forms the heart of your garden bench.
Constructing the Bench Legs and Supports
Now that you have the seat frame ready, the next step involves creating sturdy leg assemblies that will support the weight of the bench and its occupants. This crucial phase requires attention to detail to ensure the overall stability and durability of your garden bench.

Creating Sturdy Leg Assemblies
To create robust leg assemblies, you’ll need to carefully measure and cut the lumber according to your plan. Precision is key in this step, as any inaccuracies can lead to instability in the finished bench. Use high-quality wood that’s resistant to rot and insect damage, such as pressure-treated pine or durable hardwoods like oak.
When assembling the leg assemblies, consider using mortise and tenon joints or dovetail joints for added strength. These traditional joinery techniques not only provide excellent durability but also add a touch of craftsmanship to your project.
Attaching Legs to the Seat Frame
Once your leg assemblies are ready, it’s time to attach them to the seat frame. This step is critical for the overall stability of the bench. Ensure that the legs are evenly spaced and that the assembly is square before securing it to the frame.
Use appropriate hardware such as galvanized brackets or stainless steel screws to secure the legs to the seat frame. Make sure all connections are tight and secure to prevent any movement or wobbling of the bench.
“The strength of the bench lies in its foundation, much like a house. A well-constructed base ensures years of service and enjoyment.”
By following these steps and paying close attention to detail, you’ll be able to construct a sturdy and reliable garden bench that will provide years of comfortable seating.
Installing the Seat Slats
Installing the seat slats is a pivotal step in completing your garden bench, requiring attention to detail for optimal spacing and alignment. The seat slats are not just a functional component but also contribute significantly to the aesthetic appeal of your bench.

Spacing and Alignment Techniques
To ensure your garden bench is both sturdy and visually appealing, the spacing and alignment of the seat slats are crucial. You should start by laying out the slats on a flat surface to get an idea of the spacing. A uniform gap of about 5-10 mm between each slat is generally recommended. This spacing helps in preventing water from getting trapped, thus reducing the risk of rot and decay.
When you’re satisfied with the layout, you can begin attaching the slats to the frame. Use a spacer to maintain consistent gaps between the slats. It’s also essential to align the slats with the edges of the frame to maintain symmetry.
Securing Slats to the Frame
Securing the slats to the frame involves using the appropriate fasteners. Screws are generally preferred over nails because they provide a stronger hold and are less likely to work loose over time. When screwing the slats into place, pre-drill the holes to avoid splitting the wood. Countersinking the screws will give your bench a smoother finish and prevent the heads from catching on clothing or skin.
Make sure to check the slats for level as you secure them. This step ensures that your bench seat is even and comfortable to sit on. Tightening the screws firmly will provide a solid foundation for the users of your garden bench.
Adding a Backrest to Your Garden Bench
Adding a backrest to your garden bench is a simple yet effective way to increase its comfort and functionality. A well-designed backrest can make your bench a more inviting spot to relax, read, or enjoy the surroundings. In this section, we will guide you through the process of building and attaching a backrest to your garden bench.
Building the Backrest Frame
To construct the backrest frame, you will need to measure and cut the lumber according to your design specifications. It is crucial to use durable materials that can withstand outdoor conditions. Consider using weather-resistant woods like cedar or redwood for this purpose.
- Measure the width of your bench to determine the length of the backrest frame.
- Cut two horizontal pieces and several vertical pieces according to your design.
- Assemble the frame using screws or nails, ensuring it is sturdy and square.

Attaching and Angling the Backrest
Once the backrest frame is built, the next step is to attach it to the bench. The angle at which the backrest is attached is crucial for comfort. An angled backrest can provide better support and make the bench more comfortable to use.
- Position the backrest against the rear of the bench seat, determining the optimal angle.
- Mark the positions where the backrest will be attached to the bench.
- Use screws or brackets to secure the backrest firmly to the bench, ensuring it is level and at the desired angle.
By following these steps, you can create a comfortable and sturdy backrest for your garden bench, enhancing its usability and aesthetic appeal.
Sanding and Finishing Your Bench
To ensure your garden bench withstands the elements, proper sanding and finishing techniques are essential. A well-finished bench not only enhances the aesthetic appeal of your garden but also prolongs the lifespan of the furniture.

Proper Sanding Techniques for Outdoor Furniture
Sanding is a critical step that prepares the surface of your garden bench for finishing. It involves removing any splinters, rough spots, or imperfections from the wood. Start with coarse-grit sandpaper (about 80-100 grit) and work your way up to finer grits (120-150 grit) for a smooth finish.
When sanding, always move the sandpaper in the direction of the wood grain to avoid scratches. For intricate or carved areas, use a sanding block or a detail sander to maintain even pressure.
Applying Weather-Resistant Finishes
After sanding, applying a weather-resistant finish protects your garden bench from the elements. Options include varnish, oil, and wax. Varnish provides a hard, durable finish, while oil penetrates the wood, offering protection from within. Wax provides a softer finish and can be reapplied easily.
| Finish Type | Durability | Maintenance |
|---|---|---|
| Varnish | High | Moderate |
| Oil | Medium | Regular |
| Wax | Low | Frequent |
As Bob Vila once said, “The right finish can make or break the appearance and durability of your outdoor furniture.” Choose a finish that suits your needs and apply it according to the manufacturer’s instructions.
“A good finish is not just about looks; it’s about protection. It shields the wood from moisture, UV rays, and wear, ensuring your garden bench remains a beautiful focal point for years to come.”
Weatherproofing Your Garden Bench
Weatherproofing your garden bench is a crucial step in maintaining its durability and aesthetic appeal. By protecting it from the elements, you can ensure it remains a comfortable and inviting spot in your garden for years to come.
Selecting the Right Sealants and Stains
Choosing the appropriate sealants and stains is vital for effective weatherproofing. Look for products specifically designed for outdoor use, as they will provide the necessary protection against rain, sunlight, and temperature fluctuations. Consider using a waterproof sealant to fill any gaps or joints, and a UV-resistant stain to maintain the colour and integrity of the wood.

Application Methods for Long-Lasting Protection
The method of application can significantly impact the effectiveness of your weatherproofing efforts. Always follow the manufacturer’s instructions for the recommended application technique, whether it involves brushing, spraying, or rolling on the product. Ensure the surface is clean and dry before application, and consider applying multiple thin coats rather than a single thick layer for better absorption and drying.
| Weatherproofing Product | Application Method | Drying Time |
|---|---|---|
| Waterproof Sealant | Brush or Caulk Gun | 2-4 hours |
| UV-Resistant Stain | Brush or Roller | 4-6 hours |
By carefully selecting the right weatherproofing products and following the correct application methods, you can significantly extend the life of your garden bench and keep it looking its best.
Troubleshooting Common Issues
As you build your garden bench, you might face some common issues that can be easily fixed with the right troubleshooting techniques. Ensuring your bench is stable and durable requires addressing problems such as wobbly legs, warping, and damaged components promptly.
Fixing Wobbly Legs and Unstable Joints
Wobbly legs can make your bench unstable. To fix this, check that all legs are evenly cut and that the floor is level. If the issue persists, consider adding adjustable feet to your bench legs. Ensuring that the joints are securely tightened is also crucial. Use appropriate fasteners and check that they are not loose, as this can cause instability.

Addressing Warping and Wood Movement
Warping and wood movement are common issues due to changes in humidity and temperature. To mitigate warping, ensure that your wood is properly seasoned and stored. Using screws or nails that allow for some movement can help manage wood movement. Regularly inspecting your bench for signs of warping and addressing them early can prevent more significant problems.
Repairing Damaged Components
If you notice any damaged components during your bench’s construction or later, repair or replace them as needed. For minor damages, such as small cracks, using a wood filler can be an effective solution. For more significant damage, replacing the component entirely might be necessary. Regular maintenance can help identify and fix issues before they become major problems.
Maintenance Tips for Your DIY Garden Bench
Maintaining your garden bench is essential to ensure it remains a beautiful and functional part of your outdoor space. Regular care will not only enhance its durability but also keep it looking great throughout the seasons.
Seasonal Care Routines
To protect your garden bench from the elements, it’s crucial to follow a seasonal care routine. Here are some tips to keep in mind:
- Spring: Inspect your bench for any damage caused by winter weather. Clean it thoroughly and apply a fresh coat of sealant if necessary.
- Summer: Regularly clean the bench to remove dirt and debris. Consider applying a UV protectant to prevent fading.
- Autumn: Remove leaves and other debris that may accumulate on the bench. Apply a protective coating to shield it from the upcoming winter.
- Winter: Consider covering your bench or storing it in a protected area to prevent damage from harsh weather conditions.
Repairs and Refinishing Guide
Over time, your garden bench may require repairs or refinishing. Here are some steps to follow:
- Inspect the bench for any loose joints or damaged components. Tighten or replace them as needed.
- Sand the surface to smooth out any rough spots or old finishes.
- Apply a new coat of stain or sealant to protect the wood and enhance its appearance.
- Consider adding a fresh coat of paint or varnish to restore the bench’s original look.
By following these maintenance tips, you can ensure your DIY garden bench remains a lovely and functional part of your garden for years to come.

Conclusion
You’ve now reached the end of our comprehensive guide on how to build a garden bench yourself. By following the steps outlined in this article, you’ve gained the knowledge and confidence to create your own DIY garden bench, a beautiful piece of outdoor furniture that will enhance your garden’s charm.
Through this project, you’ve not only saved money compared to buying a pre-made bench but also had the freedom to customise it according to your preferences. The process of woodworking, from planning to the final touches, has allowed you to create something truly unique and functional for your outdoor space.
As you enjoy your new garden bench, remember that regular maintenance is key to its longevity. By following the maintenance tips provided earlier, you’ll be able to protect your investment and continue to enjoy your handmade outdoor furniture for years to come.
Whether you’re a seasoned woodworker or a beginner, the sense of accomplishment from creating something with your own hands is undeniable. So, get ready to relax on your new bench, surrounded by the beauty of your garden, and take pride in your DIY achievement.
FAQ
What type of wood is best for building a garden bench?
The best type of wood for building a garden bench is durable and weather-resistant, such as hardwoods like oak, teak, or beech. These woods can withstand outdoor conditions and last longer.
Do I need to have prior woodworking experience to build a garden bench?
No, you don’t need prior woodworking experience to build a garden bench. However, having some basic knowledge of woodworking tools and techniques will be helpful. You can also follow step-by-step guides and plans to help you through the process.
What are the essential tools required for building a garden bench?
The essential tools required for building a garden bench include power tools like a circular saw, drill, and sander, as well as hand tools like a tape measure, square, and clamps. You may also need measuring equipment like a level and stud finder.
How do I ensure my garden bench is weatherproof?
To ensure your garden bench is weatherproof, you should apply a weather-resistant finish, such as a sealant or stain, to protect the wood from the elements. Regular maintenance, including seasonal inspections and repairs, will also help extend the lifespan of your bench.
Can I customise the design of my garden bench?
Yes, you can customise the design of your garden bench to suit your garden’s style and your personal preferences. You can choose the type of wood, the size, and the design features, such as the shape of the legs or the addition of a backrest.
How do I maintain my DIY garden bench?
To maintain your DIY garden bench, you should perform regular seasonal care routines, including cleaning and inspecting the bench. You should also make repairs and refinish the bench as needed to keep it in good condition.
What are some common issues that may arise when building a garden bench?
Some common issues that may arise when building a garden bench include wobbly legs, unstable joints, and warping or wood movement. You can troubleshoot these issues by checking your measurements, using proper assembly techniques, and applying weather-resistant finishes.