Access Planning for Compact Metal Garden Sheds
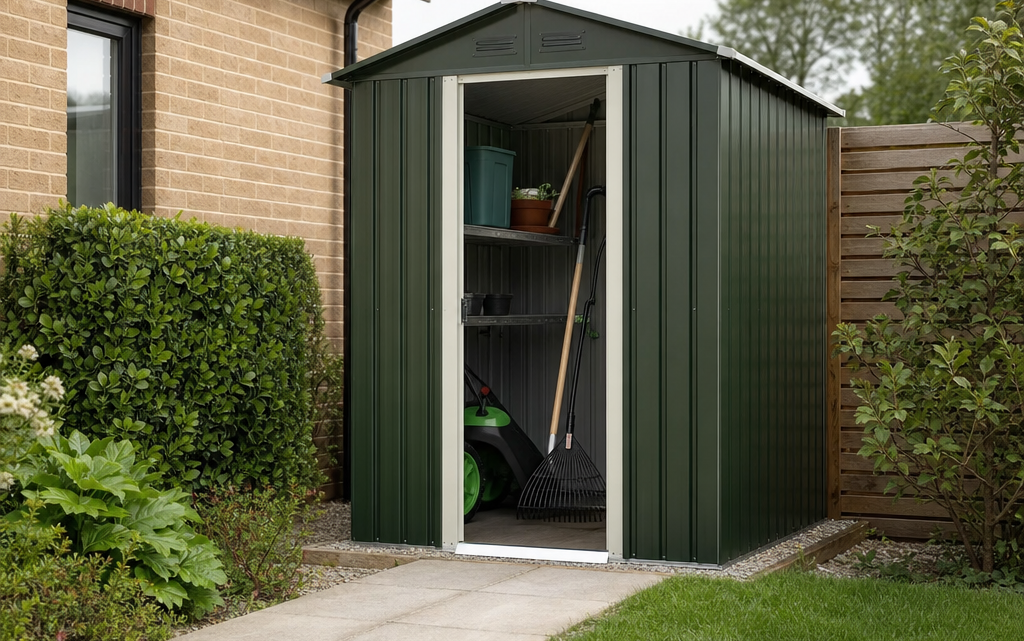
You have chosen a compact metal shed because the garden is tight on space, the lawn is already spoken for, and you need somewhere secure and weather-resistant for tools, bikes, outdoor cushions or DIY equipment. The shed itself may be small, but access planning is often what determines whether it works well in daily use. A 6ft x 6ft metal shed can look manageable on paper, yet become awkward if the door is too close to a fence, the base is difficult to reach, or the path is too narrow for carrying bulky items.
This article explains how to plan access arrangements for compact metal garden sheds before you buy, build or reposition one. It covers the route to the shed, door clearance, base preparation, delivery and assembly access, everyday use, security, drainage and common mistakes. The aim is to help you make a practical decision that suits your garden rather than simply fitting a shed into the only empty corner available.
Inhaltsverzeichnis
Why access planning matters for compact metal sheds
Compact sheds are often chosen for smaller gardens, side returns, courtyards and narrow plots. In these spaces, every centimetre matters. Unlike larger outbuildings, a small metal shed may have limited internal turning space, so the position of the door, the width of the approach and the type of items you store become especially important.
Good access planning helps you:
- move items in and out without damaging the shed, fence or stored goods;
- assemble the shed safely and accurately;
- keep the door area usable in wet or icy weather;
- avoid trapping the shed against boundaries with no maintenance or cleaning access;
- improve security by placing the entrance where it can be seen and locked easily;
- reduce trip hazards around the base, path and threshold.
Metal sheds are usually low-maintenance, but that does not mean they can be squeezed into any unused gap. You still need enough space to create a level base, manage rainwater, open the door, and reach the entrance comfortably.
Start with what you need to store
Before measuring the garden, measure the items you expect to store. This is the most practical starting point because access should be planned around real objects, not just the shed footprint.
Make a storage list
Write down the largest and most awkward items first. These might include a lawn mower, strimmer, wheelbarrow, folding garden furniture, pressure washer, barbecue, children’s outdoor toys or bicycles. Note the width, height and length of each item, particularly where handles, wheels or protruding parts make them harder to manoeuvre.
If you plan to store bikes, remember that handlebars often dictate access width. If you are storing a lawn mower, consider whether you will push it straight in, lift it over a threshold, or turn it sideways once inside. If the shed will hold tools and stacked boxes only, your access needs may be simpler, but you still need a safe route for carrying them.
Decide how often you will use it
A shed used every weekend needs better access than one opened twice a year for seasonal storage. If you will be fetching tools regularly, aim for a direct, clean and well-drained path. If the shed will store Christmas decorations or spare pots, a less prominent position may be acceptable, provided the access remains safe.
Measure the route from the house to the shed
Access is not just the space directly in front of the door. It begins where you first pick up or move the item. In many gardens, the limiting point is a side gate, narrow passage, step, change in level or tight turn near the patio.
Check the narrowest point
Measure the narrowest point on the route, including gates, alleyways, raised borders, downpipes, wall lights and bins. A shed may have enough internal space, but if your mower or bike cannot easily reach it, the arrangement will quickly become frustrating.
As a practical rule, allow more width than the item itself. You need space for your hands, body movement and slight misalignment. A route that is technically wide enough may still be unpleasant if you have to scrape past walls or plants every time.
Look at turns and approach angles
Long items such as ladders, timber, folding tables and bike trailers need turning space. If the path approaches the shed at a right angle, check whether you can line the item up with the doorway. In a compact garden, a straight approach to the shed door is often much easier than placing the door sideways against a narrow path.
Plan the shed position around the door
The most important access feature is the door. Compact metal sheds may be available with different door arrangements depending on the model, so you should confirm the exact door type, opening width and position before ordering. Do not rely only on the overall shed size.
Allow a clear working area in front
Leave a clear area in front of the door so you can stand, open the lock, carry items and put things down temporarily. This space should not be occupied by pots, water butts, bins or overhanging shrubs. Even a compact shed benefits from a small “landing zone” outside the entrance.
If the ground in front of the shed becomes muddy, uneven or slippery, access will deteriorate quickly. Consider paving slabs, compacted gravel with suitable edging, or a firm path surface leading to the threshold. The surface should drain properly and should not direct water into the shed.
Think about single doors and double doors
A single door may be sufficient for hand tools, storage boxes and smaller equipment. However, if you expect to store wide items, a double-door option can be worth considering where available. The key question is not simply whether the item fits through the opening, but whether you can move it through without twisting, lifting awkwardly or damaging the door frame.
For everyday convenience, door choice can matter as much as shed size. A slightly smaller shed with easier access may serve you better than a larger one with a restricted entrance.
Prepare the base with access in mind
A compact metal shed must sit on a sound, level base. Access planning and base preparation should be considered together because the base affects the threshold, stability and ease of assembly.
Keep the base level and reachable
A level concrete or slabbed base helps the shed frame align correctly, doors operate properly and panels fit as intended. If the base is uneven, the door can become stiff, gaps may appear, and stored items may roll or lean. You also need access around the base while assembling the shed, particularly when fixing panels and checking alignment.
Where possible, leave working room around the shed during installation. If the shed is positioned hard against a wall or fence from the outset, assembly may be difficult or impossible depending on the design. Always check the manufacturer’s instructions before finalising the location.
Avoid creating a high trip at the entrance
If the base sits proud of the surrounding ground, the threshold may become awkward for wheeled items. A small change in level can make a mower, trolley or bike difficult to move in and out. You may need to create a gentle approach using slabs or a small ramp, provided this does not compromise drainage or door operation.
Do not allow soil, mulch or gravel to build up against the shed walls or door opening. It can hold moisture, obstruct the door and encourage debris to collect at the threshold.
Use product dimensions as a check, not the whole plan
Product information is useful when you are comparing sheds, but it should be treated as one part of your access plan. Overall size, stated base size, door arrangement, locking position and window placement can all affect where the shed works best.
For example, the 6′ x 6′ Trimetals Premium Titan 660 Metal Shed is a compact metal shed example. The description refers to PVC-coated galvanised steel, a single door with an acrylic window to the side, a secure locking mechanism, and a requirement for a 1900mm x 1900mm level concrete or slabbed base. It also notes that a double-door option may be available for easier access. Details such as these are useful because they tell you what to check in your own garden: the base size, the approach to the door, and whether a wider opening is needed for your stored items.
Do not assume that the nominal shed size alone tells you everything. Check the latest supplier information, the manufacturer’s installation guidance and the exact measurements before you build the base or arrange delivery.
Plan delivery and assembly access
Many access problems occur before the shed is even built. Metal sheds are usually delivered in packaged components, but those packs can still be heavy, long or awkward to handle. You need a route from the delivery point to the assembly area that is safe and realistic.
Check the delivery route
Consider where the delivery vehicle can stop and where the packages will be left. If delivery is kerbside or to the front of the property, you may need to move the components through a house, garage, side passage or gate. Measure gates and narrow points in advance, and clear obstacles such as bins, bikes and garden furniture before delivery day.
If access is through the house, protect flooring and check whether long packs can turn through hallways and doors. Do not wait until the delivery has arrived to discover that the packages cannot reach the garden.
Allow safe assembly space
Compact does not mean instant. You may need space to lay out panels, identify fixings and work around the base. Choose a dry, calm day where possible, as lightweight panels can be awkward in wind. Keep children and pets away from the work area, and use appropriate gloves because metal edges and fixings can be sharp during assembly.
If the manufacturer provides an assembly video or manual, review it before the shed arrives. This helps you understand which sides need access during construction and whether the final position allows all fixing points to be reached.
Access checklist before you buy or build
Use this checklist before placing an order or preparing the base:
- Storage items measured: Have you measured your largest items, including handles and wheels?
- Route checked: Is the path from house, garage or gate wide enough for the items you will move?
- Turns assessed: Can long or wide items turn into the shed doorway?
- Door clearance allowed: Is there a clear standing and loading area in front of the entrance?
- Base size confirmed: Have you checked the manufacturer’s required base dimensions, not just the shed name?
- Level surface planned: Will the base be flat, stable and suitable for the shed?
- Threshold considered: Can wheeled items move in and out without an awkward step?
- Drainage checked: Will water run away from the entrance and not pool around the base?
- Assembly space allowed: Is there enough room to build the shed safely?
- Security position chosen: Is the door visible enough and convenient to lock every time?
Security and access should work together
A shed that is easy for you to access should not be easy for an intruder to exploit. Position the door where you can see it from the house if possible, or where it is not completely hidden from view. Good access encourages you to lock the shed properly because it is not awkward to reach.
If the shed includes a key-operated lock or bolts, make sure there is enough space to operate them comfortably. A door squeezed against a wall, hedge or fence can make locking inconvenient. Poor lighting can also make evening access difficult, so consider a suitable outdoor light if you regularly use the shed after dark.
Avoid placing valuable equipment in direct view through a window. If the shed has a window, think about its orientation and what can be seen from public areas or neighbouring viewpoints. Internal organisation also helps: store higher-value items away from the entrance where they cannot be grabbed quickly.
Drainage, weather and everyday usability
Access arrangements must work in British weather, not just on a dry day in summer. Rain, frost, leaves and mud can all make a compact shed less pleasant to use.
Keep the approach dry and stable
A grass path may be acceptable for occasional use, but it can become slippery and rutted if you regularly move heavy items. A firm path is usually better for year-round access. Paving should be laid so it does not rock underfoot, and gravel should be contained so it does not scatter into the doorway.
Make sure water does not collect at the entrance. If the shed is at the bottom of a slope, you may need to improve drainage or choose a different location. Water pooling around the base can also make access unpleasant and may affect the long-term condition of the area around the shed.
Control overgrowth
Plants can quickly reduce access width. Hedges, climbers and shrubs may look neat when the shed is installed, but after one growing season they can block the path or rub against the shed. Leave enough space for growth and pruning. Avoid placing thorny plants beside the approach route if you will be carrying items.
Common practical mistakes to avoid
Choosing the corner before checking the door
The far corner of the garden often seems like the obvious place for a shed, but it may create the worst access. If the door faces a fence, narrow path or planting bed, you may struggle to use the shed properly. Decide the door orientation before committing to the position.
Building the base to the wrong size
Nominal shed sizes can be rounded, and base requirements may differ from the headline dimensions. Always use the manufacturer’s specified base size. If you build the base too small, fixing points may not align properly. If it is poorly positioned, the door approach may be compromised.
Forgetting delivery access
People often measure the shed location but forget the route from the delivery point. Long packages, tight side gates and stepped paths can cause problems. Plan how components will reach the garden before delivery day.
Ignoring the threshold
A raised base with no ramp or smooth approach can make wheeled storage difficult. This is especially frustrating with mowers, barbecues and bikes. Think about the movement into the shed, not just storage once inside.
Leaving no working room for assembly
Installing a shed tight against boundaries may leave insufficient room to fix panels or check alignment. Even if the finished shed fits, the assembly process may require more space than expected.
Short FAQ
How much space should I leave in front of a compact shed door?
Leave enough space to stand comfortably, open the door fully, unlock it, and manoeuvre your largest stored item. There is no single measurement that suits every shed, so base the clearance on your door type and what you will store.
Is a double door worth it on a small metal shed?
It can be, if you store bikes, mowers, garden furniture or other wide items. If you only store hand tools and small boxes, a single door may be sufficient. Check the actual opening width before deciding.
Can I put a metal shed directly on grass?
You should follow the manufacturer’s base instructions. A firm, level concrete or slabbed base is commonly required for accurate assembly and stable use. Grass is usually unsuitable because it moves, retains moisture and does not provide a reliable fixing surface.
Should the shed door face the house?
Facing the door towards the house can improve convenience and visibility, but it is not always essential. The best orientation is one that gives safe access, suitable security, good drainage and enough clearance for the items you use most often.
Do I need access around all sides after installation?
It is sensible to leave some clearance where possible for cleaning, checking the base area and preventing vegetation from pressing against the shed. The exact requirement depends on the shed design and manufacturer’s instructions.
Conclusion
Access planning for a compact metal garden shed is about more than fitting a small footprint into a spare patch of ground. You need to think through the full journey: delivery to garden, assembly on a level base, daily movement through the door, safe footing in wet weather, and secure locking after use.
Before buying, measure your stored items, check the narrowest parts of the route, confirm the required base size and decide whether the door arrangement suits your needs. A compact shed can be highly practical in a small garden, but only if you can reach it, open it and use it without awkward manoeuvring. Careful access planning at the start will save frustration and help the shed perform well for years.