Low-threshold shed access for mowers, barrows and wheeled tools
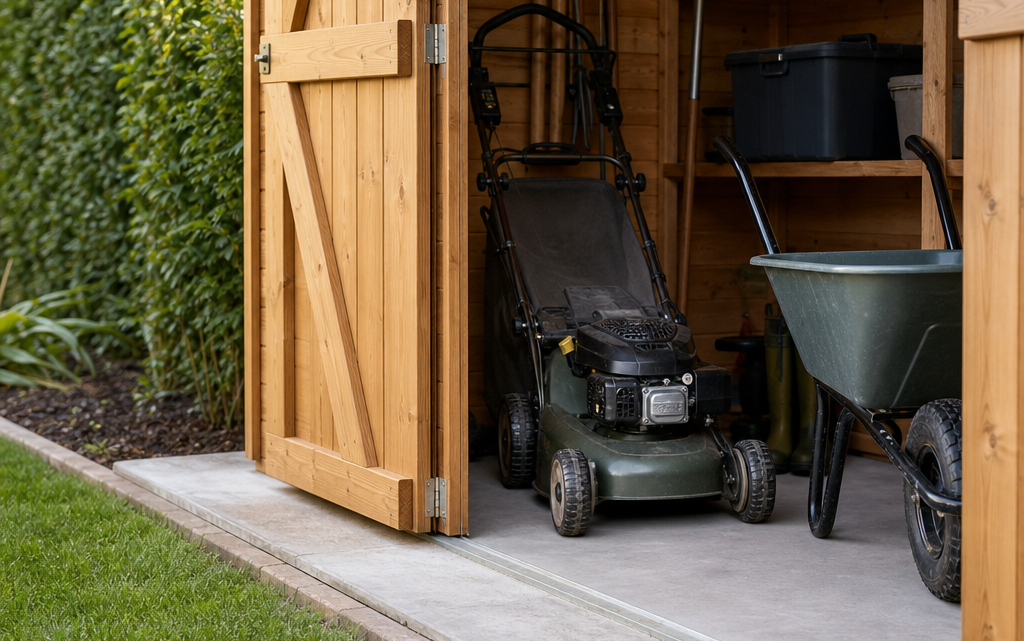
You buy a new mower, clear a corner of the garden for storage, and only then discover the awkward part: getting it in and out of the shed every week. A small lip at the doorway, a soft patch of lawn, or a tight turn in front of the doors can make a simple job irritating, especially when you are pushing a mower, barrow, pressure washer, seed spreader or wheeled tool chest. Good low-threshold access is not just about choosing a shed with wide doors. It is about planning the base, approach, threshold, ramp, drainage and internal layout as one practical route.
This guide explains how to plan low-threshold shed access for wheeled garden equipment. It is written for ordinary domestic gardens, where space may be limited and the shed needs to work reliably in wet weather as well as on dry summer days.
Inhaltsverzeichnis
Why low-threshold access matters
A low threshold reduces the height you need to lift or bump wheels over when entering the shed. That matters because garden equipment is often awkward rather than simply heavy. A rotary mower may have small wheels that catch on an upstand. A wheelbarrow concentrates weight through one front wheel. A hose trolley can twist as it crosses a lip. Battery mowers, scarifiers and pressure washers may also be heavier than they look once fitted with accessories.
Low-threshold planning helps you:
- move equipment without lifting or dragging it;
- reduce strain on your back, wrists and shoulders;
- avoid damaging mower decks, wheels and shed door frames;
- keep the doorway usable after rain, frost or soil movement;
- make better use of a compact shed because items can be rolled in straight.
The key point is that the threshold is only one part of the route. A good shed can still be awkward if it is placed behind a narrow path, on a base that sits too high, or in a corner where the doors cannot open fully.
Start with the equipment you actually need to store
Before choosing a shed position or base detail, list the wheeled items you expect to move in and out regularly. Do not plan only for the largest item; plan for the most frequently used one too. A mower that comes out every week in spring and summer deserves a smoother route than a spreader used twice a year.
Measure the critical dimensions
Measure the width, length and handle height of your main items. For mowers, measure the widest part, which may be the wheels or grass box rather than the cutting deck. For wheelbarrows, measure across the handles as well as the tray. For sack trucks or tool trolleys, check whether the load overhangs the wheels.
You should also measure turning space. It is common to have a shed door wide enough for a mower, but not enough room outside to line it up. If you need to approach at an angle because of a fence, raised bed or greenhouse, the doorway will feel narrower in use.
Decide what needs straight-in access
Some items are much easier if they can be pushed straight into the shed. These include lawn mowers, barrows, heavy planters on caddies, compost trolleys and pressure washers. Smaller wheeled tools can tolerate a slight turn, but the entrance should still be smooth and firm.
As a rule, the more often you use an item, the closer it should sit to the door and the straighter its route should be. Seasonal or lightweight items can be placed further back or hung on walls if the shed construction allows suitable fixings.
Choose the shed location around the access route
Many people position a shed where it looks neat from the house, then try to make the path work afterwards. For wheeled access, reverse the process. Decide where the practical route will run, then place the shed so the doors meet that route cleanly.
Look for a firm, direct approach
The best approach is a short, reasonably level path made from paving slabs, concrete, compacted gravel with a stable edging, or another firm surface suitable for wheels. Grass may be acceptable for occasional use, but it becomes rutted and slippery when wet. Bark, loose shingle and soft soil are poor choices for small mower wheels.
If your garden slopes, try to align the shed so you push equipment across the slope as little as possible. Pushing a mower uphill into a shed is tiring; controlling a loaded barrow downhill towards a doorway can be unsafe. A slight fall away from the shed is useful for drainage, but a steep approach needs more careful design.
Allow door swing and standing space
Low-threshold access fails if the doors cannot open fully. Check that fences, walls, planting, water butts and stored pots do not obstruct the swing. You also need standing space in front of the doors so you can open them, step aside and push the equipment through without twisting.
For double doors, make sure both leaves can be secured open while you move items. A gust of wind catching a door while you are halfway through with a mower is a common cause of dents, scrapes and frustration.
Plan the base before you think about ramps
A shed base has two jobs: it supports the building and it sets the finished height of the doorway. If the base is too high above the surrounding path, you create a step that then needs a ramp. If the base is too low, water can run towards the shed and cause problems at the entrance.
Match the finished levels
Think in terms of finished levels, not just ground levels. A concrete slab, paving base or timber frame can all raise the shed floor. The path outside may also be built up. Your goal is to have the outside approach finish close to the shed threshold while still allowing water to drain away.
A very small change in level may be manageable with a bevelled threshold or shallow ramp. A larger step needs a ramp with enough length to avoid a steep angle. Short, steep ramps are difficult for lawn mowers and can be hazardous with a loaded wheelbarrow.
Keep the base flat, square and stable
Low threshold does not compensate for a poor base. If the shed is twisted because the base is uneven, doors may bind, gaps may open unevenly and the threshold may not sit properly. Use a level, check diagonals where appropriate, and follow the shed manufacturer’s requirements for a suitable foundation.
Where an anchoring kit is supplied or recommended, plan it into the base from the start. Anchoring is especially important in exposed gardens and for lightweight structures. It also helps keep the doorway aligned over time.
Using a low-threshold shed as a practical example
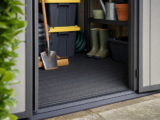
When comparing sheds for wheeled access, look for features that reduce lifting and improve day-to-day usability. For example, the 6′ x 5′ Palram Canopia Grey Skylight Plastic Shed is described as having wide double doors and a low threshold, which are both relevant for mowers and wheeled tools. Its anti-slip floor is also a practical feature at the entrance, particularly when equipment is damp. The product is a compact garden storage example rather than a one-size-fits-all solution, so you would still need to check your own equipment dimensions, approach route and base design before buying.
Use examples like this to frame your questions. Is the doorway wide enough for your mower with the grass box fitted? Can you roll a wheelbarrow over the threshold without lifting? Will the shed footprint suit the available base area? Does the door position line up with your path? These questions matter more than the headline size alone.
Designing the threshold and ramp
A low threshold is helpful, but the transition between path and shed floor must still be planned. Even a small lip can stop small wheels, particularly if the approach surface is uneven. The aim is to create a smooth, controlled change of level that stays safe in wet weather.
When you may not need a ramp
You may not need a separate ramp if the shed threshold is genuinely low and the approach surface finishes almost flush with it. This is most likely where the shed sits on a carefully levelled slab or paving base, and the path is brought neatly up to the door.
However, do not bridge drainage gaps casually. If a small gap is needed to prevent water or debris collecting against the shed, keep it deliberate and manageable. A narrow, hard-edged gap may still catch small wheels, so test it with the actual mower or trolley if possible.
When you do need a ramp
You need a ramp if the step is high enough that you have to lift, bounce or force equipment into the shed. The ramp should be wide enough for the equipment wheels, stable under load, and fixed or positioned so it cannot slip. For barrows, consider the single wheel track as well as the rear legs or handles when tipped forward.
A ramp should have a non-slip surface. Grooved boards, textured metal plates or proprietary threshold ramps can all work, provided they are suitable for outdoor use and the expected load. Avoid smooth offcuts of plywood, loose boards or anything that becomes slippery with algae.
Keep the ramp angle gentle
The steeper the ramp, the harder it is to use. Small wheels struggle on steep angles, and heavy equipment can run back towards you. In a tight garden, people often make the ramp too short because there is not enough space in front of the shed. If that is the case, consider changing the shed location, adjusting the base level, or creating a longer approach landing rather than accepting a hazardous slope.
Practical checklist for low-threshold shed access
Use this checklist before finalising the shed position and base:
- Measure your equipment: include wheel width, handle width, length and turning needs.
- Check door opening: allow for the real clear opening, not just the external shed size.
- Plan a straight approach: avoid tight turns immediately outside the doors.
- Choose a firm surface: paving, concrete or a well-compacted stable surface is preferable to grass or loose gravel.
- Set finished levels: compare the finished path level, base height and shed floor level.
- Allow drainage: ensure water falls away from the entrance rather than into it.
- Assess ramp need: if you must lift or bounce wheels, redesign the transition.
- Make it non-slip: treat the doorway and any ramp as wet-weather areas.
- Secure doors open: prevent doors swinging into equipment as you enter.
- Test the route: mark out the shed footprint and push the mower or barrow through the intended line.
Internal layout for wheeled items
Good access continues inside the shed. If the mower fits through the door but immediately hits stacked pots, bags of compost or long-handled tools, the entrance will still be awkward. Plan the first metre of floor as a manoeuvring zone where possible.
Keep the main wheeled item near the door
Place the most frequently used wheeled item closest to the entrance. For many households, that will be the lawn mower. Store it facing out if practical, so you can pull it straight out rather than reverse and turn in a confined space. If the mower has a folding handle, make sure folding it does not trap it behind other items.
Separate sharp, dirty and delicate items
Garden tools often travel into the shed wet or muddy. Keep sharp tools, chemicals, chargers and delicate accessories away from the wheel path. A mower wheel can easily crush a hose fitting or knock over a bottle if the floor is cluttered.
Use wall storage, hooks, shelves or storage boxes only where suitable for the shed type and fixings. Do not assume that every shed wall can carry heavy loads without additional support or manufacturer-approved accessories.
Drainage and weather at the entrance
The entrance is usually the hardest-working part of the shed. It collects mud from wheels, gets splashed by rain, and is repeatedly crossed by equipment. Poor drainage here can turn a low threshold into a dirty, slippery channel.
Fall water away from the doorway
The ground outside should generally fall away from the shed, not towards it. Even a shallow fall can help prevent puddles forming against the threshold. Avoid creating a hollow directly in front of the doors, as this will collect water and soften the surrounding surface.
Control mud before it reaches the shed
If your mower crosses lawn before reaching the shed, consider a short hardstanding area in front of the doors. This gives you somewhere to pause, brush off wheels, empty loose grass, or let water drain before storing the equipment. A removable stiff brush or small scraper near the entrance can help keep the floor safer.
Common mistakes to avoid
Choosing by shed size alone
A nominal shed size tells you the broad footprint, but it does not tell you whether your mower will pass easily through the doors or whether you can turn a barrow inside. Always check access dimensions and layout, not just length and width descriptions.
Building the base too high
A raised base may look tidy, but it can create an unnecessary step at the entrance. If the shed floor ends up well above the surrounding path, you will need a longer ramp than you might expect.
Using loose gravel at the doorway
Loose gravel can be attractive and good for drainage, but small wheels sink, twist or skid in it. If you want gravel nearby, use a firmer strip directly in front of the shed doors or a stabilised gravel system suitable for wheeled traffic.
Forgetting door clearance
Planters, water butts and compost bins often creep into the space in front of a shed. Keep the door swing clear and leave enough space for you to stand while guiding equipment.
Making a temporary ramp permanent
A loose plank may work once, but it is not a safe long-term access solution. It can shift, rot, flex or become slippery. If you need a ramp, design one properly and inspect it regularly.
Step-by-step planning process
- List your wheeled items and identify which ones need regular access.
- Measure the largest and most awkward items, including handles and attachments.
- Mark the shed footprint on the ground using pegs, string, chalk or temporary boards.
- Mark the door position and simulate opening the doors fully.
- Push equipment along the intended route before any permanent base is installed.
- Decide the finished base height in relation to the path and threshold.
- Plan drainage so water moves away from the entrance.
- Add a ramp or flush approach only after you know the final levels.
- Fit or use anchoring as required by the shed design and site exposure.
- Review the internal layout so the wheeled route remains clear after storage is added.
FAQ
Is a low threshold enough for a lawn mower?
It helps, but it is not enough on its own. You also need sufficient door width, a firm approach, suitable finished levels and enough space to line the mower up with the doorway.
What is the best surface outside a shed for wheeled access?
A firm, level and slip-resistant surface is best. Paving slabs, concrete or a well-constructed hardstanding usually work better than grass, bark or loose gravel for small garden wheels.
Should the shed floor be completely flush with the path?
Flush access can be convenient, but drainage must still be considered. If water can run straight into the shed, the levels need adjusting. Aim for easy wheel movement while keeping rainwater away from the entrance.
Can I use a removable ramp?
Yes, provided it is stable, strong enough for the load, non-slip and cannot slide while in use. Store it where it will not warp or become a trip hazard.
How much space do I need in front of double doors?
You need enough space for both doors to open fully, for you to stand safely, and for the longest wheeled item to approach in line with the opening. Marking this out on the ground is the most reliable way to check.
Conclusion
Low-threshold shed access is a practical detail that makes garden storage easier every time you use it. The best results come from planning the whole route: the equipment, door opening, base height, path surface, drainage, ramp and internal layout. A shed with wide doors and a low threshold can be a strong starting point, but it still needs to be matched to your garden and your tools. Measure carefully, set the finished levels before installation, avoid steep or slippery transitions, and keep the doorway clear. With a little planning, mowers, barrows and wheeled tools can roll in and out smoothly rather than being lifted, dragged or forced over an awkward step.