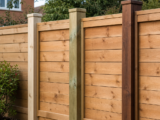
Incised Timber Fence Posts: What the Treatment Marks Mean

You are replacing a tired garden fence, the old posts have snapped at ground level, and you are trying to choose new timber posts that will not fail in the same way. In the timber aisle or online listing, you notice some posts have a pattern of small slits or marks running along the surface. These are not manufacturing damage: they are incising marks, made deliberately to help preservative treatment penetrate the timber more effectively.
For domestic boundary fencing, understanding these marks is useful because the part of the post buried in the ground is usually the most vulnerable point in the whole fence. Panels may blow out in a storm, but posts often fail because moisture, soil contact and poor installation have allowed decay to develop where you cannot see it. This article explains what incised timber fence posts are, why the marks matter, and how to choose and install them sensibly for a long-lasting garden boundary.
Inhaltsverzeichnis
What are incised timber fence posts?
Incised timber fence posts are wooden posts that have been mechanically cut with many shallow, narrow slits before preservative treatment. These cuts are usually arranged in a regular pattern and may look like short knife marks or small slots on the faces of the post.
The purpose is practical rather than decorative. Timber preservatives need to penetrate the surface to protect the wood from fungal decay and insect attack. Some softwoods do not naturally absorb preservative as readily as others, especially towards the heartwood. Incising creates extra routes for the treatment to enter the timber, helping to improve preservative penetration, particularly in posts intended for ground contact.
On a fence post, this is important because the below-ground section and the area just above ground level are exposed to the most severe conditions: moisture, limited air movement, soil organisms and repeated wetting and drying. Incising is one way manufacturers improve the durability of treated timber posts for these conditions.
What the treatment marks mean
The incising marks are a sign that the post has been prepared for deeper preservative treatment. They do not mean the post has been scratched in transit, nor do they normally indicate a fault. On posts designed for fencing, the marks are usually expected to be visible after treatment.
You may see incisions on all faces of a post, or mainly on certain faces, depending on the product and manufacturing process. The appearance can vary: some posts have fine, neat marks; others have more obvious slots. The key point is that the incisions are there to support treatment performance, not to provide structural strength or decoration.
Do incisions weaken the post?
For normal domestic fencing, properly manufactured incised posts are designed for their intended use. The incisions are shallow and controlled. They are not the same as splits, cracks or shakes that run deeply through the timber. However, you should still inspect any post before use. Reject or query posts with severe cracks, deep splits, major warping, soft patches or obvious damage, especially near the section that will be placed in the ground.
Do the marks disappear over time?
The marks usually remain visible, although they may become less noticeable as the timber weathers, darkens, is stained, or is partly hidden by panels and planting. If you want a very smooth, refined look, you may prefer planed posts for visible areas, but remember that the most important performance issue is correct treatment and installation rather than surface appearance alone.
Pressure treatment, ground contact and why it matters
Most timber fence posts sold for domestic gardens are pressure treated. In simple terms, preservative is forced into the timber under controlled conditions. This is much more effective than brushing a treatment onto the surface after purchase.
For fence posts set into the ground, you should look for posts intended for ground contact. In the UK, timber treatment is commonly discussed in terms of use classes. Ground-contact posts are generally expected to be suitable for Use Class 4 conditions. The label, product description or supplier should make clear whether the post is intended for burial in the ground. If it only states that the timber is treated but does not confirm suitability for ground contact, check before buying.
Incising and pressure treatment often work together. The incisions help preservative reach deeper into the timber, while the pressure treatment process forces the preservative in. For a domestic boundary fence, this combination is particularly relevant when the posts will be concreted or compacted into soil.
Choosing the right post for your fence
Fence posts may look simple, but choosing the wrong size or treatment type can shorten the life of the fence. Before you buy, consider the fence height, panel weight, exposure to wind, soil conditions and how the post will be fixed.
1. Match the post length to the fence height
A common rule for domestic panel fencing is to allow at least 600mm of post below ground. For example, a 1.8m fence panel will usually need a post around 2.4m long. This gives enough length for a stable fixing and helps the post resist wind loads. In very exposed locations, loose ground, or where heavier panels are used, you may need deeper holes, larger-section posts, or professional advice.
2. Choose an appropriate post section
Post thickness affects rigidity. Slimmer posts may be suitable for lighter-duty garden screens or lower fencing, while taller panel fencing normally benefits from more substantial posts. The commonly seen sizes around 70mm to 75mm square are often used in domestic panel fencing, but the right choice depends on the height and weight of the fence, spacing, site exposure and fixing method.
3. Check the treatment description
Look for clear wording such as pressure treated, suitable for ground contact, incised for deeper preservative penetration, or a stated anti-rot warranty. A warranty is useful, but it is not a substitute for correct installation. Many treatment warranties depend on the post being used and installed as intended, with cut ends treated appropriately.
4. Consider appearance
Posts may be rough sawn, smooth planed, green treated, brown treated or supplied in other finishes. A smooth planed post can suit decorative panels or more visible garden boundaries. A rough sawn post can look more rustic. Incising marks may be more noticeable on some finishes than others, so decide whether appearance or maximum durability is the priority in that location.
Buying checklist for incised timber fence posts
- Confirm ground-contact suitability: choose posts intended for use in the ground, not just general treated timber.
- Check the length: allow at least 600mm below ground for typical domestic panel fencing.
- Match the section size to the fence: taller, heavier or more exposed fences need stronger posts.
- Look for incising where durability is a priority: the marks indicate preparation for deeper preservative penetration.
- Inspect each post: avoid severe splits, major twisting, soft areas or damaged ends.
- Plan for cut-end treatment: any sawn end or drilled hole should be treated with a suitable end-grain preservative.
- Check accessories: post caps, gravel boards, fixings and concrete should be compatible with the post and panel system.
- Read warranty conditions: anti-rot warranties usually require correct use, installation and maintenance.
As a practical example of the sort of product details you may see when comparing options, a listing might describe a 2400mm pressure treated timber post, suitable for domestic panel fencing, with guidance to allow around 600mm below ground for a 1.8m fence. Use this information to check whether the post length, finish and treatment match your project rather than choosing on price alone.
How to install incised timber posts correctly
Even a well-treated post can fail early if it is installed badly. The most important area is the ground line, where water, air and soil meet. Good installation reduces standing water, improves stability and helps the treatment do its job.
Step 1: Set out the fence line
Use a string line to mark the boundary and post positions. Check the legal boundary before you start, especially if replacing an old fence that has moved or leaned over time. Measure your panels, gravel boards and post widths carefully so the spacing works before digging all the holes.
Step 2: Dig holes to the right depth
For typical domestic panel fencing, allow at least 600mm of post in the ground. The hole should be wide enough to allow concrete or compacted backfill around the post, not so tight that you cannot adjust it. If the ground is soft or exposed to high winds, consider deeper holes or stronger posts.
Step 3: Add drainage at the base
A small layer of coarse gravel at the bottom of the hole can help prevent the post end sitting directly in water. It is not a cure for poor drainage, but it can reduce prolonged saturation around the end grain.
Step 4: Position and support the post
Place the post in the hole, align it with the string line and check it is plumb with a spirit level. Brace it temporarily before adding concrete or backfill. Take time here: a small error in the first post can become very obvious across a whole run of fencing.
Step 5: Concrete with a slight fall
If using concrete, finish the top so it slopes away from the post. Do not leave a hollow around the timber where rainwater can collect. Water pooling at ground level is one of the most common reasons timber posts decay prematurely.
Step 6: Protect cut ends and drilled areas
If you cut the post to length, trim the top, notch it, or drill fixings into it, you expose untreated or less-treated inner timber. Apply a suitable cut-end timber preservative according to the manufacturer’s instructions. This is especially important on end grain because it absorbs moisture readily.
Common practical mistakes to avoid
Using posts that are too short
Trying to save money by using a shorter post can make the fence unstable. If too little timber is below ground, the fence may lean, rock or fail in strong winds. As a general guide, order posts around 600mm longer than the panel height for standard domestic panel fencing.
Assuming all treated timber is suitable for burial
Not all pressure treated timber is intended for ground contact. A batten, rail or above-ground timber component may be treated but still unsuitable as a buried post. Always check the intended use.
Cutting the bottom off the post without retreating it
The bottom of the post is the worst place to expose untreated timber. If you must cut a post, apply cut-end treatment thoroughly and allow it to dry as directed before installation.
Leaving concrete dished around the post
A depression in concrete acts like a small pond. Shape the concrete so water drains away from the timber. This simple detail can make a real difference to service life.
Ignoring wind exposure
A 1.8m solid fence panel acts like a sail. In exposed gardens, coastal areas, open fields or long straight runs, you may need larger posts, closer attention to depth, stronger fixings or a more wind-permeable fence style.
Fitting panels before posts have set
If concrete has not cured sufficiently, the weight and leverage of panels can pull posts out of alignment. Follow the concrete manufacturer’s instructions and keep posts braced until stable.
Maintaining incised timber fence posts
Incised and pressure treated posts are designed to be durable, but they still benefit from sensible maintenance. Check the fence once or twice a year, especially after winter and after strong winds. Look for movement, loose fixings, trapped soil, vegetation packed against the base, or water pooling around the posts.
Keep soil, compost and mulch from building up against the timber above the original ground line. If you raise a flower bed against a fence, you may inadvertently bury more of the post and create wetter conditions. Climbing plants can also hold moisture against timber, so keep vigorous growth under control.
If you stain or paint the visible parts of the post, use a product compatible with pressure treated timber and follow the coating manufacturer’s preparation guidance. Decorative coatings can improve appearance and reduce weathering, but they should not be relied upon as the main protection for below-ground timber.
When should you choose timber posts rather than concrete or metal?
Timber posts are popular because they are relatively easy to handle, simple to cut, visually warm and compatible with most domestic fence panels. Incised, pressure treated timber posts can be a practical choice for many garden boundaries when installed correctly.
Concrete posts may last longer in some situations and can be useful for very wet ground, exposed sites or low-maintenance requirements, but they are heavier and have a different appearance. Metal post systems can also be effective, particularly where a slim profile or specific fixing method is needed. Your decision should balance appearance, durability, budget, handling and the level of exposure on your site.
Short FAQ
Are incised fence posts better than non-incised posts?
Incising can improve preservative penetration, particularly for posts intended for ground contact. Whether an incised post is the better choice depends on the treatment specification, timber type, fence height and installation conditions. For buried timber posts, incising is generally a positive durability feature.
Are the small cuts in the wood a defect?
No. On an incised post, the small regular cuts are intentional treatment marks. They should not be confused with deep splits, severe cracks or impact damage.
How much of a fence post should go into the ground?
For many domestic panel fences, allow at least 600mm below ground. For example, a 1.8m high fence commonly uses a post around 2.4m long. More demanding sites may need deeper holes or larger posts.
Do I still need to treat cut ends?
Yes. Any cutting, drilling or notching can expose less protected timber. Use a suitable cut-end preservative, especially on ends that will be close to or below ground level.
Will an anti-rot warranty guarantee the whole fence?
Usually not. Anti-rot warranties normally relate to the treated timber component and are subject to conditions. They do not usually cover poor installation, storm damage, incorrect use, or unrelated panel and fixing failures. Always read the warranty terms.
Conclusion
Incised timber fence posts are marked deliberately to help preservative treatment penetrate more deeply into the wood. For domestic boundary fencing, those marks are a practical durability feature, especially where posts are set into the ground. When choosing posts, focus on ground-contact suitability, correct length, appropriate section size, treatment details and installation method.
The best results come from combining the right post with careful workmanship: set out accurately, bury enough of the post, provide drainage, slope concrete away from the timber and protect every cut end. If you treat incised marks as a sign of purposeful preparation rather than damage, you can make a more informed choice and build a fence that stands straighter and lasts longer.