Handling rainwater from an attached patio canopy
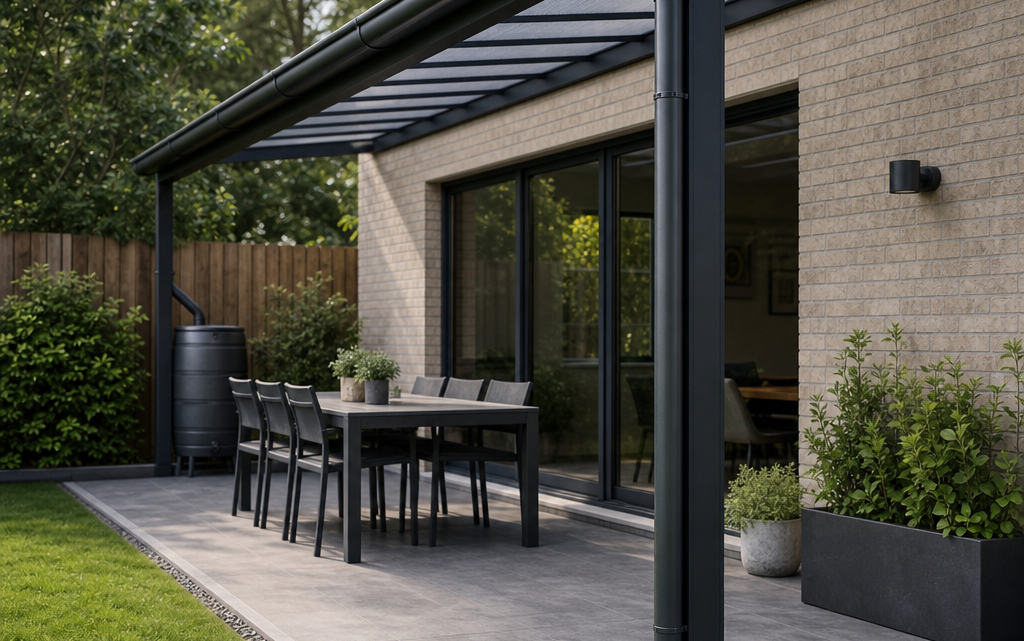
You have fitted, or are planning to fit, an attached patio canopy so you can use the terrace in more weather. The roof may look simple, but it changes how rain falls around your home. Instead of rain spreading across the patio, it is collected on one sloping surface and delivered to a gutter, outlet, downpipe or drip edge. If that water is not managed properly, it can splash onto walls, overload a small drain, undermine paving, soak a foundation, or run towards doors.
Good rainwater management is therefore part of the installation, not an afterthought. Whether your canopy is a small shelter over French doors or a large full-width patio cover, you need to decide where the water will go before you fix posts, anchor feet or wall plates. This guide explains the practical choices, common mistakes and checks that help you keep rainwater away from the house and under control.
Inhaltsverzeichnis
Why rainwater planning matters for an attached patio canopy
An attached canopy usually fixes to a wall and slopes away from the house towards front support posts. That is sensible because it directs water away from the building, but it also concentrates water at the low edge. During heavy rain, a canopy roof can shed a surprising volume of water in a short period.
As a simple guide, 1mm of rain falling on 1m² of roof equals roughly 1 litre of water. A canopy of around 25m² receiving 20mm of rain during a downpour may therefore need to deal with about 500 litres of water. If that water is allowed to fall onto paving without control, it may splash, pool, run back towards the house, or find gaps beside foundations and service entries.
Rainwater planning also protects the canopy itself. Standing water in gutters, blocked outlets, poor falls and uncontrolled overflow can stain surfaces, increase maintenance and place unnecessary load on fixings. A well-planned system keeps water moving, gives you a safe overflow route, and makes routine cleaning easier.
Start with the site: where does water naturally go?
Before choosing fittings, stand on the patio during or just after rain and observe how water behaves. Look for low spots, staining, moss, silt lines and areas where puddles remain. Check whether paving slopes away from the house or back towards it. Also note nearby drains, inspection covers, flower beds, lawns, retaining walls, steps and boundary lines.
Your aim is to take water from the canopy roof to a place where it can drain safely without causing nuisance to your own building, a neighbouring property or a public footpath. The best solution depends on the site, but the decision should be based on evidence rather than convenience.
Key site checks
- Patio fall: paving should ideally fall away from the house. If it falls towards the wall, you need extra care with drainage and thresholds.
- Ground level: make sure finished paving levels are not too high against damp proof courses, air bricks or timber thresholds.
- Existing drains: identify whether nearby gullies take rainwater, foul water or combined drainage. Do not assume any drain is suitable.
- Soil type: clay drains slowly, sandy or gravelly soils drain faster. This affects whether a soakaway is practical.
- Neighbouring land: do not discharge water so that it runs into a neighbour’s garden, driveway or building.
- Access for cleaning: gutters and outlets need to be reachable for clearing leaves and debris.
Understand the roof fall and gutter line
Most attached patio canopies are designed with a fall from the wall towards the outer beam. This fall is essential. It moves water off the roof sheets and towards a gutter or rain channel. If the canopy is installed too flat, water may sit on panels, encourage dirt build-up, or find joints it would not normally reach.
Follow the canopy manufacturer’s instructions for minimum and maximum installation heights, wall plate position and roof pitch. Do not reduce the fall just to gain headroom unless the system specifically allows it. A flatter roof may look tidier on paper, but poor drainage often leads to more problems than a slightly lower front edge.
The gutter line also needs a route to an outlet. Some canopy gutters are level by design with outlets at one or both ends, while others need a slight fall. Either way, water must be able to reach the outlet without ponding. If you are fitting a long canopy, outlet capacity and location become more important because water has farther to travel.
Choose a discharge method before installation
The most important decision is where the collected water will discharge. The right answer depends on your property layout, local drainage arrangements and how much water the canopy collects. In many cases, the options are a rainwater drain, a soakaway, a water butt with overflow, or controlled discharge to a permeable garden area.
Connection to a rainwater drain
If you already have a surface water gully or rainwater downpipe nearby, connecting the canopy downpipe may be neat and reliable. However, you should confirm that the drain is intended for rainwater and has capacity. In older properties, drains may be combined, while in some areas surface water must not be added to certain systems without permission.
Use appropriate fittings, maintain rodding or cleaning access, and avoid creating a connection that traps debris. If in doubt, ask a competent drainage contractor or your local authority for guidance.
Discharge to a soakaway
A soakaway can be a good solution where no rainwater drain is available and ground conditions are suitable. It allows water to disperse into the soil. However, it must be correctly positioned and sized. As a general principle, soakaways should be kept well away from buildings, boundaries and retaining structures. Many UK guidance documents refer to a minimum distance of 5 metres from a building, subject to site conditions.
Clay soils, high water tables and compacted ground may make a soakaway ineffective. If water cannot drain away, the soakaway simply becomes an underground storage pit that overflows in heavy rain.
Water butt with overflow
A water butt is useful for collecting water for garden use, but it is not a complete drainage solution on its own. Once full, it must overflow somewhere safe. Fit a proper overflow pipe to a drain, soakaway or suitable garden area. Do not rely on water spilling over the top of the butt beside the house.
Discharge to garden or border
For smaller canopies, it may be practical to route water to a planted border, rain garden or gravel area if the ground can absorb it and the discharge point is away from the building. Spread the flow rather than allowing a concentrated jet to scour soil. A short pipe, splash block, gravel trench or diffuser can help.
Decision criteria: what solution suits your canopy?
Use the following criteria to narrow down your drainage choice:
- Roof area: larger canopies collect more water and usually need more robust drainage than a small door canopy.
- Rainfall exposure: open, windy or coastal locations may see heavier driving rain and more debris.
- Distance to suitable drain: a nearby rainwater gully may be the simplest option if it is suitable and accessible.
- Ground permeability: free-draining ground may suit a soakaway or rain garden; clay may not.
- Maintenance access: the best design is one you can inspect and clean without dismantling the canopy.
- Risk to the building: if the patio is close to low thresholds, basements, retaining walls or timber construction, choose a more controlled drainage route.
- Appearance: consider where downpipes will sit, whether they can align with posts, and whether pipe runs will be visible.
Practical example: an attached patio cover with integrated gutters
Many modern attached patio covers include an integral rainwater channel rather than requiring a separate domestic gutter to be fitted afterwards. For example, a large canopy such as the 10’x28′ (3×8.4m) Palram Feria White Patio Cover is described as having integrated rain gutters and two gutter heads with a 3.2cm diameter each. Its adjustable support poles and wall mounting plate are intended to help position the canopy correctly, while the roof panels and frame provide a watertight covered area when installed as directed.
Those features are useful, but they do not remove the need to plan the final discharge route. Integrated gutters collect the water; you still need to decide where the outlets send it, whether a downpipe is needed, and how overflow will be handled during intense rainfall or blockage.
Fitting downpipes and outlets sensibly
The outlet is the point where drainage problems often begin. A small outlet may be adequate for normal rain but vulnerable to leaves, roof grit, insects or wind-blown debris. Keep outlets visible and accessible where possible. If the canopy has two gutter heads, consider whether using both outlets gives a better flow path than relying on only one, especially on a long roof.
Where a downpipe is used, secure it so it cannot rattle, twist or pull against the gutter head. If possible, align it with a canopy post or house wall to protect it from knocks. Avoid long, unsupported horizontal pipe runs, as they can sag and hold water. Any pipe run should have a continuous fall towards the discharge point.
At ground level, avoid ending a downpipe directly onto paving beside the support post unless the paving falls clearly away to a suitable drain. A shoe, bend, gully connection, gravel trench or water butt diverter may be needed. If water discharges onto paving, check that it cannot freeze in winter and create a slip hazard.
Protect the house wall and fixing line
Because an attached canopy meets the house wall, water management is not only about the front gutter. The junction at the wall must prevent rain running behind the wall plate or into cracks, render defects or brickwork gaps.
Follow the manufacturer’s fixing instructions and use suitable fixings for the wall type. The wall needs to be solid enough to carry the canopy loads, and the fixing line should be sealed or flashed as required by the system and wall construction. On uneven brick, stone, pebbledash or textured render, extra care may be needed to form a weather-resistant junction.
Before installation, repair obvious defects such as cracked render, loose pointing or damaged sealant around doors and windows. A canopy can hide these areas, making later repairs harder. Also check that the canopy does not bridge a damp proof course or block air bricks, vents or boiler flues.
Allow for overflow in heavy rain
Every drainage system should have a safe failure mode. Gutters can block, water butts can fill, drains can surcharge and soakaways can become saturated. Think about where water will go if the outlet cannot cope.
Ideally, overflow should spill away from the house and onto a surface that can tolerate short-term wetting. It should not pour over a doorway, electrical point, retaining wall, timber deck, basement lightwell or neighbour’s boundary. If the canopy has a front gutter, check whether overflow would run over the front edge, out of an end cap, or back towards the roof sheets.
In exposed areas, wind can also blow water beyond the gutter line. Side walls or screens may reduce wind-driven rain under the canopy, but they can also change how water and air move around the structure. Treat them as part of the whole design rather than an afterthought.
Installation checklist for rainwater management
- Confirm the canopy’s required roof pitch, wall plate height and front support position.
- Measure the approximate roof area so you understand the likely volume of rainwater.
- Identify a suitable discharge point before fixing the canopy permanently.
- Check that paving falls away from the house or provide a controlled drainage route.
- Confirm whether any nearby drain is suitable for rainwater discharge.
- If using a soakaway, assess soil conditions and keep it safely away from buildings.
- Plan downpipe positions so they are supported, accessible and protected from knocks.
- Provide an overflow route for blocked outlets or extreme rainfall.
- Keep access to gutters, gutter heads and downpipes for cleaning.
- Inspect the wall junction, pointing, render and sealant before covering the area.
- Do not block air bricks, vents, drains, inspection covers or damp proof courses.
- After the first heavy rainfall, check for leaks, pooling, splashing and overflow.
Common practical mistakes to avoid
Assuming the patio drain can take everything
A small patio gully may already be taking water from paving, roofs or garden areas. Adding a canopy can increase the load. If the drain backs up in heavy rain, water may spread across the patio or towards the house. Check performance before relying on it.
Letting water discharge at the post base
Canopy posts and foot pads need a stable, solid base. Concentrating water at the post foot can wash out bedding material, stain paving, encourage algae or soften adjacent soil. Route water away from post bases and anchor points.
Installing the canopy too flat
Reducing the fall to gain headroom can leave water sitting on roof panels or moving too slowly through the gutter. Always work within the manufacturer’s permitted installation range.
Forgetting the water butt overflow
A water butt may be full when the next storm arrives. Without an overflow pipe, water can spill beside walls or foundations. Treat the overflow as essential, not optional.
Ignoring leaves and seasonal debris
Even if there are no trees directly above the patio, wind can carry leaves, seeds and moss into gutters. Narrow outlets are particularly vulnerable. Schedule cleaning at least in autumn and after storms.
Discharging water onto a neighbour’s property
Rainwater from your canopy should be managed within your property or through an agreed and lawful drainage route. Do not direct a downpipe or overflow towards a boundary where it may cause nuisance.
Maintenance after installation
Once the canopy is fitted, monitor it in real weather. A hosepipe test can help, but it does not fully replicate wind, heavy rainfall or blocked drains. During the first few storms, look for water running behind the wall plate, overflowing at one end, dripping from joints, or ponding on the roof.
Clean gutters and outlets regularly. Remove leaves, twigs, roof grit and any debris that could restrict flow. Check that downpipes remain firmly clipped and that discharge points are not buried by soil, leaves or gravel. If you use a water butt, clean the filter or diverter and make sure the overflow remains clear.
Also watch for staining on walls or paving. Green algae, damp patches and repeated silt deposits often show where water is not being managed correctly. Early adjustments are usually cheaper and easier than repairing damp, frost damage or loose paving later.
Short FAQ
Can I let canopy rainwater run straight onto the patio?
Sometimes, but only if the patio has a reliable fall away from the house and the water can reach a suitable drain or permeable area without pooling. For larger canopies, controlled guttering and downpipes are normally the safer option.
Do I need a soakaway for an attached patio canopy?
Not always. If you have a suitable rainwater drain, that may be more practical. A soakaway is useful where drainage is not available, but it must suit the soil and be positioned safely away from buildings and boundaries.
Is a water butt enough?
No. A water butt stores some rainwater, but once full it needs a proper overflow route. Without one, it may simply move the drainage problem to the base of the butt.
How often should I clean the gutter?
At least once or twice a year is sensible for many homes, especially in autumn. Clean more often if nearby trees, moss, birds or exposed winds bring debris onto the roof.
What should I check after the first heavy rain?
Check that water reaches the outlet, the downpipe discharges correctly, the wall junction stays dry, no water pools on the roof, and no overflow runs towards doors, walls, post bases or neighbouring land.
Conclusion
Handling rainwater from an attached patio canopy is about controlling the full journey of the water: from roof fall, to gutter, to outlet, to final discharge. Integrated gutters and neat outlet fittings are helpful, but they are only part of the system. You still need a suitable drainage destination, a safe overflow route and regular access for cleaning.
Plan the drainage before installation, check the patio levels, protect the house wall, and avoid concentrating water at foundations, thresholds or post bases. With these practical steps, your canopy will not only provide shelter from showers but also manage those showers safely and reliably for years to come.