Protecting Timber Fence Post Tops from Rain, Frost and Sun
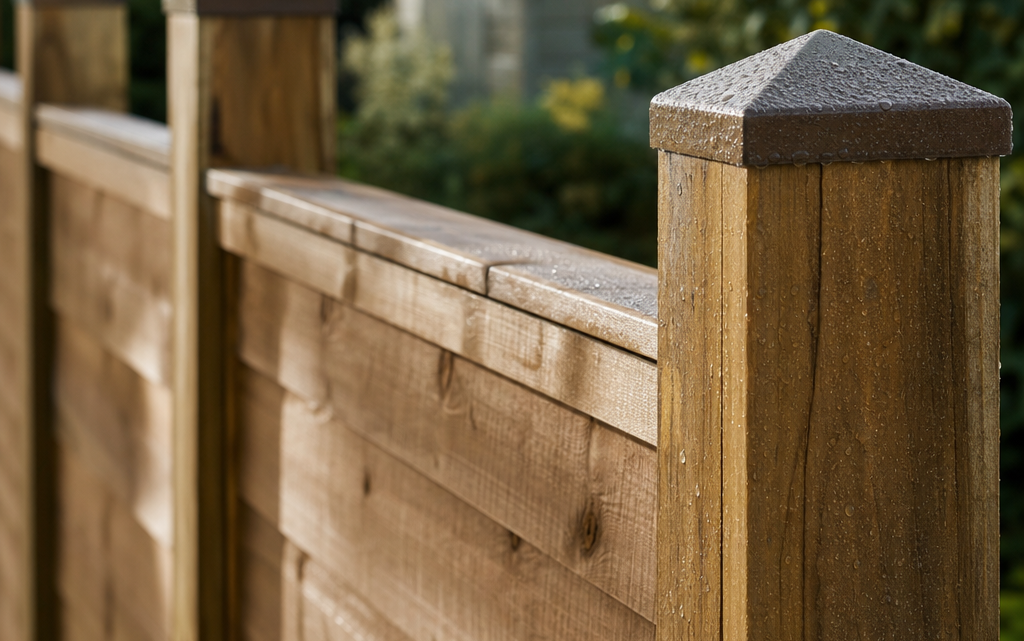
If you have ever looked along a fence after a wet winter and noticed cracked post tops, green staining, soft fibres or splits opening around the grain, you have seen one of the most common weak points in garden fencing. Even when the posts themselves are sound and correctly installed, the exposed top end of a timber fence post takes a great deal of punishment from rain, frost, snow and strong sun. The good news is that protecting post tops is a straightforward maintenance task, and it can add years to the useful life of your fence.
This guide explains why fence post tops are vulnerable, how to choose a suitable form of protection, and the practical steps you can take to reduce weather damage. It also covers common mistakes, seasonal checks and a short FAQ to help you make sensible decisions for an existing fence or a new installation.
Inhaltsverzeichnis
Why Timber Fence Post Tops Need Protection
Timber is a natural material with grain running through it. At the top of a fence post, the end grain is exposed directly to the weather. End grain behaves rather like a bundle of straws: it can absorb moisture more readily than the planed or sawn sides of the post. When rain sits on a flat post top, that moisture can soak into the fibres and remain there for longer than you might expect.
Once moisture enters the top of the post, several forms of damage can follow. Frost can cause absorbed water to expand, widening small splits and opening the grain further. Repeated wetting and drying can lead to checking, cracking and surface breakdown. In warm, sunny weather, rapid drying can also stress the timber, especially where the top has already become saturated during rain. Over time, this cycle can make the post top rough, absorbent and more vulnerable to decay.
Pressure treatment helps protect timber against rot and fungal decay, but it does not make the wood completely immune to weathering. The exposed top is still a high-risk area, so physical protection and routine care remain worthwhile.
What Good Weather Protection Should Achieve
The aim is not simply to cover the post. Effective protection should manage water, reduce direct exposure and avoid trapping moisture. When assessing a post cap, capping detail or treatment method, look for the following qualities.
It should shed water away from the end grain
A sloping, domed or angled top is usually better than a flat surface because it encourages rainwater to run off. The faster water is moved away from the end grain, the less chance it has to soak into the post.
It should cover the vulnerable top surface
The protective detail should sit over the exposed top, shielding the end grain from direct rainfall, snow and intense sunlight. A cap should be correctly sized so it does not look out of place or leave large areas exposed.
It should allow the post to dry
Protection should not seal damp timber in an airtight pocket. Timber moves and breathes with changing conditions, so any product or finish should be applied to dry, sound wood and maintained as needed.
It should be suitable for the post size and location
A sheltered decorative fence may not need the same level of protection as a boundary fence in an exposed garden, coastal area or open field. The more weather the fence receives, the more important it is to use a robust protective approach.
Main Options for Protecting Fence Post Tops
There are several ways to protect timber post tops. The best choice depends on the condition of the post, the appearance you want and how exposed the fence is.
Timber post caps
Timber post caps are a common choice because they suit wooden fencing visually and provide a simple protective cover. Many have angled edges or a shaped top to help shed water. They can be used on new fencing or retrofitted to existing posts, provided the top of the post is sound, reasonably level and dry before fitting.
Metal post caps
Metal caps can provide a durable barrier against direct rainfall. They often suit contemporary gardens or areas where a stronger contrast is desired. However, they should be fitted carefully to avoid sharp edges, rattling in wind or water being trapped underneath.
Shaping the post top
Some posts are cut to a weathered point, bevel or pyramid shape. This can help shed water without adding a separate cap. The disadvantage is that cutting exposes fresh timber, so the cut surface should be treated with a suitable end-grain preservative or protective finish.
Brush-on treatments and end-grain preservers
A suitable timber treatment can help reduce moisture uptake, especially on freshly cut or weathered post tops. It is not a complete substitute for good detailing, but it is an important part of maintenance. Always follow the manufacturer’s instructions, especially around drying times, re-coating and compatibility with pressure-treated wood.
Decision Criteria: Choosing the Right Protection
Before you buy or fit anything, assess your fence carefully. A small amount of time spent checking the post condition and exposure will help you avoid wasted effort.
- Post size: Measure the top of the post accurately. Do not rely on a rough description such as “standard post”, as older posts may not match modern nominal sizes.
- Post condition: A cap will not repair a rotten post. If the top is soft, crumbling or deeply split, you may need to cut back to sound timber or consider replacing the post.
- Exposure: Fences facing prevailing weather, open countryside or driving rain need more reliable water-shedding details.
- Existing treatment: Pressure-treated posts still benefit from capping, but freshly cut ends should receive appropriate extra treatment.
- Appearance: Choose a cap or finish that suits the style of your fencing, especially on front gardens or decorative panels.
- Maintenance access: If the fence is difficult to reach, choose a longer-lasting and robust solution to reduce future work.
- Fixing method: Make sure the cap can be fixed securely without splitting the timber or creating unnecessary water traps.
A Practical Example of a Timber Post Cap
As an example of the type of product used for this purpose, the Forest Fence Post Cap 10 x 10cm is a pressure-treated timber cap with angled edges. It is described as being suitable for 75 x 75mm wooden posts, with the angled edging intended to help protect against driving rain, snow and extreme heat. It is also stated to carry a 15-year guarantee against rot and fungal decay, and is priced at 3.99 EUR. This is only one example, but it illustrates the main principle: cover the vulnerable end grain and encourage water to run off rather than sit on the post top.
How to Fit a Fence Post Cap Correctly
Fitting a cap is usually a simple job, but careful preparation makes a real difference. Poor fitting can leave gaps, split the post or trap moisture, which defeats the purpose of the work.
1. Check the post top
Inspect the post for softness, deep cracks, fungal growth or loose fibres. Use a screwdriver or bradawl gently; if the timber is spongy or breaks away easily, the post may already be decaying. A cap should only be fitted to a sound surface.
2. Clean and dry the timber
Brush away dirt, algae, loose fibres and debris. If the post is wet, wait for a dry spell before fitting. Installing a cap over saturated timber can slow drying and may encourage ongoing deterioration.
3. Level or tidy the top if needed
If the post top is uneven, you may need to plane, sand or saw it back slightly. Avoid removing more timber than necessary. If you expose fresh wood, apply a suitable end-grain treatment and allow it to dry according to the instructions before fitting the cap.
4. Position the cap squarely
Place the cap centrally so it protects the top evenly. Check the overhang or alignment from more than one angle, especially on visible runs of fencing. A neat line of caps improves both protection and appearance.
5. Fix without splitting
Use appropriate exterior-grade fixings. If nailing or screwing near edges, pilot holes can reduce the risk of splitting the cap or post. Fix firmly, but do not overtighten screws to the point where the timber is crushed.
6. Finish and maintain
If the cap or surrounding timber requires a compatible exterior finish, apply it as directed. Check the cap after the first spell of bad weather to ensure it has not shifted and that water is shedding properly.
Checklist: Protecting Exposed Fence Post Tops
- Measure each post top before choosing a cap.
- Confirm the timber is sound, not soft or crumbling.
- Clean off algae, dirt and loose fibres.
- Allow wet timber to dry before covering it.
- Treat freshly cut end grain with a suitable preservative or end-grain product.
- Choose a cap or shaped detail that sheds water away from the top.
- Use exterior-grade fixings and drill pilot holes where needed.
- Avoid sealing in damp or rotten wood.
- Inspect caps annually, especially after winter storms.
- Reapply compatible protective finishes when required.
Common Practical Mistakes to Avoid
Fitting caps to rotten posts
A cap is a protective measure, not a structural repair. If the top of the post is already rotten, covering it may hide the problem while decay continues. Deal with the damaged timber first.
Ignoring freshly cut timber
When you cut a post to height, you expose untreated or less-protected end grain. This area needs attention before it is left to the weather. Apply an appropriate end-grain preservative or treatment, particularly on pressure-treated posts that have been cut after manufacture.
Using an unsuitable size
A cap that is too small may leave part of the end grain exposed. One that is too large may look clumsy or catch on clothing, tools or garden equipment. Measure carefully and choose a proportionate size.
Creating a water trap
Flat covers, excessive sealant or poorly fitted caps can hold moisture against the timber. The goal is to shed water, not create a damp pocket.
Forgetting ongoing maintenance
Even well-protected timber should be checked regularly. Wind, frost, movement and general weathering can loosen fixings or open small gaps over time.
Seasonal Maintenance for Fence Post Tops
Post-top protection works best as part of a simple maintenance routine. You do not need to inspect your fence every week, but a few checks at the right times can prevent avoidable damage.
Spring
After winter, look for lifted caps, frost cracks, loose fixings and dark staining around the post tops. Clear away climbing plant growth that traps moisture around the tops of posts. If timber has become rough or absorbent, plan any treatment work for a dry period.
Summer
Warm, dry weather is often the best time for cleaning, drying and applying compatible treatments. However, avoid applying finishes in extreme heat or direct sun if the product instructions advise against it.
Autumn
Before prolonged wet weather arrives, check that caps are secure and that water is not sitting on flat surfaces. Remove leaves, moss and debris from the top of fence lines where they collect.
Winter
Do not attempt unnecessary timber treatment during wet or freezing conditions. Instead, make visual checks after storms and note any repairs to complete when conditions improve.
When a Cap Is Not Enough
Sometimes the condition of the post calls for more than simple top protection. If a post moves when pushed, has rot at ground level, leans significantly, or shows deep structural cracking, the main problem may not be the top at all. Ground-line decay and poor drainage around the base are also common causes of fence failure.
In these cases, protecting the top is still sensible for new or repaired posts, but you should not ignore structural issues. A fence post that is failing at the base may need repair spurs, reinforcement or replacement. If you are unsure, assess the entire post from top to ground level before spending money on cosmetic improvements.
FAQ
Do pressure-treated fence posts still need caps?
They do not always require caps, but caps are a sensible extra measure. Pressure treatment helps protect against rot and fungal decay, while a cap helps reduce direct weathering of the exposed end grain.
Can I fit post caps in winter?
You can, if the timber is dry enough and conditions allow secure fixing. However, it is better to avoid fitting caps over wet or frozen timber. A dry spell in spring, summer or early autumn is usually preferable.
Should I seal around the edge of a post cap?
Be cautious. Heavy sealing can trap moisture if water gets underneath. In many cases, good fit, proper water shedding and sound timber preparation are more important than sealing every edge.
What if the post top is already split?
Small surface checks are common in outdoor timber. Clean and dry the area, treat exposed end grain if appropriate, and fit protection if the timber remains sound. Deep, soft or widening splits should be assessed more carefully.
How often should I inspect fence post tops?
At least once a year is sensible, with an additional check after severe winter weather or high winds. Regular inspection helps you catch loose caps, cracks and early signs of decay before they become serious.
Conclusion
Protecting timber fence post tops is a small maintenance job with a worthwhile practical benefit. The top of a post is especially vulnerable because exposed end grain absorbs moisture, then suffers through repeated cycles of rain, frost and sun. A well-chosen cap, shaped top or suitable treatment helps shed water, reduce weathering and keep the post in better condition.
For the best results, start with sound, dry timber, choose protection that fits properly, avoid trapping moisture and include the post tops in your annual fence inspection. Whether you are maintaining an older boundary fence or finishing a new installation, attention to this exposed detail can improve both durability and appearance.