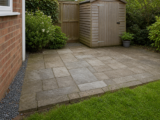
Levelling Uneven Garden Ground Before Installing a Shed Base

You have chosen your shed, measured the garden, and found what looks like the perfect spot. Then you put a spirit level or a straight length of timber across the ground and realise the area falls away to one corner, holds water after rain, or has a hump where an old border used to be. This is a very common situation. Most gardens are not naturally level, and a shed base needs more than a quick scrape with a spade if you want the building to sit square, keep its doors working properly, and stay dry underneath.
Levelling uneven garden ground before installing a shed base is not simply about making the surface look flat. You need to manage the gradient, provide a firm bearing surface, and allow water to drain away rather than collect beneath the floor. Whether you plan to use concrete, paving slabs, timber bearers, or a plastic grid base, the principles are the same: the ground must be stable, level across the shed footprint, and prepared so that rainwater has somewhere sensible to go.
Inhaltsverzeichnis
Why gradients matter beneath a shed base
A slight garden slope is not a problem in itself. In fact, a controlled fall can be useful for moving surface water away from buildings. Problems occur when the shed base follows that slope or when water is directed under the shed rather than around it.
If a shed is installed on an uneven base, the structure can twist over time. Doors may drop, catches may no longer line up, windows can bind, and timber floors may become damp where they sit close to wet ground. Even metal and plastic sheds can suffer if the frame is not properly supported. A level base spreads weight evenly and helps the shed perform as designed.
Level does not mean water should be trapped
The top of the shed base should be level, but the ground and drainage around it should still deal with rainfall. You are aiming for a level platform with water movement planned around or through the base, depending on the system used. A sealed concrete slab, for example, needs water to run away from the edges. A gravel-supported plastic grid base can allow water to drain through, provided the sub-base is prepared correctly and is not installed in a natural sump.
Assess the site before you start digging
Before you buy materials or remove turf, take time to understand the site. This is where many failed shed bases begin: the installer levels the top few centimetres without noticing that the wider area channels water directly into the shed position.
Check the fall across the footprint
Mark out the intended shed base using pegs and string. Include a small margin around the shed if possible, typically at least 75mm to 150mm beyond the shed walls, unless the shed manufacturer specifies otherwise. Place a long straightedge, scaffold board, or length of timber across the area and set a spirit level on top. Measure the gap between the low end and the ground.
Repeat this from front to back, side to side, and diagonally. A site that appears to slope in one direction may actually have a dip in the middle or a raised ridge near one edge. If you have a large shed, check at several points rather than relying on one reading.
Look for drainage clues
After rain, inspect the area. Standing water, mossy patches, compacted clay, and watermarks along fences are useful indicators. If the proposed shed position is already the wettest part of the garden, levelling alone will not solve the problem. You may need to choose a different location, improve drainage, or raise the base above the surrounding ground.
Decision criteria: choose the right levelling approach
The best method depends on the slope, soil type, shed size, and base system. Use the following criteria before deciding how much ground preparation is required.
1. How much does the ground fall?
For a minor difference of around 10mm to 25mm across a small footprint, you may be able to correct the level by removing high spots and adding a compacted bedding layer. For larger differences, particularly over 50mm, you should think in terms of forming a proper level platform rather than simply packing up one side.
On a significant slope, avoid creating a base that is level at the top but unsupported at the lower edge. You may need a retained edge, deeper compacted sub-base, or a different construction method such as a timber frame on posts or a professionally installed concrete slab.
2. What is the soil like?
Free-draining sandy or gravelly soils are generally easier to prepare. Clay soils hold water and can soften in winter, so they need more attention to drainage and compaction. Recently disturbed soil, old vegetable beds, filled ponds, or areas where trees have been removed may settle over time. Do not install a shed base on loose fill unless it has been properly compacted in layers.
3. What type of shed base are you using?
Concrete and paving slabs need a well-compacted sub-base and an even bedding layer. Timber bearers need solid support points and good airflow. Plastic grid bases usually need firm, level ground, a weed membrane, and a gravel fill. Each system can work well, but none should be used to disguise poor ground preparation.
4. Where will water go?
Ask this before you level anything. Rainwater from the roof, nearby paving, and surrounding slopes must not be directed under the shed. If the garden falls towards the shed, consider adding a shallow gravel drain, a French drain, or regrading the surrounding soil so water bypasses the base.
Practical steps for levelling uneven garden ground
Step 1: Mark out the base area accurately
Use pegs and string to mark the footprint. Check that the corners are square by measuring the diagonals; equal diagonal measurements indicate a square or rectangular layout. Make the prepared area slightly larger than the shed base where practical, so edges are supported and maintenance is easier.
Step 2: Remove turf and organic material
Cut away grass, roots, leaves, and soft topsoil. Organic matter decomposes and settles, which can create dips under the base. Dig down until you reach firm ground. On some sites this may be only a few centimetres; on others you may need to remove more material.
Step 3: Reduce high spots rather than only filling low spots
It is usually better to cut down the high side than to build up the low side with loose soil. Soil used as fill can settle when wet. If you must raise an area, use a suitable granular material and compact it in thin layers rather than tipping in a deep layer and hoping it will firm up later.
Step 4: Install an edge if needed
On sloping ground, edging helps keep gravel or sub-base material in place. Treated timber, concrete edging, or suitable retaining boards can be used, depending on the base design. Make sure any retaining edge is itself secure and level. A weak edge will move, allowing the base to spread or slump.
Step 5: Add and compact the sub-base
For many base types, a compacted layer of MOT Type 1 or similar granular sub-base is used to create a stable platform. Add it in layers and compact thoroughly with a hand tamper for small areas or a vibrating plate compactor for larger installations. Do not compact only the top surface; poorly compacted material underneath can settle later.
Step 6: Create the final level surface
Use sharp sand, grit, pea gravel, or another recommended bedding material according to the base system. Screed it level using rails or straight timber. Check the level in several directions. Take your time here, because small errors can become very noticeable once the shed is assembled.
Using drainage to protect the shed floor
Good drainage is about preventing prolonged contact between the shed floor and moisture. It is also about keeping the surrounding ground from becoming waterlogged and unstable.
Allow water to drain away from the base
If you are using a solid base such as concrete, make sure the surrounding ground does not sit higher than the slab edges. Soil or mulch banked against the base can trap moisture. Ideally, the finished base should stand slightly proud of the surrounding ground, with a gentle fall away around the perimeter.
Use gravel zones wisely
A gravel margin around the shed can reduce splashback and help surface water disperse. However, gravel is not a cure for a drainage problem if it sits in a clay-lined hollow. Where water cannot soak away, consider directing it to a suitable drainage point, soakaway, or garden drainage system, subject to local conditions and regulations.
Plan for roof runoff
Shed roofs can shed a surprising amount of water. A pent roof may discharge water along one side, while an apex roof drains to two sides. If that water lands directly on soft soil at the base edge, it can erode the support or create damp conditions. Consider guttering, water butts, or a gravel strip beneath the drip line.
Plastic grid bases are often chosen where the installer wants a lightweight, ventilated base that can drain through a gravel fill. For example, a 16×10 Plastic Shed Base Kit may use interlocking recycled plastic grids laid over a firm, level prepared area, with a membrane and pea gravel used as part of the installation. This type of system still depends on correct levelling: the grids should not be used to bridge hollows, and the ground beneath must be capable of supporting the shed evenly.
Whatever base product you choose, treat the manufacturer’s instructions as the controlling guidance. If a kit specifies a particular gravel size, membrane arrangement, or ground preparation standard, follow it. The general levelling and drainage principles in this article support those instructions rather than replacing them.
Checklist: before you install the shed base
- Footprint confirmed: You have checked the shed dimensions and allowed a suitable margin around the base where possible.
- Levels measured: You know how much the ground falls from side to side, front to back, and diagonally.
- Drainage observed: You have checked where water sits after rain and where runoff enters the area.
- Organic material removed: Turf, roots, and soft topsoil have been dug out from beneath the base area.
- Firm formation achieved: The exposed ground is stable, not spongy, loose, or recently filled.
- Sub-base compacted: Granular material has been laid in suitable layers and compacted thoroughly.
- Edges supported: Any raised or sloping side has a secure edge restraint where needed.
- Final surface level: The finished base surface has been checked with a reliable spirit level in several directions.
- Water route planned: Roof runoff and surface water will move away from the shed or drain through an appropriate medium.
- Instructions followed: The base and shed manufacturers’ installation requirements have been read before assembly begins.
Common practical mistakes to avoid
Levelling with loose soil
Loose garden soil is easy to shovel into a hollow, but it is not a reliable foundation. It compresses when wet and can be disturbed by worms, roots, and frost. Use compactable granular material where you need to build up levels.
Ignoring a low corner
A low corner may seem minor during preparation, but it can become the point where water collects and the shed begins to twist. Check all four corners carefully and confirm that the base is supported across its full footprint.
Installing the base flush with surrounding soil
If soil, lawn, or bark chippings sit level with or above the shed floor, moisture can be held against the base. Keep the immediate perimeter clear and allow air and water movement around the shed.
Assuming gravel always solves drainage
Gravel improves local drainage only if water can move through it and then away. In heavy clay, a gravel-filled hole can act like a sump. If the site stays wet, you may need to intercept water before it reaches the base.
Not compacting in layers
A thick pile of sub-base material may feel firm underfoot after the surface is tamped, but the lower layer can remain loose. Add material gradually and compact each layer. This is particularly important for larger sheds and for bases carrying heavy stored items.
Using packers as a permanent fix
Small packers may help during shed assembly, but they should not compensate for a badly levelled base. A shed needs continuous or properly distributed support. Isolated packing points can concentrate loads and cause distortion.
When you should consider extra drainage or professional help
Some sites need more than ordinary DIY levelling. If water flows towards the shed from a patio, driveway, bank, or neighbouring garden, install the shed only after the drainage route has been addressed. A shallow channel filled with clean stone may help in simple cases, but more serious problems can require a properly designed French drain or soakaway.
You should also seek professional advice if the base is for a very large shed, workshop, garden office, or any structure carrying heavy equipment. The larger and heavier the building, the less tolerance there is for settlement. Similarly, if you are cutting into a steep slope or retaining a raised base, the retaining structure must be suitable for the load and ground conditions.
FAQ
Can I put a shed base directly on grass?
No. Grass and topsoil are organic, uneven, and prone to movement. Remove turf and soft material first, then prepare a firm, level foundation appropriate for your chosen base.
Should a shed base be perfectly level?
The supporting surface for the shed should be level so the building sits square. Drainage should be managed around, beneath, or through the base depending on the construction, rather than by leaving the shed itself on a slope.
How do I level a shed base on a sloping garden?
Mark out the area, measure the fall, cut down high ground where practical, and build up low areas only with compacted granular material and suitable edge restraint. On steeper slopes, consider a retained base, post-supported frame, or professional installation.
What should I do if water pools where I want the shed?
First, consider moving the shed to a drier location. If that is not possible, identify where the water comes from and provide a drainage route before installing the base. Simply raising the shed slightly may not be enough if the surrounding ground remains saturated.
Is a plastic grid base suitable for uneven ground?
A plastic grid base can be suitable for a prepared, firm, level area, but it should not be laid over uneven ground without correction. The ground still needs proper levelling, support, and drainage preparation.
Conclusion
Levelling uneven garden ground for a shed base is a foundation job, not just a cosmetic one. Start by measuring the gradient, understanding how water behaves on the site, and choosing a base method that suits the soil and shed size. Remove organic material, compact the sub-base properly, support the edges, and make sure the finished platform is level while water is directed safely away.
If you prepare the ground carefully, your shed is far more likely to remain square, dry, and usable for years. The time spent checking levels and drainage before installation is almost always less than the time and cost of correcting a shed that has settled, twisted, or started to suffer from damp beneath the floor.