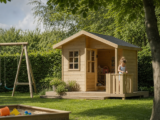
How to plan a level base for a garden building

You have chosen a timber shed, summerhouse, workshop or garden office, and the delivery date is approaching. The building looks straightforward enough on paper, but there is one part of the job that decides how well it will perform for years: the base. A garden building placed on an uneven, soft or poorly drained base can twist, leak, bind at the doors and suffer premature timber decay. A level, stable base is not an optional extra; it is the foundation of the whole structure.
This guide explains how to plan a level base for a timber garden building in a practical, step-by-step way. It covers where to position the building, how to assess your ground, which base types to consider, what mistakes to avoid, and how to check the finished base before assembly begins.
Inhaltsverzeichnis
Why the base matters for timber garden buildings
Timber garden buildings are usually delivered in panels or sections that are designed to sit squarely on a flat, level support. If the base is out of level, the walls may not line up properly, the roof may not sit evenly, and doors or windows can become difficult to open and close.
A good base has three main jobs:
- It spreads the load of the building, its contents and the people using it.
- It keeps the timber floor off wet ground, reducing the risk of moisture damage.
- It provides a flat and level platform so the structure remains square and stable.
Even pressure-treated timber benefits from being kept clear of standing water and damp soil. A properly planned base also makes installation easier, whether you are assembling the building yourself or using a professional installer.
Choose the right position before you plan the base
Before you buy materials or start digging, decide exactly where the building will go. Moving a base after it has been built is difficult, so take time at this stage.
Check access and working space
Allow enough space around the building for installation, maintenance and future treatment or painting if required. You should be able to reach all sides safely. Leaving a narrow gap against a fence or wall may seem convenient, but it can make it impossible to fix roof felt, maintain cladding or clear leaves and debris.
As a practical rule, try to leave at least 450mm to 600mm around the building where possible. Larger garden rooms, summerhouses and workshops may need more space for safe assembly.
Consider sunlight, shade and exposure
A very shaded corner may stay damp for longer after rain, particularly under trees or beside high fencing. A highly exposed spot may receive strong wind-driven rain. Neither is automatically unsuitable, but both should affect your planning. In damp locations, drainage and airflow beneath the building become especially important.
Avoid obvious drainage problems
Do not place a timber garden building where water naturally collects. Look for signs such as mossy ground, puddles after rain, soft soil, or water flowing from paving, lawns or neighbouring areas. If the chosen position is the lowest part of the garden, you may need to improve drainage or choose a different site.
Measure the building footprint accurately
The base should support the full footprint of the building. For most timber sheds and summerhouses, the base should be the same size as the building’s external footprint or very slightly smaller, depending on the manufacturer’s instructions. A base that projects too far beyond the walls can catch rainwater and direct it back under the timber.
Always check the building supplier’s base guidance. Do not rely only on a nominal size such as “6×4”, “8×6” or “10×8”, as these are often approximate descriptions rather than exact measurements. Use the actual external dimensions given for the building when setting out the base.
Mark out the area
Use pegs and string to mark the proposed footprint. Measure both the length and width, then measure diagonally from corner to corner. If the two diagonal measurements are equal, the layout is square. If they differ, adjust the pegs until the shape is correct.
Once the footprint is marked, stand back and check how the building will sit in the garden. Consider door swing, window outlook, access from the house, and whether gutters, overhangs or roof slopes need extra clearance.
Understand your ground conditions
The best base type depends partly on the ground beneath it. Firm, well-drained ground offers more options than soft, uneven or waterlogged soil.
Firm soil or existing hardstanding
If the area is already compact and level, you may be able to use a lighter base system, paving slabs, timber bearers on suitable supports, or a compacted sub-base. Existing concrete or paving can be suitable if it is sound, level and large enough, but cracked, sinking or uneven surfaces should be repaired before use.
Soft soil or newly disturbed ground
Freshly turned soil, old flower beds and poorly compacted ground can settle over time. If you build directly over them without proper preparation, the base may sink unevenly. In these cases, you will usually need to excavate, add a compacted sub-base and choose a more robust base construction.
Sloping ground
A slight slope can often be managed by cutting into the high side and building up the low side with compacted hardcore or suitable supports. A steep slope needs more careful design. Avoid simply packing up corners with loose bricks, timber offcuts or unstable blocks, as these can move and create point loads.
Compare common base options
There is no single best base for every garden building. The right choice depends on building size, weight, ground conditions, budget, drainage and how permanent you want the installation to be.
Concrete base
A concrete slab is one of the most durable and stable options. It is well suited to larger or heavier timber buildings, workshops, summerhouses and buildings that will hold substantial contents. It must be properly levelled, laid on a suitable compacted sub-base, and allowed to cure before installation.
The main advantages are strength, longevity and a solid finished surface. The disadvantages are cost, labour, permanence and the need to get drainage details right. If the slab extends beyond the walls, water can sit against the timber unless the design prevents it.
Paving slab base
Paving slabs can provide a practical base for small to medium garden buildings when laid on a properly prepared bed. They should not simply be dropped onto grass. The ground should be excavated, levelled and compacted, usually with a sand or mortar bed depending on the specification.
This option can be cost-effective and easier to adjust than poured concrete. However, individual slabs can move if the sub-base is poor, so careful preparation is essential.
Plastic grid base
Plastic grid bases are modular systems that can be filled with gravel to create a free-draining support. They are often used for sheds and smaller garden buildings, particularly where drainage is important and a less permanent base is preferred. They still need proper ground preparation and a level, compacted sub-base.
As a practical example, a product such as a 6×4 Plastic Shed Base Kit, priced at 81.99 EUR, illustrates the type of modular base system you might consider for a smaller garden building. Before choosing any kit, check that its actual dimensions, load suitability and installation requirements match your building and site conditions.
Timber frame base
A timber frame base can work where the ground is firm and level, or where it is supported on suitable pads or posts. It can help lift the building off the ground and improve airflow. However, the timber used for the base should be suitable for external ground-adjacent use, and it must be installed square, level and well supported.
A timber base is not a shortcut for poor ground preparation. If the supports move, the building will move with them.
Ground screws or adjustable supports
Ground screws and adjustable pedestals can be useful on sloping sites or where minimal excavation is preferred. They can provide a level support framework while reducing the amount of concrete used. They need correct spacing, suitable ground conditions and careful installation, so they are often best planned with professional advice for larger buildings.
How to set out and prepare a level base
The exact method varies by base type, but the principles are similar. The ground must be cleared, compacted, levelled and checked before the building is installed.
1. Clear the site
Remove vegetation, roots, loose soil, stones and debris. Do not build directly on grass. Organic material rots down and creates movement, voids and damp conditions beneath the building.
2. Excavate to the required depth
Dig out the area to allow for the base build-up. This may include a compacted sub-base, bedding layer, grid, slabs or concrete. The depth will depend on the chosen system, soil type and manufacturer’s guidance. Keep the excavation as even as possible and avoid disturbing more ground than necessary.
3. Install a suitable sub-base
For many bases, a layer of compacted hardcore or Type 1 sub-base is used to create a firm foundation. Add it in layers and compact thoroughly rather than tipping it in all at once. Poor compaction is one of the most common causes of later settlement.
4. Add a weed membrane where appropriate
A permeable weed membrane can help reduce weed growth beneath gravel-filled grids or slab bases. It should not trap water in a way that worsens drainage. Use the type recommended for the base system you are installing.
5. Level the surface carefully
Use a long spirit level, laser level or straightedge to check the base in several directions. Check front to back, side to side and diagonally. A base can look level by eye but still be far enough out to cause installation problems.
6. Check the finished dimensions
Measure the base again before the building arrives. Confirm length, width and diagonal measurements. It is much easier to correct a base before the building is assembled than after wall panels and roof sections are in place.
Base planning checklist
Use this checklist before you start installation:
- The chosen site is not prone to standing water.
- There is enough access around the building for installation and maintenance.
- The base dimensions match the building manufacturer’s requirements.
- The layout is square, with equal diagonal measurements.
- Vegetation, roots and loose soil have been removed.
- The sub-base is suitable for the ground conditions and building size.
- The surface is level in all directions.
- The base supports the whole footprint, not just the corners.
- Rainwater will not be directed back under the timber walls.
- Delivery and installation teams can reach the site safely.
Common mistakes to avoid
Building straight onto grass or soil
This is one of the quickest ways to shorten the life of a timber garden building. Soil holds moisture, grass decays, and the ground moves with weather changes. The floor can become damp, uneven and unsupported.
Using an oversized projecting base
A base that sticks out beyond the building walls may appear tidy, but it can collect rainwater. Water sitting on a concrete or slab edge can be blown or drawn under the timber, increasing the risk of damp. Follow the building supplier’s guidance on finished base size.
Relying on packing pieces
Small shims, loose bricks, offcuts or bits of paving used to correct a bad level can move over time. They may also create point loading, where only small parts of the floor are supported. Correct the base itself rather than trying to rescue it during assembly.
Ignoring the door threshold
Think about how you will step into the building. If the base is too high without a step or ramp, access may be awkward, especially for lawnmowers, bikes, wheelbarrows or mobility needs. If the base is too low, water may splash back against the timber.
Forgetting future use
A base for a simple storage shed may not be suitable for a heavily loaded workshop, gym equipment, freezers or machinery. Plan for the realistic contents of the building, not just the empty structure.
Drainage and airflow considerations
Moisture management is especially important for timber. The aim is not only to stop water coming in from above, but also to prevent damp conditions below and around the structure.
Where possible, the surrounding ground should fall gently away from the building. Avoid creating a soil or gravel level that bridges up against the timber walls. Keep plants, compost, stored timber and other materials away from the sides so air can circulate.
If the building has gutters or a roof slope that sheds water in one direction, plan where that water will go. It may need a water butt, soakaway or drainage channel rather than being allowed to discharge onto the base edge.
When to get professional help
You may be comfortable preparing a small shed base yourself, particularly on level, firm ground. However, professional help is sensible if the building is large, the site slopes significantly, the soil is soft or waterlogged, or the garden has difficult access.
Professional installation services often require the base to be completed before they arrive, and they may refuse to install on an unsuitable base. Check the terms in advance. If the base is not level and ready, you could face delays or additional charges.
Short FAQ
Does a timber garden building base need to be perfectly level?
It should be as level as practically possible across the full footprint. Small tolerances may be acceptable depending on the building, but visible slopes or twists can cause major problems with doors, windows and roof alignment.
Can I put a shed on existing paving?
Yes, if the paving is level, stable, well supported and large enough for the building. Loose, cracked or uneven slabs should be lifted and relaid or replaced before installation.
Should the base be bigger than the garden building?
Not usually by much. A base that projects beyond the walls can collect water. Follow the manufacturer’s instructions for the exact base size and detail.
Do I need a damp-proof membrane under a concrete base?
That depends on the base design, building type and site conditions. For many garden buildings, drainage and keeping timber clear of standing water are the priorities. If in doubt, ask the building supplier or a competent builder for advice.
How long should concrete cure before installation?
Concrete needs time to gain strength. The required curing time depends on the mix, thickness and weather conditions. Always follow the concrete supplier’s or installer’s guidance before placing a building on it.
Conclusion
A level base is one of the most important parts of any timber garden building project. Choose a well-drained location, measure the true footprint, prepare the ground properly and select a base type that suits the building and the site. Whether you use concrete, paving slabs, a plastic grid system, timber supports or ground screws, the finished base must be square, level, stable and able to keep the timber clear of damp ground.
Good base preparation is far easier than correcting a twisted building later. Plan carefully before delivery, check everything twice, and your shed, summerhouse or garden room will have the best possible start.