Compact Square Timber Planters for Garden Entrances and Path Junctions

You have a narrow side gate leading into the garden, a path that splits towards the patio, and a lawn edge that never quite looks intentional. There is no need for major landscaping, but the space would benefit from clearer visual cues: “enter here”, “turn this way”, and “pause at this junction”. Compact square timber planters are useful for exactly this sort of job. They add structure without the permanence of masonry, soften hard landscaping with planting, and can be moved or replanted as your garden changes.
Used well, small square planters can define entrances, mark path junctions, frame steps, and create rhythm along a route. The key is to treat them as part of the garden layout rather than as isolated containers. Their size, placement, planting and maintenance all affect whether they look deliberate and inviting or simply like pots left in the way.
Inhaltsverzeichnis
Why compact square timber planters work at entrances and junctions
Entrances and path junctions need clarity. A garden visitor should instinctively understand where to walk, where a route changes direction, and which areas are private, practical or decorative. Compact square timber planters help because they combine strong geometry with natural material. The square form gives definition, while timber usually sits comfortably alongside paving, gravel, decking, brick and planting.
Unlike large raised beds or fixed walls, small timber planters are flexible. You can place one beside a gate to mark a threshold, use a pair to frame a path, or position a group of three around a junction to guide movement without blocking it. They are particularly useful in front gardens, courtyards, patios, rented properties and newly landscaped spaces where you may not want permanent structures.
Start with the purpose of the planter
Before you choose a planter or buy plants, decide what job the planter needs to do. This will affect its position, height, planting style and whether you use one planter or a pair.
To frame an entrance
A pair of square planters either side of a gate, doorway or path opening creates symmetry and a sense of arrival. This works especially well where the entrance itself is plain, such as a simple timber gate, a gap in a hedge or a side access route. If the route is narrow, keep the planters tight to the edge so they define the entrance without reducing usable width.
To mark a change in direction
At a path junction, a single planter can act as a visual anchor. Placed on the outside corner of a turn, it draws the eye and signals that the path changes direction. This is useful where paving meets gravel, where a lawn path joins a patio, or where a route divides towards a shed, seating area or vegetable garden.
To slow movement and create a pause
Some parts of the garden benefit from a gentle pause point. A compact planter near a bench, a water butt, a patio step or the end of a path can encourage people to slow down and notice the planting. Use this approach where you want a softer transition rather than a strong directional signal.
Choosing the right size and proportion
Compact square planters work best when their scale suits the path and the surrounding hard landscaping. Too small, and they look like an afterthought. Too large, and they can obstruct movement or make a modest garden feel cluttered.
As a general guide, a planter around 40 cm square is suitable for small entrances, balconies, patios and narrow path junctions. It has enough presence to hold a small shrub, ornamental grass or seasonal display, while remaining manageable in weight and footprint. Larger planters may be more appropriate beside wide steps, double gates or generous patios, but compact planters are usually better where circulation space is limited.
Consider height as well as footprint. Low planters are subtle and let the planting do the work. Taller planting in a compact square container can provide more emphasis, but it must not overhang the path or brush against people as they pass. At entrances, avoid spiky or scratchy plants close to shoulders, legs or clothing.
Positioning planters without obstructing access
A planter that looks good in an empty garden may become awkward when you carry shopping, push a wheelie bin, move a bicycle or walk through with tools. Before finalising the position, test the route in real life.
For main paths, leave a comfortable walking width. In many domestic gardens, around 900 mm is a useful minimum for a frequently used path, although wider is better where two people need to pass. Side paths and secondary routes may be narrower, but planters should not create pinch points at gates, corners or steps.
At junctions, avoid placing a planter in the natural walking line. Instead, set it just outside the path edge, on a corner, or within a planted margin. If you are using two planters, make sure they frame the route rather than forming a barrier. The aim is to guide movement, not force people to weave around obstacles.
Practical decision criteria before you buy
Use the following criteria to narrow down your choice and avoid a planter that suits the catalogue image but not your garden.
- Footprint: Check the actual external dimensions and mark them on the ground with string, chalk or canes before buying.
- Capacity: Ensure the planter can hold enough compost for the type of planting you want. Small seasonal bedding needs less root space than shrubs or grasses.
- Drainage: The planter must allow excess water to escape, especially in the UK climate where wet winters can quickly waterlog compost.
- Material: Timber gives a warm, natural appearance and suits many garden styles, but it should be protected against rot and raised from constantly wet ground where possible.
- Finish: Smooth planed timber can look contemporary, while rougher finishes suit rustic gardens. Match the finish to nearby fencing, decking or furniture.
- Weight when filled: A compact planter can still become heavy once filled with compost and watered. Decide whether it needs to remain moveable.
- Maintenance: Consider how easy it will be to water, deadhead, prune and refresh the compost in its chosen location.
Using timber planters as a practical example
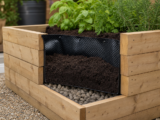
As a practical example of the type of compact square container that can be used in this role, a small timber planter of roughly 40 cm square can suit a path junction or garden entrance where space is limited. The Forest Linear Square Wooden Garden Planter 1’x1′ is described as a pressure treated smooth planed wooden planter measuring 44 x 40 x 40 cm, with a 42 litre compost capacity and a porous lining supplied to protect the wood while allowing drainage. Those characteristics illustrate the sort of details you should check: external size, compost volume, drainage provision, timber treatment and overall finish.
Price is also a practical factor. At 64.99 EUR for this example, you would need to multiply the cost if you are planning a pair for an entrance or a repeated sequence along a path. When budgeting, remember to include compost, plants, any pot feet or small supports, and seasonal replacements if you want year-round colour.
Designing with one, two or several planters
The number of planters you use changes the message they send. One planter creates a focal point. Two create formality and direction. Several create rhythm and can link different parts of the garden.
One planter for a focal point
A single compact square planter works well where a path bends, ends or meets a seating area. Place it where it can be seen on approach, but not where it blocks the route. In a small garden, one well-planted container is often more effective than several competing pots.
A pair for gateways and thresholds
Two matching planters either side of an entrance are a simple way to make a threshold feel intentional. This is useful at side gates, patio doors, the entrance to a kitchen garden, or the start of a stepping-stone path. For a formal look, plant both identically. For a more relaxed garden, use the same structure plant in each planter but vary the seasonal underplanting.
Groups for path junctions
At a junction, a group can help define the meeting point between different routes. Three planters of the same material but different planting heights can look natural and balanced. Keep the tallest plant furthest from the walking line and use lower planting near path edges to preserve visibility and prevent overgrowth.
Planting choices for clear definition
The planting should support the purpose of the planter. For entrances and path junctions, choose plants that look good from more than one angle and do not collapse across the path after rain.
Evergreen structure
Evergreen plants are useful because entrances and junctions are visible all year. Compact shrubs, clipped forms, small conifers, evergreen grasses and hardy herbs can provide dependable structure. If you want a neat entrance, clipped evergreens in matching planters can look smart and controlled. For a softer effect, use grasses or small shrubs with movement.
Seasonal colour
Seasonal bedding, bulbs and trailing plants can add colour without dictating the whole design. Spring bulbs, summer annuals and autumn or winter bedding can be changed as needed. At a path junction, use colour to draw the eye, but avoid overcomplicated combinations that make the area look busy.
Scent and touch near entrances
Near a doorway or gate, scented planting can make the entrance more welcoming. Lavender, thyme and other aromatic plants can work well in sunny positions, provided the container offers suitable drainage and the plant’s mature size is appropriate. Avoid plants that are thorny, irritant or likely to snag clothing in tight spaces.
Step-by-step: placing a planter at a path junction
- Watch how people move: Walk the route several times and note the natural line you take when turning or crossing the junction.
- Mark the footprint: Use a cardboard template, canes or chalk to mark the planter size on the ground.
- Check clearance: Carry a watering can, garden trug or bin through the space to test whether the planter would get in the way.
- Assess sightlines: Stand at each approach and check whether the planter helps explain the route.
- Prepare the base: Place the planter on a stable, level surface. On soil or gravel, ensure it will not rock or sink unevenly.
- Allow for drainage: Do not block drainage points. If needed, raise the planter slightly on suitable feet or supports.
- Plant for the location: Choose plants suited to the sun, shade and exposure of the exact position.
- Review after use: After a week, adjust the position if people naturally cut across the corner or brush against the planting.
Checklist for entrance and junction planters
- The planter is visible on approach and helps guide movement.
- There is enough clear width for everyday access.
- The planter does not obstruct gates, doors, steps or bin routes.
- The scale suits the path, patio or entrance.
- The material complements nearby fencing, paving, decking or furniture.
- The planter has drainage and is not sitting in constant standing water.
- The plants suit the light level and exposure.
- Mature plant size has been considered, not just the size at purchase.
- Watering and maintenance are easy from a safe standing position.
- The overall arrangement looks intentional from more than one viewpoint.
Common practical mistakes to avoid
Making the route too narrow
The most common mistake is placing planters where they look attractive but reduce access. This is especially problematic at gates and corners. Always test the route with real tasks in mind, such as carrying bags, using a pushchair, moving a bicycle or taking garden tools to a shed.
Ignoring mature plant size
Plants sold in small pots can quickly outgrow a compact planter or flop across a path. Check the expected height and spread, and be realistic about pruning. If you want a crisp entrance, choose plants that naturally stay compact or tolerate trimming.
Using thirsty planting in exposed positions
Containers dry out faster than beds, especially in sunny or windy locations. A planter at a front entrance or patio edge may need frequent watering in summer. If regular watering is unlikely, choose drought-tolerant planting and use a suitable compost mix for containers.
Forgetting winter appearance
A path junction or entrance is visible in every season. If the planter relies entirely on summer bedding, it may look bare or neglected in winter. Include evergreen structure, bark texture, stems, bulbs or winter bedding to maintain definition.
Letting timber sit permanently wet
Timber planters are exposed to moisture from weather, compost and ground contact. Even where timber is treated, good drainage and sensible positioning matter. Avoid placing a planter in a hollow where water collects, and do not block drainage with plastic sheeting unless the design specifically provides another way for water to escape.
Maintenance for a smart, long-lasting display
Planters used at entrances and junctions are highly visible, so small maintenance tasks make a noticeable difference. Water according to the weather and plant needs rather than on a fixed schedule. In warm, dry spells, check compost moisture regularly. In wet periods, make sure water is draining and the compost is not sour or waterlogged.
Remove dead leaves, faded flowers and weeds promptly. Top up compost if it settles, and refresh the upper layer when seasonal plants are changed. Prune shrubs and grasses before they encroach on the path. If the planter stands on paving, occasionally move it or clean around it to prevent staining, algae build-up or debris collecting underneath.
FAQ
Are compact square planters suitable for very small gardens?
Yes, provided they are placed carefully. In a small garden, a compact square planter can create structure without taking up as much room as a raised bed. Mark the footprint first and make sure the route remains comfortable to use.
Should entrance planters always be used in pairs?
No. Pairs are effective for formal entrances and gateways, but a single planter can work better where space is limited or the entrance is asymmetrical. The important point is that the planter looks intentional and does not obstruct movement.
What should you plant in a square timber planter by a path?
Choose plants that suit the light and exposure, stay within bounds, and look good from several angles. Evergreen structure, compact shrubs, ornamental grasses, bulbs and seasonal colour are all useful options. Avoid thorny or spreading plants where people pass closely.
How do you stop a planter at a junction looking random?
Relate it to the path layout. Place it on an outside corner, beside a threshold, or in line with another feature such as a gatepost, step or bed edge. Repeating the same material or planting style elsewhere in the garden also helps it feel connected.
Do timber planters need drainage?
Yes. Container plants generally need excess water to drain away. Poor drainage can damage plants and keep the planter wetter than necessary. Use any supplied lining correctly and avoid blocking drainage routes.
Conclusion
Compact square timber planters are a practical way to define garden entrances and path junctions without committing to permanent construction. They can frame a gateway, clarify a change in direction, add seasonal interest and bring structure to awkward spaces. Success depends on careful placement, suitable scale, reliable drainage and planting that remains attractive without obstructing the route.
Before you buy, mark out the planter’s footprint, test everyday access and decide whether you need a single focal point, a matching pair or a small group. Treat the planter as part of the garden’s circulation and design, not just as a container for plants, and it will make the entrance or junction feel clearer, more welcoming and better resolved.