Checking Seals, Vents and Bracing in Resin-Framed Greenhouses
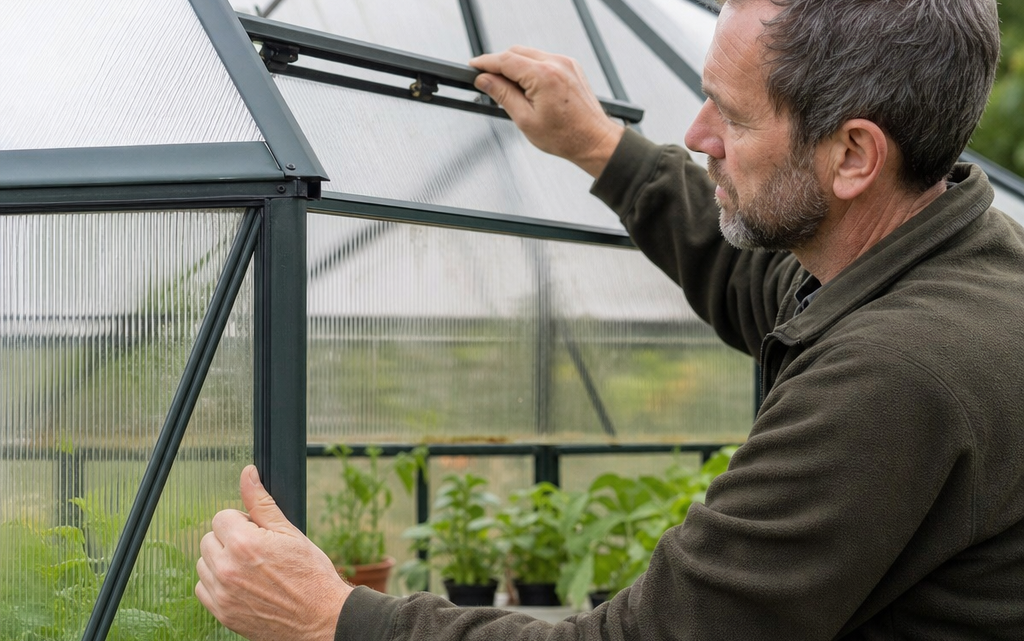
A resin-framed polycarbonate greenhouse can cope well with everyday British weather, but only if its seals, vents and structural bracing are kept in good condition. After a windy night, a spell of heavy rain, or the first warm week of spring, small weaknesses often show up: a strip of rubber starts to lift, a roof vent no longer closes squarely, or a brace has loosened just enough to let the frame flex. If you spot these issues early, they are usually simple to correct. If you ignore them, you may end up with draughts, water ingress, heat loss, distorted panels or avoidable storm damage.
This guide explains how to inspect seals, vents and frame bracing in resin-framed polycarbonate greenhouses in a practical, systematic way. It is written for gardeners who want to keep their greenhouse secure, weather-resistant and suitable for growing, without treating maintenance as a major engineering project.
Inhaltsverzeichnis
Why resin-framed polycarbonate greenhouses need regular checks
Resin frames are popular because they do not rust, rot or corrode in the way that metal or timber can. Polycarbonate glazing is also light, impact-resistant and safer than glass in exposed family gardens. However, “low maintenance” does not mean “no inspection”. The frame, glazing panels, seals, vents and bracing still work together as one structure.
In day-to-day use, a greenhouse is affected by:
- Wind pressure, especially on exposed sides and around doors and roof vents.
- Heat expansion and contraction, as polycarbonate and resin move slightly between hot days and cold nights.
- Rain and standing moisture, which test the seals and panel joints.
- Snow load, where relevant, particularly on roof sections and bracing points.
- Frequent access, as doors, handles and vents are opened and closed throughout the growing season.
Your aim is not to make the greenhouse completely airtight. Plants need ventilation, and some air movement is healthy. The aim is to make sure the structure closes properly, sheds water correctly, and remains rigid enough to resist normal weather conditions.
When to inspect seals, vents and bracing
A sensible inspection routine is simple and does not need specialist tools. Check the greenhouse at the start of spring before the main growing season, again in autumn before storms and colder weather, and after any period of unusually high winds, heavy snow or driven rain.
You should also inspect it soon after assembly. New resin-framed greenhouses often use push-fit, pin-and-lock or similar connectors, and the first few weeks are a useful bedding-in period. If the base was not perfectly level, if a panel was not fully seated, or if a brace was not tensioned correctly, the symptoms often become visible once the structure has been exposed to real weather.
Inspecting rubber seals and glazing joints
Seals are easy to overlook because they are small, but they play a major role in insulation and weather protection. On polycarbonate greenhouses, rubber sealing strips or glazing gaskets help hold panels neatly, reduce draughts and limit water being driven into joints.
What good seals should look and feel like
A sound seal should sit evenly along the panel edge, with no obvious bulges, gaps, twists or loose ends. It should make contact with the panel and frame without being stretched so tightly that it pulls away at the corners. When you press it lightly with a finger, it should feel secure rather than brittle, sticky or detached.
Pay particular attention to corners, roof edges, the windward side of the greenhouse and the area around doors and vents. These are the places where movement, wind uplift and repeated use most often reveal weaknesses.
Practical steps for checking seals
- Choose a dry day. Wet seals can hide small gaps and make dirt look like damage.
- Walk around the outside first. Look along each panel edge from a shallow angle so uneven seals are easier to see.
- Check from inside as well. Daylight showing through where it should not can indicate a poorly seated panel or seal.
- Press gently along the seal. Do not pull it out unless you know the manufacturer’s fitting method.
- Look for trapped grit or plant debris. Dirt can prevent seals from sitting flush and may hold moisture against the joint.
- Inspect after rain. Water tracks, drips or damp lines below a joint show where attention is needed.
If a seal has simply lifted, you may be able to reseat it by hand according to the greenhouse instructions. If it has split, shrunk, hardened or gone missing, replacement is usually better than improvising with unsuitable tape or sealant. Always use compatible parts where possible, because the wrong material can prevent panels expanding correctly.
Checking vents for alignment and reliable ventilation
Vents are not just comfort features. They control heat and humidity, reduce condensation and help prevent fungal problems. In a polycarbonate greenhouse, roof vents are especially important because hot air rises. If a vent sticks, closes unevenly or leaves a gap in poor weather, it can affect both plant health and the greenhouse structure.
Signs that a vent needs attention
- The vent does not close flat against the frame.
- One corner sits higher than the other.
- The handle, stay or opener feels strained.
- Rain enters around the vent during normal rainfall.
- The vent rattles noticeably in wind.
- The surrounding panel or frame appears bowed.
Open and close the vent several times, watching the movement rather than just the handle. A vent should move smoothly through its range and settle squarely when shut. If it catches, do not force it. Forcing a resin-framed assembly can damage a connector, twist a panel or worsen a misalignment.
Vent decisions: repair, adjust or replace?
Use these decision criteria. If the vent is basically sound but slightly stiff, clean the contact points and check for plant ties, grit or debris. If it is out of square, first check whether the greenhouse is still level and whether nearby braces or connectors have loosened. If the vent hardware is cracked, heavily worn or no longer holds the vent securely, replacement parts may be required. If a vent problem appeared immediately after a storm, inspect the whole roof section rather than treating it as an isolated fault.
Where the greenhouse uses manual roof vents, make it part of your routine to close them before high winds unless the manufacturer’s instructions say otherwise. A vent left open in gusty weather can act like a small sail, transferring strain to hinges, stays and roof framing.
Using a product example to understand inspection points
The same principles apply across many resin-framed polycarbonate greenhouses. For example, a model such as the 8′ x 8′ Palram Canopia Rion Grand Gardener Polycarbonate Greenhouse uses a green resin frame with pin and lock connectors, polycarbonate roof and wall panels, rubber sealing strips, a reinforcement cable, wide double doors and an opening roof vent. Those details illustrate the main areas you would inspect: whether the seals remain seated, whether the vent closes properly, whether the connectors remain engaged, and whether the reinforcement cable is correctly positioned and doing its job.
Although the example above has stated wind and snow-load testing, those figures do not remove the need for inspection. Test ratings assume correct assembly, a suitable base, properly fitted panels and all structural components in place. A loose connector, missing seal or slack brace can reduce real-world performance.
Inspecting frame bracing and reinforcement
Frame bracing is what stops a greenhouse from behaving like a flexible box in wind. In resin-framed designs, structural strength often comes from the whole assembly: base fixing, upright sections, roof shape, connectors, bracing elements and sometimes reinforcement cables. If one part is loose, the greenhouse can rack from side to side, doors may stop lining up and panels may begin to work free.
What to look for in the frame
Stand a few metres back and look at the greenhouse as a whole. The roof ridge should appear straight, the sides should not lean, and the door opening should look square. Then move closer and check individual junctions. Pin-and-lock or push-fit connectors should be fully engaged. Bracing cables or rods, where fitted, should not be hanging loose, detached or obviously distorted.
Inside the greenhouse, look for signs of movement:
- doors rubbing at the top or bottom;
- new gaps around panels;
- clicking or creaking in wind that was not present before;
- panels shifting in their channels;
- bracing that looks slack on one side and tight on the other;
- fixings at the base pulling away or loosening.
Do not ignore the base
Many resin-framed greenhouses are supplied without a floor and must be fixed to a solid, level base. This is not a minor detail. A greenhouse fixed to an uneven or unstable base may twist slightly, even if the frame was assembled correctly. That twist can make vents leak, doors bind and seals open up.
Check the base before blaming the upper frame. Look for settlement, rocking, loose anchors or areas where paving slabs, timber edging or concrete have shifted. If water pools around one side, soil may soften beneath the base and contribute to movement over time. A level base is one of the most important forms of structural maintenance.
Seasonal inspection checklist
Use this checklist at least twice a year and after severe weather. Take your time: a careful inspection of a small to medium greenhouse may only take 20 to 40 minutes.
Greenhouse seals, vents and bracing checklist
- External seals: Are rubber strips seated evenly with no gaps, twists or loose ends?
- Internal joints: Can you see daylight, water tracks or draught points where panels meet the frame?
- Roof panels: Are panels fully located and free from obvious bowing or slipped edges?
- Wall panels: Are the side panels secure and correctly retained in their channels?
- Roof vent: Does it open smoothly and close squarely without rattling?
- Vent hardware: Are hinges, stays, handles or manual openers secure and undamaged?
- Doors: Do they close evenly, and does any holder or latch keep them in the intended position?
- Connectors: Are pin, lock or push-fit joints fully engaged?
- Bracing: Are reinforcement cables, rods or braces attached, correctly positioned and not slack?
- Base fixings: Is the greenhouse still fixed firmly to a solid, level base?
- After rain: Are there leaks, damp lines or signs of water being driven through joints?
- After wind: Has anything shifted, rattled loose or changed alignment?
Common practical mistakes to avoid
Sealing everything with general-purpose silicone
It is tempting to run a bead of sealant around every draught or drip, but this can create new problems. Polycarbonate panels and resin frames need to move slightly with temperature changes. Inappropriate sealant may restrict movement, trap water, make future repairs difficult or be incompatible with the glazing material. Use the manufacturer’s recommended sealing method and replacement strips where possible.
Forcing vents and doors into place
If a vent or door does not close, forcing it may hide the symptom while damaging the cause. Misalignment often points to a loose connector, shifted panel, uneven base or frame movement. Find out why it is out of line before applying pressure.
Assuming a resin frame cannot loosen
Resin does not rust, but joints can still work loose if the greenhouse moves in wind or if it was not fully locked together during assembly. Inspect connectors as you would inspect screws or bolts on another type of greenhouse.
Leaving roof vents open in rough weather
Ventilation is essential in warm weather, but an open roof vent can be vulnerable in gusts. Close manual vents before storms, and check them afterwards for alignment and damage.
Ignoring small leaks
A single drip may seem harmless, but it can indicate a seal that has lifted or a panel that has shifted. Water ingress can also wet staging, tools and electrical accessories. Investigate small leaks before they become routine.
Overlooking the doors
Doors are part of the weather envelope and the frame alignment. If double doors no longer meet evenly, or if a holder no longer keeps them secure, check both the door hardware and the squareness of the surrounding frame.
Practical inspection method after a storm
After high winds or heavy snow, wait until conditions are safe before inspecting. Do not stand under loaded roof panels or try to adjust a structure while wind is still pushing against it. Once safe, start outside and work from the top down.
- Check the roof line. Look for shifted panels, raised edges or a vent sitting open.
- Inspect the windward side. This side often shows the first signs of loosened seals or panel movement.
- Check doors and vents. Open and close them gently to confirm alignment.
- Look at internal bracing. Confirm that reinforcement elements are still attached and correctly tensioned where applicable.
- Check the base. Make sure anchors or fixings have not pulled loose.
- Record any change. A quick photo helps you compare the same area later.
If you find a structural issue that you cannot identify, stop using the greenhouse in severe weather until it has been corrected. For warranty-covered products, keep records and follow the supplier’s process before modifying components.
FAQ
How often should I check the seals on a polycarbonate greenhouse?
Check them at least in spring and autumn, and after strong winds or heavy rain. Also inspect them after assembly, once the greenhouse has been through its first few weather changes.
Should a polycarbonate greenhouse be completely airtight?
No. A greenhouse needs controlled ventilation to manage heat and humidity. The goal is to prevent unwanted draughts, leaks and loose panels, not to remove all airflow.
Why has my roof vent stopped closing properly?
Common causes include debris in the mechanism, a shifted panel, a loose connector, frame movement, or an uneven base causing the roof opening to go slightly out of square.
Can I use tape to repair a loose seal?
Tape may provide a very short-term emergency measure, but it is rarely a good permanent repair. It can fail in sunlight and moisture, leave residue, and interfere with panel movement. Use compatible replacement sealing strips where needed.
What should I do if the frame appears to be leaning?
Check the base and fixings first, then inspect connectors and bracing. Do not simply pull the frame back by force. A leaning frame usually has an underlying cause that must be corrected.
Conclusion
Inspecting seals, vents and bracing is one of the most effective ways to keep a resin-framed polycarbonate greenhouse performing well. Focus on the areas where weather and movement place the greatest strain: roof vents, door openings, panel edges, bracing points and the base. Look for small changes before they become failures, use compatible parts rather than improvised repairs, and treat misalignment as a sign to investigate the whole structure.
With a regular spring and autumn check, plus a quick inspection after severe weather, you can protect your plants, reduce heat loss, avoid preventable leaks and help your greenhouse remain stable for years of practical use.