
How Fence Panel Fixings Influence Boundary Appearance and Stability
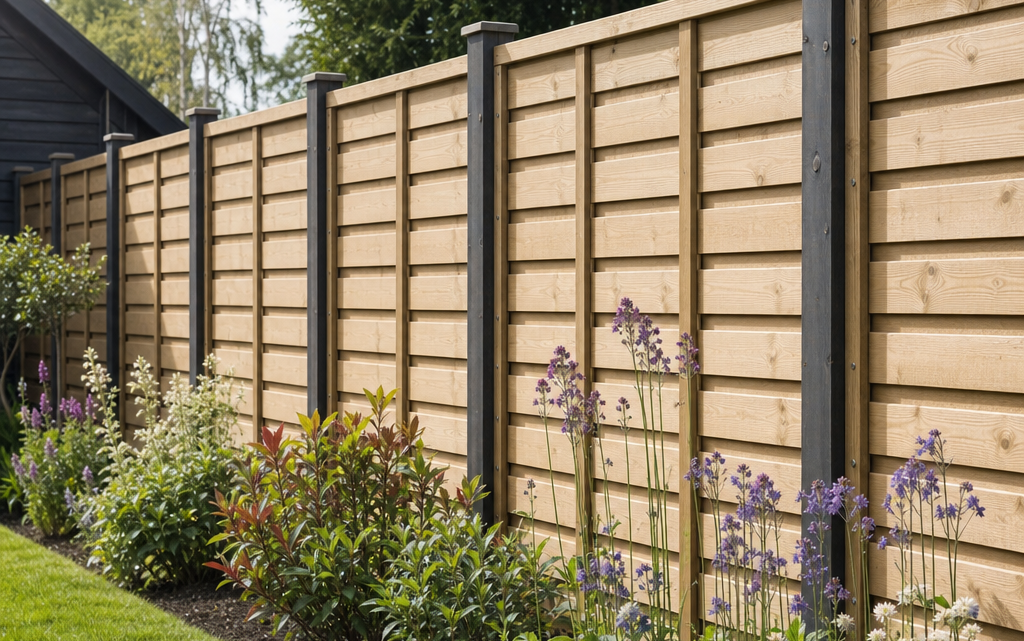
You have chosen attractive decorative timber fence panels for a boundary, perhaps with a trellis top, a woven face or a smooth planed finish. The panels themselves may be the most visible part of the project, but the way they are fixed is what determines whether the finished fence looks neat, stays aligned and copes with everyday wind movement. Poor fixings can make even premium panels appear uneven, while well-chosen brackets, posts and support details can give a garden boundary a clean, intentional appearance.
This article explains how fence panel fixings influence both appearance and stability. It focuses on practical decisions you can make before installation, including bracket choice, post spacing, panel support, corrosion resistance and common mistakes to avoid. Decorative timber panels are often less forgiving than plain lap panels because the visual lines, trellis sections and framed edges make small alignment errors more noticeable.
Inhaltsverzeichnis
Why fixings matter for decorative fence panels
Fence fixings do more than simply hold a panel in place. They affect how the panel sits between posts, how much movement is allowed, how water drains away and how the finished boundary looks from both sides. A decorative panel usually has a framed construction, planed boards or a visible design pattern, so the fixing method should support the frame without crushing, twisting or obscuring it.
When fixings are suitable and correctly positioned, the panel should appear square, level and evenly spaced between the posts. When they are poorly selected or installed, you may see tilted panels, gapping at the top or bottom, exposed screw heads in awkward places, stained timber around metal parts or panels that rattle in windy weather.
Start with the fence structure, not the bracket
Before choosing individual clips or screws, assess the whole fence line. Decorative panels are normally installed between posts, and the posts provide the main structural resistance to wind and ground movement. Even the best panel fixing cannot compensate for a leaning post, shallow footing or inconsistent spacing.
Check post type and condition
If you are fitting new panels to existing posts, check that the posts are upright, sound and firmly set. Timber posts should not be soft at ground level, split badly or move when pushed. Concrete posts should be stable, with no major cracks or movement in the footing. If a post is already loose, adding new decorative panels can increase the visual and structural problem.
For new installations, decide whether timber or concrete posts suit the garden style. Timber posts often look warmer and more natural with decorative panels, while concrete posts can offer a robust, low-maintenance support. Your fixing choice will depend on this decision, as some brackets are intended for timber-to-timber fixing, while slotted concrete posts use a different approach.
Measure the panel bay accurately
Decorative panels need consistent spacing. Measure the actual width of the panels and mark the post positions carefully. Do not assume that every panel or post bay is perfectly identical, especially if you are replacing older fencing. A small error repeated across several bays can leave the final panel squeezed, gapped or visibly out of line.
Allow for any brackets, clips or clearance recommended for the panel system. Timber moves slightly with moisture changes, so panels should be held securely but not forced so tightly that expansion causes bowing or stress on the frame.
How fixings influence boundary appearance
The appearance of a decorative fence is strongly affected by the visibility, position and consistency of fixings. The aim is usually to make the fixing method look deliberate and discreet, rather than improvised.
Visible versus concealed fixing
Some fixing systems are more visible than others. Face-fixed screws through the panel frame can be strong, but they leave screw heads on show and may interrupt the decorative lines. Brackets and clips can make installation easier and reduce the need to screw through prominent parts of the panel face, although they may still be visible depending on their position and colour.
Where fixings are visible, keep them consistent. Use the same type, colour and position on every bay. A row of evenly placed fixings looks much more professional than random screw positions, even if the fixings themselves are not hidden.
Alignment and shadow gaps
Decorative panels often include horizontal boards, trellis sections or framed edges. Any tilt in the panel is immediately noticeable because the eye follows these lines. Brackets can help keep a panel seated in the same position on both sides, but only if they are set out accurately.
It is good practice to establish a level line or datum before installation. Use a spirit level or laser level to mark the intended top or bottom alignment. If the ground slopes, decide whether the panels will step down in even increments or follow the slope. Decorative panels usually look best when stepped neatly rather than forced to twist along uneven ground.
Colour and finish of fixings
The colour of brackets, clips and screw heads can affect the finished look. Dark, galvanised, painted or coated fixings may blend differently depending on whether the panels are natural timber, pressure-treated green, stained brown or painted. If the fixing will remain visible, choose a finish that sits quietly against the timber or matches the overall design.
Do not paint over fixings without considering future maintenance. Paint can disguise metalwork, but it may also make later adjustment or removal messier. If you intend to stain or paint the fence after installation, check that the fixings will not leave awkward uncoated areas behind them.
How fixings influence stability
Stability depends on the relationship between the panel, fixing, post and ground conditions. Decorative panels with trellis sections may allow some wind through, but they still act as a large surface in gusty weather. The fixing method must resist both outward pressure and side-to-side movement.
Number and position of fixings
A common approach is to support each panel at several points on the vertical frame, rather than relying on one or two screws. Fixings should hold the panel evenly and reduce twisting. In many panel systems, brackets are placed near the upper and lower parts of the frame on both sides, although you should always follow the relevant product or manufacturer guidance for the panel and fixing type.
The key point is load distribution. A heavy or broad panel fixed only near the top may swing or pull at the lower edge. A panel fixed only at the sides without proper support can drop over time. Evenly spaced fixings help the panel remain square within the bay.
Screw selection
The bracket is only part of the fixing. The screws must be appropriate for outdoor timber use and suitable for the post and panel material. Exterior-grade screws are important because ordinary indoor screws may corrode quickly, staining the timber and weakening the connection.
Choose screw length carefully. Screws should penetrate the supporting post enough to hold securely, but should not be so long that they emerge through the other side or split narrower timber. Pilot holes can reduce splitting, especially near the edge of a panel frame or when working with dry timber.
Wind exposure
A sheltered courtyard has different fixing demands from an exposed boundary at the end of a long garden. If your fence line is in a windy position, be conservative. Use robust posts, sound footings and an appropriate number of fixings. Do not rely on decorative panels to provide structural strength to a weak fence line.
Where exposure is high, it may be worth seeking professional advice on post size, footing depth and panel suitability. Fence failure is often caused by the post and footing giving way, not the panel itself.
Choosing fixings for decorative timber panels
When selecting fixings, think about compatibility, strength, appearance and maintenance. Decorative timber fencing is not only a barrier; it is part of the garden design, so the fixing method should support both performance and presentation.
Decision criteria before you buy
- Panel construction: Check whether the panel has a solid frame, trellis top, woven boards or delicate decorative sections. Fix into structural frame members, not fragile infill.
- Post material: Timber posts, concrete posts and metal supports require different fixing methods.
- Panel thickness and edge profile: Make sure brackets or clips suit the shape and thickness of the panel frame.
- Visibility: Decide whether the fixing will be seen and whether its colour suits the panel finish.
- Exposure: Consider wind, open ground and the height of the fence.
- Maintenance access: Choose a method that allows panels to be removed or replaced without dismantling the whole fence line.
- Corrosion resistance: Use fixings and screws suitable for outdoor conditions.
As a practical example, U-shaped panel brackets are often used to help hold decorative panels between posts and make installation more manageable. The product below is one example of a bracket pack used with decorative fencing; the principle is to choose a fixing that suits the panel system and supports the frame evenly.
Practical installation steps for a neater result
Good installation is as important as product choice. Take your time with marking, levelling and fixing, particularly on the first panel. Any error at the start can carry along the fence line.
1. Set out the fence line
Run a string line between the start and end points of the boundary. This helps you keep the posts in line and avoid a wavy fence. Mark post positions according to the actual panel width and the chosen fixing method. If the fence is shared or near a boundary line, confirm ownership and positioning before work begins.
2. Install or check the posts
Posts must be upright, aligned and secure. Use a spirit level on two faces of each post. If setting new posts in concrete, allow the concrete to cure adequately before hanging panels. Trying to fit panels while posts are still able to move can lead to misalignment.
3. Dry-fit the panel
Before driving screws fully home, place the panel in position and check the top line, side gaps and bottom clearance. Use temporary packers to maintain a consistent gap above ground level. Keeping timber panels slightly clear of soil and standing water helps reduce moisture exposure at the lower edge.
4. Mark bracket positions consistently
Measure from the same reference point on each post or panel. For example, if you place an upper bracket a set distance below the top of the panel frame, repeat that measurement across the whole run. Consistency is what makes the final boundary look professionally planned.
5. Drill pilot holes where needed
Pilot holes help prevent splitting and make it easier to drive screws accurately. This is particularly useful near edges, in dry timber or when using thicker screws. Avoid overtightening, as this can distort a bracket, crush timber fibres or pull the panel out of square.
6. Check movement and final alignment
Once fixed, gently test the panel for movement. It should feel secure without being strained. Step back and view the fence from different angles. Check that the decorative lines run cleanly and that the tops of adjacent panels are aligned as intended.
Checklist: before fixing decorative panels
- Have you checked that all posts are upright, sound and securely set?
- Have you measured the actual panel width rather than relying on nominal sizes?
- Have you chosen fixings compatible with the panel frame and post material?
- Are the screws suitable for exterior use?
- Will visible fixings look consistent across the whole fence line?
- Have you decided how to handle sloping ground?
- Is there enough clearance between the timber panel and the ground?
- Have you avoided fixing into delicate trellis or decorative infill?
- Can panels be removed later for maintenance or replacement?
Common practical mistakes to avoid
Fixing into the wrong part of the panel
Decorative panels may include trellis, woven boards or lighter infill sections that are not intended to carry the main load. Fix into the structural frame wherever possible. Screwing into a decorative section can split the timber, distort the pattern or fail under wind pressure.
Ignoring ground clearance
Timber panels should not be left sitting directly on soil or in standing water. This can shorten their service life and cause staining, swelling or decay at the bottom edge. Use packers during installation to maintain an even gap, then remove them once the panel is fixed.
Overtightening screws
It is tempting to tighten screws as much as possible, but overtightening can pull brackets out of shape or crush timber. A secure fixing should be firm, not forced. If the panel starts to twist as you tighten, stop and reassess the position.
Using mismatched fixings
Mixing different brackets, screw colours or fixing positions can make a fence look patchy. It can also create uneven load points. Buy enough suitable fixings for the whole job before you begin, allowing a small surplus for dropped or damaged screws.
Forgetting future maintenance
Panels may eventually need staining, cleaning or replacement. A fixing method that makes panels removable can be helpful, especially with decorative fencing where individual panels may be damaged by weather, climbing plants or garden equipment.
Design details that improve the finished boundary
Fixings are part of a wider design. For a polished result, consider capping, gravel boards, post tops and planting around the fence line.
Gravel boards can lift timber panels away from the ground and create a neat horizontal base line. They may be timber or concrete, depending on the post system and desired appearance. Post caps can protect the top of timber posts from water while giving the fence a finished look. If you are adding climbers or screening plants, avoid attaching heavy growth directly to delicate decorative panels, as this can increase wind loading and moisture retention.
Think about which side of the boundary is most visible. If both you and a neighbour will see the fence, choose a fixing approach that looks acceptable from either side. Some decorative panels are designed to be attractive on both faces, so untidy fixings can undermine that benefit.
Short FAQ
How many brackets do I need per fence panel?
This depends on the panel system and the bracket type. Some bracket packs or panel systems specify a set number per panel. Always follow the relevant product guidance and ensure the panel is supported evenly on both sides.
Can I screw decorative panels directly to timber posts?
In some situations, yes, but it is not always the neatest or most flexible method. Brackets or clips can make positioning easier and may allow panels to be removed more conveniently. If screwing directly, fix through structural frame members and use suitable exterior screws.
Should panels touch the ground?
No. It is better to keep timber panels slightly clear of the ground to reduce moisture exposure. A gravel board or consistent bottom gap can help protect the lower edge and improve the appearance of the fence line.
Are decorative panels suitable for windy gardens?
They can be, but the whole installation must be appropriate for the exposure. Strong posts, secure footings and correct fixings are essential. In very exposed positions, seek advice on panel suitability and structural support.
Do I need to treat pressure-treated panels after installation?
Pressure treatment helps protect timber, but decorative panels may still benefit from appropriate maintenance over time, such as cleaning and compatible exterior wood finishes. Follow the panel manufacturer’s care guidance and avoid trapping moisture behind accessories or planting.
Conclusion
Fence panel fixings have a direct effect on how a decorative timber boundary looks and performs. The right brackets, screws and support details help panels sit squarely, resist movement and maintain a consistent appearance across the garden. The wrong choices can lead to visible misalignment, rattling panels, timber damage and premature maintenance problems.
Before you install, assess the posts, measure carefully, choose compatible outdoor fixings and plan the visual layout of every bracket and screw. Treat the fixing method as part of the design, not an afterthought. With careful setting out and practical attention to support, your decorative fence panels will look more refined and remain more stable for years to come.

