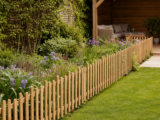
Using Low Timber Palisade Fencing Around Vegetable Plots

In many productive gardens, the vegetable area starts as a few raised beds or an open patch of soil and gradually becomes harder to manage. Paths creep into growing space, children and visitors take shortcuts across beds, grass edges invade, and the compost corner, herbs and salad rows begin to look untidy. Low timber palisade fencing is a practical way to give your vegetable plot a clear edge without making it feel closed in.
Unlike tall boundary fencing, low palisade or picket-style fencing is primarily about definition. It marks where growing areas begin, supports an organised layout, and gives a kitchen garden a more deliberate, attractive appearance. Used well, it can help separate crops from lawns, paths, play areas, patios and ornamental borders while still allowing light, air and easy access.
Inhaltsverzeichnis
Using Low Timber Palisade Fencing Around Vegetable Plots
Low timber palisade fencing suits vegetable plots because it provides a visible boundary without casting excessive shade. Most vegetables need plenty of direct light, so a low, open fence is usually preferable to solid screening. The gaps between pales allow air to move through the growing area, which can help reduce stagnant, damp conditions around crops.
This type of fencing is especially useful if you want your productive garden to look more intentional. A neat timber edge can turn a simple vegetable patch into a structured kitchen garden, even if the planting inside remains seasonal and informal. It is also a good option where you need a modest visual barrier to discourage accidental trampling, keep hoses on paths, or guide visitors towards gates and access points.
Where Low Palisade Fencing Works Best
Before buying materials, think carefully about what you want the fence to achieve. Low timber fencing is not a substitute for serious security, deer protection or a fully pest-proof enclosure. Its strength lies in organisation, appearance and light-duty separation.
Good uses in productive gardens
- Defining vegetable beds: A low fence can frame a rectangular, square or L-shaped growing area and give it a tidy edge.
- Separating crops from lawns: It creates a clear mowing line and helps prevent grass from spreading into cultivated soil.
- Protecting young planting from foot traffic: It makes it obvious where people should not walk.
- Dividing garden zones: You can use it to separate vegetables, herbs, soft fruit, composting areas and seating spaces.
- Improving the look of raised beds: A palisade fence can visually tie several beds together as one productive area.
- Creating a cottage or kitchen garden style: The traditional timber appearance works well with gravel paths, brick edging, fruit cages and timber beds.
Situations where you may need something different
If rabbits, deer or foxes are a significant issue, a low open fence on its own is unlikely to be enough. You may need mesh, buried barriers, taller fencing or a dedicated fruit cage depending on the problem. Similarly, if your vegetable plot is exposed to strong winds, a low palisade fence may mark the area but will not provide the same shelter as a more substantial windbreak.
Key Decision Criteria Before You Start
A successful vegetable plot fence depends less on the panel itself and more on the planning. The right layout, height, access and fixings will determine whether the finished area is practical to use.
1. Height and openness
For vegetable plots, low fencing is usually best. It should be high enough to be clearly visible but low enough to avoid unnecessary shading. Open palisade panels are useful because they allow light through and do not make the productive area feel boxed in. Consider where the sun travels across your garden, particularly in spring and autumn when crops are lower and light is weaker.
2. Access for tools and barrows
Think about how you actually garden. You may need to carry compost, push a wheelbarrow, move canes, bring in watering cans, or harvest bulky crops. A narrow gap may be fine for daily picking, but not for seasonal work. If you are enclosing a plot, plan at least one generous entrance and avoid making the route from compost heap to beds unnecessarily awkward.
3. Panel length and plot shape
Standard fence panels suit straight runs and regular shapes. If your plot is curved or irregular, you may need shorter sections, posts set at angles, or a combination of fencing and planted edging. Measure the actual ground line, not just the bed dimensions on paper. A vegetable garden that looks square from the house may not be square when measured carefully.
4. Timber treatment and durability
Outdoor timber is exposed to rain, soil splash, frost and sun. Pressure-treated timber is commonly used for garden fencing because it is designed to resist decay for longer than untreated wood. Even so, good installation matters. Keeping timber off constantly wet soil, using suitable posts and allowing air circulation will help extend the life of the fence.
5. Style and visibility
Your vegetable plot may be a working area, but it is still part of the garden. Choose a fence style that suits the surroundings. Pale picket or palisade fencing often works well in traditional, cottage and family gardens. Natural timber can be left to weather, while some gardeners prefer to stain or paint timber to match sheds, gates or raised beds, provided the chosen product is suitable for exterior use.
Planning the Layout of a Productive Garden Area
Start by deciding whether you are fencing the entire vegetable plot or simply defining one side. You do not always need a full enclosure. In some gardens, fencing along the lawn edge and a short return at each end is enough to make the vegetable area feel separate. In others, a complete surround with a gate gives a more formal kitchen garden effect.
Mark the intended line with string, hosepipe or landscape marking paint. Stand back and view it from the house, patio and main paths. The fence line should feel logical from everyday viewpoints, not just from within the vegetable plot. It is often worth living with a temporary marked line for a few days before committing to posts.
Allow space inside the fence
A common mistake is to put the fence too close to the beds. Leave enough space for maintenance. You should be able to kneel, weed, harvest and push a small barrow without damaging crops. If you have raised beds, allow for the width of the bed sides and any overhanging crops such as courgettes, squash, potatoes, brassicas or herbs.
Think about paths first
Paths are the backbone of a productive garden. If the paths are too narrow or poorly placed, the fence will not solve the problem. Main paths should be wide enough for comfortable movement with tools. Secondary paths between beds can be narrower, but still need to be usable in wet weather. Gravel, bark, compacted stone, paving and mown grass can all work, depending on the style and budget.
Choosing Materials and Components
Low timber palisade fencing is typically installed with posts, panels and suitable fixings. The details will depend on the product and ground conditions, so always follow the manufacturer’s installation guidance. In general, you will need to consider panels, posts, post supports or concrete, screws or brackets, and possibly a gate.
As a practical example, a low pressure-treated pale picket panel with a stated size of 1.83m x 0.9m can be suitable for defining productive areas where you want an attractive low-level boundary. Its open design allows the vegetable plot to remain visible, while the height is enough to mark the edge clearly. The important point is to treat this type of panel as a garden zoning tool rather than a high-security or pest-proof barrier.
When comparing panels, check the stated dimensions, treatment, appearance on both sides, guarantee information and whether the style suits the rest of your garden. Also confirm what posts and fixings are recommended, as these are essential to the stability of the finished fence.
Step-by-Step Installation Approach
The exact method will depend on the fencing system, soil conditions and whether you use timber posts, metal post supports or posts set in concrete. The following practical sequence will help you plan the work and avoid common errors.
Step 1: Measure and calculate
Measure each run of the planned fence line. Divide the length by the panel width, allowing for posts and any gaps specified by the manufacturer. Decide where panels may need to be cut or where a shorter return section would look better. It is often neater to adjust the layout symmetrically rather than leaving one very short panel at the end.
Step 2: Mark post positions
Use string lines and pegs to mark the fence. Check corners carefully with a builder’s square or by measuring diagonals if you are creating a rectangular enclosure. Mark post positions before digging so you can see whether any posts clash with raised beds, tree roots, drains, edging stones or underground services.
Step 3: Prepare the ground
Clear weeds, stones and loose debris along the line. If the fence borders a lawn, cut a clean edge first. If it borders cultivated soil, consider adding a narrow maintenance strip of gravel, pavers or compacted surface to reduce soil splash and make trimming easier.
Step 4: Install posts securely
Posts are what keep the fence upright, so do not rush this stage. Ensure they are vertical, aligned and set at the correct spacing. Where posts are set into the ground, consider drainage at the base and avoid leaving untreated cut ends exposed if the manufacturer recommends sealing. If using post supports, make sure they are suitable for the ground and the fence height.
Step 5: Fix panels consistently
Attach panels using suitable exterior fixings. Keep the top line even where possible, but remember that gardens are rarely perfectly level. On sloping ground, you may need to step panels down gradually or follow the slope, depending on the design. Check appearance from both inside and outside the vegetable plot as you work.
Step 6: Add access points
If you are fitting a gate, place it where you naturally enter the plot, not where it simply looks symmetrical. A gate near the compost heap, water source or main garden path will be used more often and will make the area easier to manage. Ensure it opens freely and does not catch on gravel, mulch or uneven ground.
Useful Checklist Before Buying
- Have you decided whether you need a full enclosure or only partial edging?
- Have you measured the actual fence line, including corners and returns?
- Have you allowed enough space for paths, kneeling, harvesting and a wheelbarrow?
- Will the fence avoid shading sun-loving crops?
- Is the height suitable for definition rather than unnecessary screening?
- Are the panels treated for outdoor use?
- Have you checked what posts, fixings and gates are compatible?
- Can you install the fence without disturbing drains, cables, tree roots or existing structures?
- Will you be able to mow, strim or maintain the edge easily?
- Does the style suit the rest of the garden?
Design Ideas for Productive Areas
Frame a formal kitchen garden
For a classic kitchen garden look, use low palisade fencing around a group of raised beds with a central path. A simple gate or open entrance can create a sense of arrival. This layout works particularly well where the vegetable plot is visible from the house and you want it to look orderly throughout the year, even when beds are empty.
Separate vegetables from ornamental planting
Many gardens combine flowers, shrubs and edible crops. A low timber fence can mark the transition between ornamental borders and productive beds without creating a harsh divide. You can soften the fence with herbs, calendula, nasturtiums or compact flowers that attract pollinators, while still keeping the main growing area clearly defined.
Create a child-friendly growing area
If children use the garden, a low fence can help explain where vegetables are growing and where ball games or running are better suited. It does not need to feel restrictive. A small entrance, a labelled herb bed and easy-to-pick crops such as peas, strawberries or cherry tomatoes can make the area inviting while still protected from accidental damage.
Edge a herb or cut-and-come-again salad bed
You do not have to fence a large plot. A short run of palisade fencing can define a herb garden near the kitchen door or a salad bed close to a patio. This can be especially useful in smaller gardens where productive areas are integrated with outdoor living spaces.
Common Practical Mistakes to Avoid
Putting the fence too close to crops
Vegetables grow outwards as well as upwards. Courgettes, brassicas, potatoes, tomatoes and beans can all spread into paths and against fencing. If the fence is too close, harvesting becomes awkward and plants may be damaged. Leave working room, not just planting room.
Ignoring future crop rotation
A vegetable plot changes each season. A fence line that works for small salad crops may be inconvenient when the same area is used for beans, netted brassicas or potatoes. Keep the enclosure flexible enough for crop rotation, temporary cloches, supports and netting.
Forgetting maintenance access
Every fence needs occasional cleaning and inspection. You also need to control weeds along the base. If you cannot reach both sides easily, the edge may become untidy. Where possible, leave a narrow strip that can be weeded, swept or trimmed.
Assuming low fencing will stop pests
Low palisade fencing can deter casual disturbance, but it will not reliably stop rabbits, deer, squirrels or birds. If pests are a known problem, plan additional protection such as mesh, crop cages, netting or taller barriers as appropriate.
Using poor alignment
A low fence draws the eye, so wavy lines and uneven post spacing are noticeable. Take time with setting out. String lines, careful measuring and repeated checks will make the finished result look much more professional.
Overcomplicating the layout
Too many short sections, corners and narrow entrances can make a productive area awkward to use. Simple shapes are easier to build, maintain and work within. Let the planting provide seasonal interest rather than relying on a complicated fence line.
Aftercare and Long-Term Maintenance
Pressure-treated timber is designed to last outdoors, but it still benefits from sensible care. Keep soil, mulch and wet leaves from building up against the base of the fence. Check fixings after strong winds and inspect posts periodically for movement. If you cut timber during installation, follow the manufacturer’s guidance on treating exposed cut ends.
You may choose to leave timber to weather naturally or apply a suitable exterior wood finish for appearance. If the fence is close to edible crops, use products that are appropriate for garden use and apply them carefully, avoiding contamination of soil or plants. Always read the label before using paints, stains or preservatives near food-growing areas.
Short FAQ
Will low timber palisade fencing shade my vegetables?
Usually only minimally, provided it is genuinely low and has an open design. However, shade depends on the height of the fence, its position and the path of the sun. Be especially careful on the southern side of a vegetable plot, where any structure is more likely to cast shade in the UK.
Can I use it around raised beds?
Yes, but allow enough space between the raised beds and the fence for access. You should be able to weed, harvest and maintain both the beds and the fence without squeezing through a narrow gap.
Does a palisade fence keep animals out?
It may discourage pets or casual foot traffic, but it should not be relied on as pest control. For rabbits, deer or birds, you will usually need more specific protection such as mesh, taller fencing or crop netting.
Should I install a gate?
If the fence fully encloses the vegetable plot, a gate is usually worthwhile. Place it where you naturally approach the area and make it wide enough for tools, trugs and, ideally, a wheelbarrow.
Is pressure-treated timber suitable near vegetable plots?
Pressure-treated timber is widely used outdoors, including in gardens. If you have concerns, keep soil from sitting directly against the timber, use a maintenance strip, and follow the manufacturer’s guidance, particularly where timber has been cut.
Conclusion
Low timber palisade fencing is a practical and attractive way to define vegetable plots and other productive garden areas. Its main value is in creating structure: it marks boundaries, protects beds from accidental traffic, improves the appearance of working areas and helps organise paths, crops and access.
For the best result, plan the layout before you buy, allow generous working space, choose outdoor-suitable timber, install posts accurately and avoid assuming that a low fence will solve pest problems. Used thoughtfully, palisade fencing can turn a loose vegetable patch into a well-defined kitchen garden that is easier to use, easier to maintain and more pleasing to look at throughout the year.