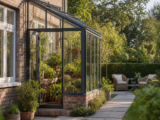
Managing drainage and splashback beside lean-to garden greenhouses

A lean-to greenhouse can make excellent use of a warm, sheltered house wall, but that same wall can create drainage problems if you do not plan the base and rainwater route carefully. In a typical garden installation, water runs off the sloping greenhouse roof, hits paving or bare soil, splashes back onto the lower panels and brickwork, then sits against the base after heavy rain. Over time, this can cause algae, staining, damp smells, slippery paths, frost damage and premature wear around fixings and seals.
Good drainage beside a wall-side greenhouse is not complicated, but it does need to be decided before the greenhouse is fixed down. This guide explains how to assess the site, choose a practical drainage arrangement, reduce splashback and avoid the common mistakes that lead to standing water around lean-to garden greenhouses.
Inhaltsverzeichnis
Why drainage matters more with a lean-to greenhouse
A freestanding greenhouse sheds water on all sides, but a lean-to concentrates water along one outside edge and close to an existing wall. That wall may be part of your house, garage, shed or boundary structure. If the area is already paved, water may have nowhere obvious to go. If the ground is soil, it may become compacted during installation and stop absorbing water effectively.
You also need to consider the greenhouse itself. Many lean-to garden greenhouses are designed to be fixed to a solid, level base and may not include a built-in floor. That means the surface beneath and around the structure is part of the installation, not an afterthought. The base must stay stable, drain freely and resist splashback at the bottom of the frame and panels.
Start with a simple site assessment
Before choosing a drain, channel or gravel strip, check how the site behaves in wet weather. Ideally, inspect it during or just after heavy rain.
Check the direction of fall
Use a long spirit level, laser level or a straight board with a level on top to see which way the surface falls. For drainage, you normally want water to move away from the building wall and away from the greenhouse entrance. A slight fall is usually enough, but a perfectly flat patio or a fall towards the wall is a warning sign.
If the existing paving falls towards the house or garage wall, simply putting a greenhouse on top will not solve the problem. You may need to relay paving, introduce a channel drain or create a controlled route to a soakaway or existing surface water system.
Look for damp marks and algae
Green staining on paving, dark splash marks on brickwork and moss along wall edges all suggest that water already lingers there. Installing a lean-to greenhouse can intensify this because the roof may direct more rain to a narrower strip.
Identify where roof water will land
Stand where the front edge of the lean-to roof will be and imagine a line of rain falling from that edge. That is your main drainage zone. If it lands on soil, think about erosion and mud splash. If it lands on paving, think about bounce-back and where the runoff will travel next.
Choose the right base for drainage and stability
The best drainage plan starts with the base. A lean-to greenhouse needs a stable, level fixing surface, but the surrounding area should still be arranged so water can escape.
Concrete slab
A concrete slab can be a strong, tidy base if it is laid correctly. The key is to keep the greenhouse fixing area level while ensuring that nearby exposed surfaces drain away. If the whole slab is flat and water collects at the front, you may end up with puddles just where you walk and work.
For a wall-side installation, avoid bridging or covering existing damp-proof courses on a house wall. If the greenhouse is being fixed near a dwelling, it is sensible to leave the damp-proof course visible and to seek building advice if you are unsure.
Paving slabs
Paving slabs are common for garden greenhouses because they are accessible and easy to clean. They must be properly bedded and level under the frame, with no rocking slabs. Around the outside, a gentle fall can help water move away from the structure. Open joints may allow some drainage, but they should not be relied on as the only route for heavy roof runoff.
Permeable base edges
A useful approach is to combine a firm fixing base with a permeable edge strip. For example, you might fix the greenhouse to a slabbed or concrete base, then run a gravel-filled drainage strip along the drip line at the front. This reduces splash, accepts roof runoff and helps prevent water from bouncing back onto panels.
Understanding splashback
Splashback is the dirt and water thrown upwards when rain hits a hard or muddy surface. It is most noticeable on clear panels, white frames, brickwork and low-level vents. It is not just cosmetic: repeated wetting at the base can encourage algae and make the surrounding path slippery.
Hard paving can increase splash
Smooth concrete, porcelain paving and tightly jointed slabs are easy to sweep, but they can bounce water sharply upwards. If the greenhouse roof has no gutter or the gutter overflows, the drip line can become a constant splash zone.
Bare soil creates mud splash
Bare borders may absorb some rain, but heavy drops from a roof edge can break up the soil surface and throw mud onto the greenhouse. This is especially likely in winter or where the soil is clay-based and slow draining.
Gravel helps reduce bounce-back
A gravel strip is one of the simplest ways to control splashback. The stones break the force of the falling water and allow it to disperse. Use clean, angular gravel of a practical size, laid over a permeable membrane if you need to suppress weeds. Avoid very fine gravel directly under a strong drip line, as it may scatter.
Decision criteria: which drainage option suits your greenhouse?
Your best solution depends on the wall, base, soil and available outfall. Use the following criteria before committing to the installation.
1. How much roof water will be collected?
The larger the roof area, the more water you need to manage. A compact lean-to may be adequately served by a gravel strip and a sensible fall, while a larger wall greenhouse may need guttering connected to a water butt, drain or soakaway.
2. Is there an existing surface water drain?
If there is an appropriate surface water drain nearby, a channel drain or downpipe connection may be possible. Do not discharge roof water into a foul drain unless you know it is permitted. If in doubt, check with your local authority, drainage professional or property documents.
3. Is the soil free draining?
Sandy or loamy ground may cope well with a soakaway or gravel trench. Heavy clay may hold water and need a more deliberate outfall. A simple percolation check can help: dig a small test hole, fill it with water and see how quickly it drains away. If it remains full for many hours, do not assume a shallow gravel strip will handle all roof runoff.
4. How close is the house wall?
Water should not be encouraged to sit against a house wall. Keep drainage routes clear, avoid raising ground levels against brickwork, and maintain the damp-proof course. Where the lean-to is against a garage or outbuilding, the same principle applies: avoid trapping water at the wall base.
5. Will you collect rainwater?
A water butt can be very useful for greenhouse watering. If the greenhouse design allows for guttering or rainwater collection, position the butt on a firm base and include an overflow route. An overflowing butt beside the wall can create the very problem you were trying to avoid.
Practical example: planning around a 6 ft x 10 ft lean-to
As a practical reference point, consider a wall greenhouse of around 1.8 m x 3.0 m, such as the 6′ x 10′ Palram Canopia Rion White Sun Room Walk-In Wall Greenhouse. It is described as a lean-to style structure with polycarbonate panels, a resin frame and no floor, and it is intended to be fixed to a solid, level base. Those details are important for drainage planning because the base surface and the roof runoff route must be prepared before the structure is secured.
For a greenhouse of this general size, you should think about the full front roof edge as a drainage line rather than treating rainwater as a minor detail. If that line falls onto paving, consider a gravel margin or a channel drain. If it falls onto soil, improve the strip with gravel or a planted border that can tolerate wetting without throwing mud back onto the panels.
Drainage methods that work well beside lean-to greenhouses
Gravel drip strip
A gravel drip strip is often the simplest solution. Excavate a narrow trench along the roof drip line, line it with a permeable landscape membrane if required, and fill it with clean gravel. The strip should sit slightly below adjacent paving or edging so water can enter it rather than running past it.
This method is most suitable where the volume of water is modest and the ground below drains reasonably well. It is also useful as a splash-control measure even when you have guttering, because gutters can overflow during intense rain or become blocked with leaves.
Channel drain
A channel drain is a linear drain set into paving or concrete. It collects water from a hard surface and carries it to a suitable outfall. This is a good option where the greenhouse fronts onto a patio, path or courtyard and water would otherwise run towards the wall or doorway.
The channel must be installed with the correct fall and connected to an appropriate drainage point. A channel with nowhere to discharge is just a long puddle. Choose a grate that is easy to lift for cleaning, especially if leaves, compost or grit are likely to collect nearby.
Guttering and water butt
Where compatible with the greenhouse design, guttering can reduce the amount of water dropping straight from the roof edge. A downpipe can feed a water butt for plant watering, but the butt must be stable and should have an overflow that leads away from the wall and base.
Check the gutter after autumn leaf fall and after storms. Even a small blockage can cause concentrated overflow, which may produce worse splashback than having no gutter at all.
Soakaway or French drain
A soakaway or French drain may be suitable where you need to move water away from the greenhouse and disperse it into the ground. This is more involved than a surface gravel strip and depends heavily on soil type, available space and proximity to buildings. Soakaways should not be placed where they could undermine foundations or direct water towards neighbouring property.
Step-by-step planning process
- Mark the greenhouse footprint. Use pegs, chalk or tape to mark the wall line, front line and door position.
- Mark the roof drip line. Estimate where water will fall from the front roof edge and any side edges.
- Check levels. Confirm whether water will naturally run away from the wall, towards the wall or sit in place.
- Choose your main drainage route. Decide between gravel, guttering, a channel drain, a soakaway or a combination.
- Plan overflow behaviour. Ask where water will go if the drain blocks, the water butt fills or rain is heavier than expected.
- Prepare the base. Ensure the greenhouse fixing area is solid, level and suitable for the manufacturer’s installation requirements.
- Install drainage before final fixing. It is much easier to cut channels, relay slabs or dig gravel strips before the frame is anchored.
- Test with water. Use a hose or watering can to check that water moves as intended before filling joints and completing surrounding landscaping.
Wall-side drainage checklist
- The base is solid, level and suitable for fixing the greenhouse securely.
- Ground levels do not bridge the damp-proof course of a house or adjoining building.
- Water falls away from the wall wherever possible.
- The roof drip line is protected by gravel, guttering, drainage channel or another planned solution.
- There is no bare soil directly under a heavy roof drip line.
- Any water butt has a firm base and a clear overflow route.
- Channel drains have a proper outfall and removable grates for cleaning.
- Paths near the greenhouse door do not collect standing water.
- Drainage can cope with blocked gutters or exceptional rainfall without sending water towards the wall.
- You can access drains, gutters and gravel strips for routine maintenance.
Common practical mistakes to avoid
Fixing the greenhouse before planning drainage
Once the frame is fixed down, altering falls, cutting paving or adding drainage becomes awkward and may risk damaging the installation. Drainage should be part of the base design, not a later repair.
Assuming a level base means a level surrounding surface
The greenhouse itself may need a level fixing base, but the surrounding paving still needs to shed water. You can have a level frame line and a nearby surface that drains away, provided it is planned carefully.
Letting water discharge against the wall
Downpipes, water butt overflows and channel drain outlets should not simply dump water at the wall base. Always think about the final destination of the water.
Using decorative stones without drainage capacity
A thin layer of decorative gravel over compacted clay or concrete may reduce mud splash, but it will not necessarily drain water away. If you need drainage as well as appearance, prepare the depth and outfall properly.
Ignoring maintenance access
Leaves, compost, potting grit and moss can block small drainage routes. If you cannot clear a channel drain, inspect a gutter or rake a gravel strip, the system will become less effective over time.
Reducing splashback day to day
Even with good drainage, greenhouse areas are wet, humid places. Keep pots, compost bags and trays away from the wall base so they do not trap moisture. Sweep soil from paving before it turns into sludge. Trim overhanging plants that shed leaves into gutters or channels. If you use gravel, rake it occasionally to remove silt and organic matter from the surface.
Pay particular attention to the doorway. Door areas receive foot traffic, spilled compost and water from cans or hoses. A small threshold mat suitable for outdoor use, well-drained paving and a slight fall away from the entrance can make the greenhouse safer and cleaner.
FAQ
Do I always need a drain in front of a lean-to greenhouse?
Not always. If the site has free-draining soil, a good fall away from the wall and a gravel drip strip, that may be sufficient. If water collects on paving or runs towards a building, a more formal drainage solution is advisable.
Can I put a lean-to greenhouse straight onto an existing patio?
Possibly, but only if the patio is stable, level where the greenhouse will be fixed, and drains correctly. Check for rocking slabs, low spots and falls towards the wall before installation.
Is gravel better than paving beside the greenhouse?
Gravel is usually better for reducing splashback under a drip line, while paving is better for clean access. Many installations use both: a paved working path with a gravel strip where roof water lands.
Where should a water butt overflow go?
It should discharge away from the wall, base and doorway, ideally to a suitable drain, soakaway area or well-drained part of the garden. Do not allow overflow to pour straight onto the greenhouse base.
How often should I check drainage?
Check after installation, after the first heavy rain, in autumn when leaves fall, and after storms. A quick inspection can prevent long-term damp and splash problems.
Conclusion
Managing drainage beside a lean-to garden greenhouse is mainly about controlling where roof water lands and where it goes next. Start by checking levels, wall conditions and the roof drip line. Choose a base that is solid enough for fixing but supported by practical drainage, such as a gravel strip, guttering, channel drain or soakaway where appropriate. Avoid trapping water against walls, do not rely on decorative finishes alone, and make sure every drainage feature can be cleaned.
If you plan the water route before installation, your greenhouse will stay cleaner, paths will be safer, and the wall-side base will be far less likely to suffer from damp, algae and splashback.