How to plan a liftable base for a garden shed that may move later
You have a perfectly good garden shed, but you are not completely sure it will stay where it is. Perhaps you are planning landscaping work, expecting an extension, moving house in a few years, or simply want the option to turn the shed to face a new patio. In that situation, pouring a permanent concrete slab can feel excessive. A liftable, removable base gives you a firm and level support now, while keeping future relocation realistic.
Planning this type of base is not just a matter of choosing something lightweight. It still has to support the shed properly, shed water, resist movement, and protect the floor from damp. The aim is to create a base that is strong enough for daily use but can be dismantled without breaking up concrete or leaving a difficult scar in the garden.
Inhaltsverzeichnis
What makes a shed base “liftable”?
A liftable shed base is a foundation system that can be removed in sections rather than demolished. Common examples include interlocking plastic grid bases, timber bearers on compacted aggregate, paving slabs laid on a prepared bed, or modular steel frames designed for the shed. The key point is that the base is not permanently bonded to the ground.
For a shed that may move later, you should plan the base as a system made of layers: the ground preparation, a weed control layer if appropriate, a load-spreading layer such as compacted aggregate or gravel, and the removable supporting structure. Each part should be simple to inspect, lift and reinstate elsewhere.
Start with the relocation plan, not the base material
Before choosing a base, think about how likely the move is and how far the shed might go. A temporary move to another part of the garden needs a different approach from a move to a new property. You should also consider whether you will dismantle the shed or move it as one structure.
Ask these questions first
- How heavy will the shed be when in use? A shed full of tools, bicycles and timber can place much higher loads on the base than the empty building.
- Will the shed have a timber floor? A good shed floor still needs even support to prevent sagging and premature rot.
- Is the site wet, sloping or shaded? Drainage and ventilation matter more in damp corners of the garden.
- Can you access the site later? If the shed will be boxed in by fences, raised beds or paving, moving it may be much harder than expected.
- Do you need the ground restored afterwards? A removable base should leave a manageable area to rake, seed, replant or pave.
Choose the right type of removable base
There is no single best liftable base for every shed. The most suitable option depends on shed size, ground conditions, budget and how neat you want the finished installation to look.
Interlocking plastic grid bases
Plastic grid systems are popular for relocation planning because they are modular, comparatively light and can be lifted square by square. They usually sit on a firm, level prepared area, often with a membrane and gravel infill. The open grid structure can help with drainage and airflow beneath the shed, provided the ground has been prepared correctly.
This type of base suits many domestic sheds where you want a clean, practical alternative to concrete. However, it still needs proper levelling. If you lay grids straight onto soft, uneven ground, they may settle, twist or create pressure points under the shed floor.
Concrete paving slabs on a prepared bed
Paving slabs can also be removable, especially if laid dry on a compacted sand and hardcore bed rather than mortared permanently. They provide a robust surface and are familiar to many DIY installers. The disadvantage is weight. Lifting and moving slabs later can be labour-intensive, and cracked slabs may not be reusable.
Timber bearers on compacted aggregate
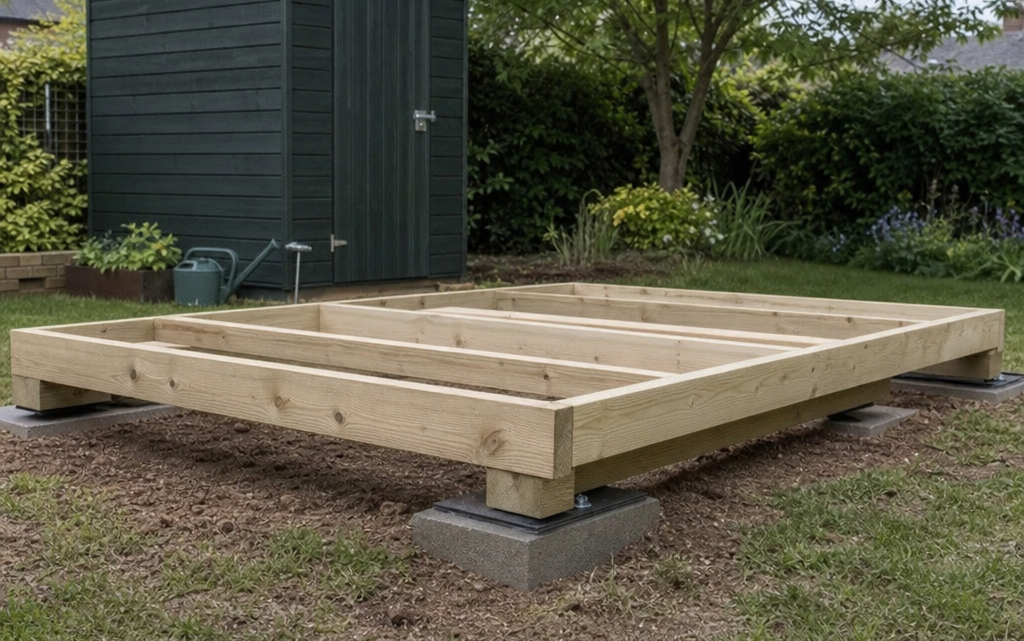
Pressure-treated timber bearers can work well where the shed has a suitable floor frame and the bearers are kept off wet soil. This approach can be relatively easy to move, but timber in contact with damp ground will eventually deteriorate. You need good drainage, proper treatment, and enough support points to prevent bounce or sagging.
Adjustable shed feet or pad systems
Adjustable supports can be useful on mildly uneven ground, but they must be rated and spaced correctly for the shed. They may be more appropriate where you need fine levelling than where you need a broad, load-spreading base on soft ground.
Decision criteria for a base that may move later
When comparing options, do not look only at the purchase price. A cheap base that takes days to lift, damages the shed floor, or cannot cope with wet ground may cost more in the long run.
Use these criteria
- Load spreading: The base should support the whole floor evenly, not just a few isolated points.
- Drainage: Water should be able to move away from and beneath the shed rather than collecting under it.
- Ventilation: Airflow beneath a timber floor helps reduce damp risk.
- Ease of removal: Consider the weight and size of each component, not just the total base.
- Reusability: Modular components are usually easier to reuse than materials that crack, warp or become embedded.
- Ground disturbance: A shallow, well-prepared base is easier to restore than a poured slab.
- Future access: You should be able to reach the base edges and fixings when the time comes to move the shed.
Preparing the ground properly
Even a removable base needs a sound formation underneath. The most common reason liftable bases fail is not the base material itself, but poor ground preparation.
Mark out an area slightly larger than the shed footprint. This gives you working room and helps water drain away from the edges. Remove vegetation, roots and soft topsoil. If the ground is clay, boggy or recently disturbed, take extra care with compaction and drainage. A shed base should not be placed over loose soil that will settle unevenly.
Use a long spirit level, straightedge or laser level to check the area. The base should be level across both directions. A slight fall in the surrounding ground can help water run away, but the shed support surface itself should be level unless the shed manufacturer states otherwise.
Plan the base size and edge support
The base should match the shed’s required support area. Do not assume the nominal shed size is the exact floor size. A “12 x 10” shed, for example, may not measure precisely 12 feet by 10 feet externally, and cladding overhangs may differ from the floor frame. Always check the shed manufacturer’s floor dimensions and recommended base size.
Edge support is particularly important. Shed floors often fail first at corners, door thresholds and edges where loads are concentrated. If you are using modular grids, slabs or bearers, make sure the shed perimeter is fully supported. Avoid placing a shed so that part of the floor frame sits beyond the edge of the base.
A practical example of a modular plastic base
As a practical example, a 12×10 Plastic Shed Base Kit is the type of product many people consider when they want an alternative to slabs or concrete. The described system uses interlocking recycled plastic grids and is intended to be laid on a firm, level area of ground. Each square is stated as 500 x 500 x 40 mm, with 48 squares in the pack, along with a heavy-duty weed membrane. The guidance also recommends using pea gravel in the grids, with gravel not included. At a listed price of 300.99 EUR, it is useful as a comparison point when weighing up modular convenience against the labour and materials involved in other base types.
The important lesson from this kind of example is that “removable” does not mean “placed straight on the lawn”. Interlocking grids can be reusable and convenient, but they still depend on a prepared, level surface and suitable infill. If you plan to relocate the shed later, keep the installation instructions, take photographs of the build-up, and note how much gravel or membrane was used so you can recreate the base elsewhere.
Step-by-step planning process
1. Confirm the shed dimensions and load
Check the exact floor footprint, not just the advertised shed size. Think about what you will store. A lawnmower, log store, workbench or shelving full of paint and tools will add considerable load. The base must suit the real use, not the empty building.
2. Inspect the site in wet weather
If possible, look at the area after heavy rain. Puddles, soft patches and water flowing from neighbouring hard surfaces are warning signs. A removable base can cope with normal garden moisture, but it should not sit in a sump.
3. Decide how reversible the installation must be
If you only need the option to relocate in five years, a more substantial compacted sub-base may be sensible. If you are renting or want minimal disturbance, choose a shallower system that can be lifted and the ground restored more easily.
4. Prepare a level formation
Remove turf and soft material. Level and compact the ground. For many modular bases, a membrane and gravel layer will be appropriate, but follow the chosen system’s instructions. Do not rely on the shed’s weight to flatten bumps.
5. Assemble from a fixed reference edge
Set out a straight front edge or side edge first. Measure diagonals to check squareness. Small errors can grow across a large base, especially with modular units.
6. Check level before placing the shed
Once the base is assembled and filled or bedded as required, check it again. Correct dips and high points immediately. It is far easier to adjust the base before the shed is built on top.
Checklist for a liftable shed base
- The exact shed floor dimensions have been confirmed.
- The base extends to support all edges and corners properly.
- The site has been checked for standing water and poor drainage.
- Vegetation, roots and loose topsoil have been removed.
- The ground has been levelled and compacted.
- A suitable membrane has been used where required.
- Gravel, aggregate or bedding material matches the base system’s guidance.
- All modular sections are locked, aligned or seated correctly.
- The finished base is level in both directions.
- There is future access around the shed for lifting and dismantling.
- Instructions, receipts and installation photos have been kept for relocation.
Common practical mistakes to avoid
Laying the base on unprepared lawn
Grass and topsoil are not a stable foundation. They compress, rot and move with moisture. Even a lightweight grid or timber system needs firm ground beneath it.
Forgetting about the door threshold
The front of a shed takes repeated traffic from feet, wheelbarrows, bikes and mowers. If the threshold is poorly supported, it can dip or twist. Plan extra care at the entrance.
Making the base too small
A base that is slightly undersized may seem acceptable during assembly, but it can leave floor edges unsupported. This is one of the quickest ways to damage a shed floor.
Trapping water under the shed
A removable base should not create a waterproof tray. Water needs a route out. Pay attention to the surrounding levels, not just the base itself.
Assuming removable means maintenance-free
Leaves, soil and gravel movement can affect drainage over time. Inspect the base periodically, especially after storms or very wet winters.
Building obstacles around the shed
If you later install decking, fencing or raised beds tight against the shed, you may lose the very access that makes the base liftable. Leave sensible clearance where possible.
How to make future relocation easier
Think ahead while the shed is still easy to access. Avoid permanent fixings into concrete where they are not needed. If the shed must be anchored for wind resistance, use fixings that can be undone and replaced rather than buried or bonded permanently. Keep a record of anchor positions and any packers or levelling shims used.
Store spare base clips, grid sections or manufacturer information if available. If the base uses gravel infill, remember that moving it will involve either taking the gravel with you or buying new material. Use buckets or strong bags if you want to recover it cleanly.
When the time comes to relocate, empty the shed first. Remove heavy contents, shelving and anything fixed to the walls. Check whether the shed is designed to be moved assembled; many sheds are safer to dismantle partially or fully. Lift base components carefully and inspect them before reuse. Cracked, distorted or weakened parts should not be relied upon in the new location.
FAQ
Is a removable shed base as good as concrete?
For many domestic sheds, a well-prepared removable base can be perfectly suitable. Concrete may be preferable for very heavy buildings, workshops with machinery, or sites needing a permanent engineered slab. The right answer depends on load, ground conditions and the shed manufacturer’s requirements.
Can I put a plastic grid base straight onto soil?
You should follow the specific product instructions, but in general the ground must be firm, level and properly prepared. Soft soil, turf and uneven ground are likely to cause settlement and distortion.
Will a liftable base stop damp?
No base can guarantee a dry shed on its own. Good drainage, airflow, correct installation and shed maintenance all matter. A ventilated base can help reduce moisture risk, but it must not sit in standing water.
How much bigger should the base be than the shed?
Use the shed manufacturer’s recommended base dimensions. The support area should fully carry the shed floor and edges. Avoid excessive overhangs that catch rainwater and direct it under the shed walls.
Can I reuse the same base when I move the shed?
Often, yes, if the components are designed to be reusable and remain in good condition. You may need new membrane, gravel or bedding material, and the new site will still need proper preparation.
Conclusion
A liftable shed base is a sensible choice when you want flexibility without sacrificing support. The best results come from planning the move before you build: choose modular or recoverable materials, prepare the ground properly, support the shed edges, and keep drainage in mind. Whether you use plastic grids, slabs, timber bearers or another removable system, the base should be level, stable and accessible. If you treat removability as an additional design requirement rather than a shortcut, your shed will be easier to use now and far easier to relocate later.