
Garden Path Planning for Everyday Summerhouse Access
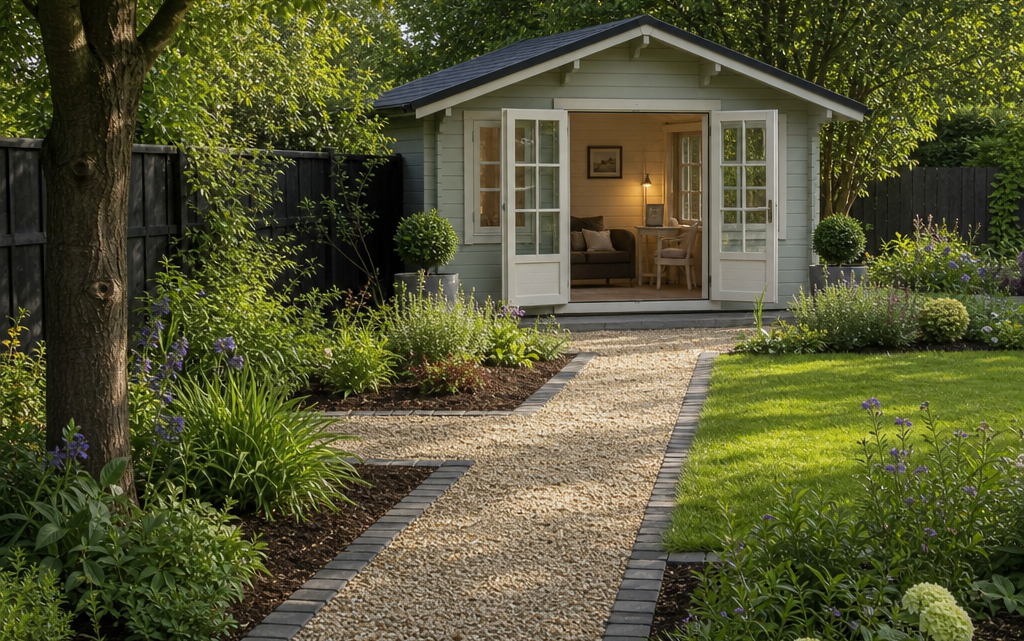
It is easy to spend weeks choosing a summerhouse, then leave the route to it as an afterthought. In everyday use, however, the path matters almost as much as the building itself. If you use your summerhouse as a reading room, home office, hobby space, gym or place to entertain, you need a route that is safe, dry, attractive and convenient in all seasons. A narrow line of stepping stones may look charming in July, but it can quickly become awkward when you are carrying mugs, cushions, tools, a laptop or garden furniture across wet grass in November.
Good garden path planning starts with a practical question: how will you actually move between the house, the garden and the summerhouse? Once you understand that, you can decide where the path should go, how wide it should be, what it should be made from and how it should meet the summerhouse entrance. The aim is to create an approach that feels natural, looks right in the garden and stands up to regular use.
Inhaltsverzeichnis
Start with how you will use the summerhouse
Before choosing paving, gravel or edging, think about the purpose of the summerhouse. A building used once a fortnight for summer drinks needs a different approach from one used daily as a workspace. Your route should reflect the frequency of use, the items you will carry and the conditions you expect to face.
If you will be walking to the summerhouse in work shoes, after dark or while carrying a laptop bag, the route should be firm, even and well lit. If it will be used by children, older relatives or guests, avoid surfaces that shift underfoot or become slippery. If the summerhouse is used for hobbies, you may need space to move storage boxes, equipment or small furniture without stepping onto lawns or borders.
Key questions to ask before drawing the route
- Will you use the summerhouse daily, weekly or only occasionally?
- Will access be needed in winter, after rain or after dark?
- Will you carry hot drinks, tools, electrical equipment, cushions or furniture?
- Do you need step-free access, or at least a route with minimal level changes?
- Will guests need to find the entrance easily from the patio or house?
- Could the path also serve bins, storage, a greenhouse or another garden area?
Answering these questions helps you avoid designing a path that looks good on paper but fails in daily use.
Choose the most natural approach route
The best garden paths usually follow the way people want to walk. If a path takes a long detour around a border, people will often cut across the grass instead. Watch how you naturally move through the garden now, then mark a likely route with string, a hosepipe or temporary canes.
For a summerhouse, there are usually three common options. A direct path runs from the back door or patio to the summerhouse and is the most practical choice for frequent use. A curved path creates a more relaxed, landscaped feel and can help the building sit more softly within the garden. A secondary path from an existing patio, deck or seating area may work well if the summerhouse forms part of an entertaining zone.
Curves should be generous rather than fussy. A path that snakes too tightly can be frustrating, especially when carrying items. If you want a soft informal look, use a broad curve with planting around it rather than a series of small bends.
Plan the width for real movement
Path width is one of the most important practical decisions. A decorative path through planting can be narrow, but an everyday route to a summerhouse should give you enough room to walk comfortably without brushing against wet foliage or stepping off the edge.
As a general guide, a path of around 900mm is comfortable for one person and feels more substantial than a narrow garden trail. Around 1,000mm to 1,200mm is better if the path will be used often, if you will carry items, or if you want two people to pass occasionally. Where the path meets the summerhouse entrance, consider widening it into a small landing area so you can open the doors, pause, put bags down or greet visitors without standing on grass.
If the summerhouse has double doors, make sure the approach is aligned with the door opening and wide enough to feel balanced. A very narrow path leading to wider doors can look awkward and may make moving furniture in and out more difficult.
Think carefully about levels and drainage
A path to a summerhouse should not channel water towards the building. This is a common mistake and can cause puddling at the entrance, muddy edges and damp conditions around the base. Look at how water already moves across your garden during rain. Low spots, compacted lawns and shaded areas are often the first places to become boggy.
Ideally, the path should have a slight fall so surface water drains away from the summerhouse and nearby structures. Hard surfaces such as paving should be laid to a suitable fall and should not trap water against timber, thresholds or edging. Gravel paths should have a properly prepared sub-base and edging to prevent migration into lawns and beds.
Where the garden slopes, avoid creating an uncomfortable ramp unless it is designed properly. A gentle gradient may be fine, but a steep path can become slippery and tiring. In some gardens, shallow steps with generous treads are safer and more attractive. If step-free access is important, plan this from the start rather than trying to adapt a steep route later.
Match the path material to everyday use
The right material depends on budget, garden style, drainage, maintenance and how often the route will be used. There is no single best option, but there are clear strengths and weaknesses.
Paving slabs
Paving gives a firm, stable surface and is one of the most practical choices for regular access. It suits formal gardens, patios and straight routes. Choose slabs with a suitable outdoor texture rather than overly smooth finishes, which may become slippery. Good preparation is essential; uneven paving quickly becomes a trip hazard.
Gravel
Gravel is flexible, comparatively simple to install and works well in informal gardens. It also allows water to drain through when laid correctly. However, it can be awkward for wheelchairs, small wheels, some footwear and frequent carrying of heavy items. Use a compacted sub-base, membrane where appropriate and solid edging. Avoid very large stones that are uncomfortable underfoot.
Setts, blocks and bricks
These can create a durable and attractive approach, especially in traditional gardens. They are good for curves and detailing but require careful laying to avoid unevenness. Reclaimed materials can look beautiful, but check that they are sound and not too slippery.
Decking and boardwalks
Decking may be useful over damp or uneven ground, but it needs careful detailing and maintenance. It can become slippery if shaded, dirty or algae-covered. If you choose timber or composite boards, consider grip, ventilation and how the deck meets the summerhouse entrance.
Stepping stones
Stepping stones are best for occasional use or decorative routes. For everyday summerhouse access, they are often less practical because stride lengths vary and grass between stones becomes worn or muddy. If you love the look, consider setting large stones close together within gravel or low planting for a more reliable surface.
Create a practical entrance zone
The area immediately outside the summerhouse deserves special attention. This is where people slow down, open doors, remove muddy shoes, carry things in and out, and sometimes gather before entering. A small apron of paving, compacted gravel or another firm surface can make a big difference.
Allow space for the door swing, especially if the doors open outwards. Keep planting clear of the entrance so leaves and wet stems do not brush against people or the building. If you have a doormat, boot scraper, pot plants or lanterns, make sure they do not obstruct the route or create a trip hazard.
For a larger garden building, such as a 12 x 8 summerhouse with double doors, the approach should feel proportional. A narrow path ending abruptly at the threshold may not be enough for everyday use. A wider landing area gives a more settled, intentional look and makes the summerhouse feel properly connected to the garden.
Use planting to guide the journey
A good path is not only functional; it also shapes the experience of moving through the garden. Planting can soften hard materials, frame views and make the summerhouse feel like a destination rather than an isolated building at the end of the lawn.
Keep the centre of the path clear and choose plants that suit the available space. Low, spreading plants can soften edges, while taller planting can frame the route or screen less attractive views. Avoid placing thorny, brittle or heavily scented plants where people will brush past them. In shaded, narrow routes, avoid dense planting that holds moisture and makes the path feel cramped.
Think about seasonal interest. Evergreen structure can keep the route looking intentional in winter, while bulbs, grasses and perennials can add movement and colour during the main summerhouse season. If the summerhouse is used in the evening, pale flowers and silver foliage can be particularly effective near the path because they show up in low light.
Plan lighting before the path is finished
Lighting should be considered early, not added only after someone trips on a dark evening. The purpose is not to floodlight the garden, but to make the route legible and safe. You need to see changes in level, path edges, steps and the summerhouse entrance.
Low-level bollard lights, recessed step lights, wall-mounted fittings near the entrance and carefully positioned solar lights can all work, depending on the garden. Avoid glare directed into eyes or neighbours’ windows. If you use solar lighting, remember that performance depends on panel position, season and shade. In a heavily shaded garden, solar fittings may not provide reliable winter lighting.
Where mains power is involved, use a competent qualified electrician and ensure all outdoor electrical work is suitable for exterior use. If you are planning cables, ducts or conduits, it is usually easier to install them before final surfacing is laid.
Checklist: planning your summerhouse path
- Confirm the main starting point: usually the back door, patio, side gate or existing terrace.
- Mark the route on the ground: use string, sand, spray marker or a hosepipe before committing.
- Walk the route several times: carry a bag, tray or garden chair to test real movement.
- Check the width: allow comfortable access, not just the minimum possible strip.
- Assess drainage: make sure water will not run towards the summerhouse entrance or base.
- Plan the entrance landing: provide space for doors, doormats, pots and turning.
- Choose a surface for the level of use: daily access needs a stable, all-weather finish.
- Include edging: especially for gravel, bark or paths next to lawns.
- Consider lighting: identify steps, corners, thresholds and darker sections.
- Allow for maintenance: leaves, weeds, algae and loose stones all need periodic attention.
Common practical mistakes to avoid
Making the path too narrow
A narrow path may save money initially, but it often feels mean and impractical. If you regularly step onto the lawn to pass someone or avoid wet planting, the path is not wide enough for its purpose.
Ignoring the desire line
If the route is too indirect, people will create their own shortcut. This leads to worn grass, muddy patches and a garden that looks untidy. A beautiful curve is worthwhile only if it still feels natural to use.
Letting water collect at the door
Puddles at the summerhouse entrance are both inconvenient and unsightly. Always consider falls, sub-base construction and the relationship between path level and threshold.
Choosing a surface only for appearance
Some materials look excellent in photographs but are less suitable for daily access. Smooth paving, loose decorative stones and widely spaced stepping stones can all become frustrating if used in the wrong place.
Forgetting night-time use
If you leave the summerhouse after dark, you need to see the route back to the house. Lighting should identify direction and hazards without overpowering the garden.
Planting too close to the edge
New plants may look small, but many spread into the path within a season or two. Check mature sizes and leave enough clearance, particularly along narrow approaches.
Practical steps for setting out the path
Once you have chosen the route and material, take time to set it out properly. Start by marking the centre line, then mark the actual path width. Look at it from the house, from the summerhouse position and from key viewpoints in the garden. A path that looks right from one angle may feel oddly placed from another.
Next, check levels. Even a simple path benefits from basic level planning, especially near the summerhouse. Decide whether the path will sit flush with the lawn, slightly proud of it, or edged clearly with timber, metal, brick or stone. Flush edges are easy to mow beside, while raised or defined edges can help contain gravel and protect borders.
If using contractors, agree the construction build-up, edging, drainage approach and finished levels before work begins. Ask where excavated soil will go and how access through the house or side passage will be protected. If doing the work yourself, avoid rushing the sub-base. Many path failures come from poor preparation rather than the visible surface.
Maintaining the route over time
A summerhouse path should be easy to live with. Sweep leaves before they break down into slippery mulch, remove weeds while they are small and clean algae from shaded hard surfaces. Gravel may need occasional raking and topping up. Paving joints may need attention if they loosen or attract weeds.
Also check how the path performs after heavy rain. If water sits in one place, deal with it early before it causes staining, movement or muddy overspill. Keep planting clipped back so the path remains inviting and safe throughout the year.
FAQ
What is the best path surface for daily summerhouse access?
For regular use, a firm and stable surface such as textured paving, well-laid setts or a properly constructed compacted path is usually most practical. Gravel can also work well, but it needs good edging and may be less suitable where wheels, mobility aids or very frequent carrying are involved.
How wide should a path to a summerhouse be?
For comfortable single-person access, around 900mm is a useful guide. If the path will be used often, by guests, or while carrying items, consider 1,000mm to 1,200mm. Widen the area near the doors to create a practical entrance landing.
Should the path be straight or curved?
A straight path is efficient and suits formal layouts. A curved path can look more relaxed and help the route blend into planting. The best choice depends on your garden style and how you naturally move through the space. Avoid unnecessary detours.
Do I need lighting along the whole route?
Not always. You may only need lighting at key points such as steps, turns, edges and the summerhouse entrance. The aim is safe navigation, not excessive brightness.
Can I lay a path after the summerhouse is installed?
Yes, but it is often easier to plan the path before installation so you can align it with the doors, manage levels and avoid disturbing the base or surrounding ground later.
Conclusion
A well-planned path turns a summerhouse from a garden feature into a genuinely usable everyday space. By thinking about the route, width, surface, drainage, lighting and entrance area before work begins, you can avoid muddy shortcuts, awkward access and costly changes later. The most successful approach is one that suits how you live: easy to follow, safe underfoot, proportionate to the building and attractive throughout the year.

