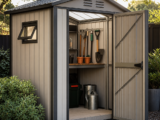
How to plan fixings and base preparation for a metal garden shed

You have chosen a metal garden shed, cleared the corner of the garden and decided on a concrete base because you want a solid, long-lasting installation. The next question is often the one that causes the most uncertainty: how should the shed actually be fixed down? A metal shed is light compared with a masonry or heavy timber building, so even a well-made model can move, twist or suffer damage if wind gets under it or if the base is uneven. Good anchoring is not an optional finishing touch; it is part of the structure.
This guide explains how to plan the fixings and prepare a concrete base for a metal garden shed. It is written for typical domestic garden buildings and focuses on practical decisions: base size, slab quality, hole positions, anchor types, damp control and common installation mistakes. Always follow the shed manufacturer’s instructions first, but use the principles below to help you plan the job properly before assembly day.
Inhaltsverzeichnis
Why metal sheds need careful anchoring
Metal garden sheds are usually made from thin sheet steel panels fixed to a frame. This makes them durable, low-maintenance and efficient to assemble, but it also means they rely heavily on being square, level and properly secured at the base. If the base rails are not fixed down, the building can rack out of shape, doors may stop closing neatly and panels can flex in strong winds.
Anchoring is especially important where the shed is exposed to gusts, positioned near an open field, installed on a raised patio, or placed with the door facing the prevailing wind. A concrete base gives you the best opportunity to fix the shed down securely, but only if the slab is suitable and the anchor points are planned before you start drilling.
Start with the manufacturer’s fixing plan
Before buying fixings, unpack the instructions and identify the base frame layout. Most metal sheds are anchored through pre-drilled holes in the base rails or through brackets supplied with the building. Do not assume that fixing positions are evenly spaced or that every corner uses the same arrangement. Door thresholds, internal floor supports and corner posts may all affect where anchors can be installed.
You should check:
- whether the shed must be bolted to concrete as a warranty or safety requirement;
- the exact external footprint of the base frame, not just the nominal shed size;
- the number, diameter and position of fixing holes;
- whether the manufacturer supplies anchor bolts or expects you to source them;
- the minimum recommended base size and whether the base should be flush or slightly larger;
- door swing, access space and gutter or roof overhang requirements.
If no fixing sizes are specified, you will need to choose anchors that suit the hole diameter in the shed frame and the condition of your concrete. Avoid enlarging holes in the metalwork unless the manufacturer permits it, as this may weaken the frame or invalidate instructions.
Choosing the right concrete base size
A concrete base should support the whole shed evenly. It should normally be at least as large as the shed’s external footprint, with enough tolerance to allow accurate positioning. However, making the base much larger than the shed can create a ledge that catches rainwater. Water sitting around the base rails encourages damp, dirt build-up and possible leakage under the frame.
For most metal sheds, a neat base that is only slightly larger than the shed footprint is preferable. If the slab is larger because it is part of an existing patio or hardstanding, you can still use it, but you should think carefully about drainage. A slight fall away from the shed, a bead of suitable external sealant beneath the base rail, or a raised plinth detail may be needed depending on the shed design.
Decision criteria for the base dimensions
- Accuracy: the slab must be large enough that all anchor holes land well inside the concrete, not near an edge.
- Edge distance: anchors should not be drilled too close to the slab edge, as the concrete may crack or break away.
- Water control: avoid creating a broad, flat concrete shelf around the shed that holds rainwater.
- Assembly space: leave enough room around the shed for safe access with tools, ladders and panels.
- Door clearance: ensure the threshold area remains level and usable, especially if you will wheel equipment in and out.
How level and flat does the base need to be?
A shed base needs to be both level and flat. These are related but not identical. A base can be level overall but have bumps, dips or trowel ridges that stop the metal frame from sitting properly. Conversely, a slab may be smooth but slope too much, causing door alignment problems and uneven loading.
As a practical test, place a long straightedge or spirit level across the slab in several directions. Look for rocking, daylight under the straightedge and sudden high spots. Minor texture is normal, but the shed frame should not bridge over hollows or twist when tightened down. If you bolt a metal frame onto an uneven slab, you can pull it out of square.
Small imperfections can sometimes be corrected with external-grade packers or a suitable levelling compound, but avoid using soft timber shims under a permanent metal shed base. Timber packers can absorb moisture, compress and rot. If the slab is seriously uneven, it is better to rectify the base before assembly rather than try to force the shed to fit.
Planning anchor positions before drilling
It is tempting to build the shed, push it into position and drill through the holes immediately. A more controlled approach is safer. First, dry-position the base rails or assembled base frame on the slab and check that it is square. Measure the diagonals; if they are equal, the frame is square. Mark the fixing holes with a pencil, marker or centre punch, then move the frame aside if you need clearer access for drilling.
Anchor positions should be far enough from the edge of the concrete to prevent cracking. The required edge distance depends on the anchor type and diameter, but as a general principle, more distance is better. If a manufacturer’s hole positions fall very close to the slab edge, do not simply drill and hope. You may need a larger base, a local concrete repair, or an alternative fixing detail approved by the shed supplier.
Selecting suitable fixings for concrete
There are several fixing options for anchoring a metal shed to concrete. The best choice depends on the slab thickness, concrete quality, shed size, exposure and the hole size in the frame.
Expansion bolts
Expansion bolts are common for concrete because they grip the sides of the drilled hole as the nut is tightened. They can provide strong holding power in good concrete, but they need the correct hole diameter and adequate edge distance. Over-tightening can crack weak concrete or distort thin metal base rails, so tighten gradually and use washers where appropriate.
Concrete screws
Concrete screws cut into the drilled hole and are often convenient for lighter domestic installations. They are removable and do not usually create as much expansion stress as wedge or sleeve anchors. They still require accurate drilling, correct embedment depth and a clean hole. Use corrosion-resistant screws suitable for external use.
Sleeve anchors
Sleeve anchors can be useful where the fixture thickness varies, but they must be sized carefully. They expand within the concrete and can be effective, provided the slab is sound. As with other expansion fixings, avoid using them close to edges or in crumbly concrete.
Chemical anchors
Chemical resin anchors are usually more than is needed for a small garden shed, but they can be useful in certain situations, such as weaker concrete or where reduced expansion force is desirable. They require clean holes, curing time and careful installation. They are less convenient for a quick shed assembly, but can provide a strong fixing when correctly installed.
Using a real shed as a planning example
As a practical example, consider a compact metal garden shed such as the 6′ x 3′ Trimetals Premium Titan 630 Metal Shed. The product information describes it as a PVC-coated galvanised steel shed and states that Trimetals Titan metal sheds should be bolted down to a concrete base. That single instruction has several consequences: you need a suitable slab, you need to confirm the actual base footprint from the supplied instructions, and you need fixings compatible with the shed’s base frame and your concrete.
The key lesson is not that every shed uses the same anchor, but that the anchoring requirement should be treated as part of the installation plan rather than an afterthought. Even a relatively compact shed can be vulnerable if it is placed on a slab but not fixed to it.
Preparing the concrete before assembly
Good fixing starts with good preparation. Concrete should be fully cured before drilling and loading. Fresh concrete may look hard after a day or two, but it continues to gain strength over time. For a new slab, follow the concrete supplier’s or installer’s guidance before installing the shed. As a practical rule, avoid rushing the shed onto very fresh concrete.
Clean the slab thoroughly before assembly. Sweep away grit, remove lumps of mortar or concrete splash, and check that there are no raised stones where the base frame will sit. If the slab has been painted or sealed, make sure the surface is not slippery and that sealants or coatings will not interfere with any bedding sealant recommended for the shed base.
Base preparation checklist
- Confirm the shed’s actual base dimensions from the instructions.
- Check the slab is large enough for the frame and anchor edge distances.
- Test the slab for level and flatness in several directions.
- Make sure water drains away from the shed position.
- Clean the surface where the base rails will sit.
- Check that the concrete is cured, sound and not crumbling.
- Lay out the base frame and measure diagonals before marking holes.
- Choose external-grade fixings suitable for concrete and the shed frame.
- Use the correct drill bit size and drilling depth for the chosen anchors.
- Have washers, sealant and a torque-controlled or careful tightening method ready.
Drilling the holes correctly
Accurate drilling is essential. Use a masonry drill bit of the correct diameter for the chosen fixing, not a bit that is “close enough”. If the hole is too small, the anchor may not fit or may damage the concrete as it is forced in. If it is too large, the fixing may not grip properly.
Mark each hole clearly and use a hammer drill suitable for concrete. Drill perpendicular to the surface unless the fixing manufacturer states otherwise. Wrap tape around the drill bit as a depth guide, or use the depth stop on the drill. Drill deep enough to accommodate the anchor and any dust, but not unnecessarily deep if the fixing depends on a precise embedment.
After drilling, clean the holes. This is a step many people skip, but dust reduces the holding strength of fixings, especially concrete screws and resin anchors. Use a vacuum, blow-out pump or brush according to the fixing instructions. If you are using chemical anchors, hole cleaning is particularly important.
Fitting the shed frame without distorting it
Once the holes are drilled and cleaned, reposition the shed base frame. Check the diagonals again before inserting anchors. Do not fully tighten one corner first and then work around the shed, as this can pull the frame out of square. Instead, loosely fit all anchors, check alignment, then tighten gradually in stages.
Use washers if they are supplied or required so the fixing head does not pull through or deform the metal rail. Tighten firmly, but do not crush the rail. With thin metal components, excessive force can be just as damaging as insufficient tightening. If the base rail visibly bends or the door opening changes shape as you tighten, stop and reassess the base level and anchor positions.
Managing water at the base
A metal shed bolted to concrete still needs sensible water management. Rain can run down the walls and collect where the base rail meets the slab. Some shed designs include a floor, some sit over a separate floor, and some use a base rail detail intended to shed water. Follow the manufacturer’s guidance on sealant, membranes and floor kits.
Where sealant is recommended, use an external-grade product suitable for metal and concrete. Apply it neatly and avoid blocking designed drainage paths. Sealing the wrong area can trap water inside the frame rather than keeping it out. If the shed sits on a large slab, consider whether a small fillet of sealant around the external base edge is appropriate, but only if it will not prevent water from escaping where the shed design requires drainage.
Common practical mistakes to avoid
Using the nominal shed size as the base plan
A shed described as 6′ x 3′ may not have an exact base frame of those dimensions. Nominal sizes are useful for shopping, but not for setting out concrete or anchor holes. Always use the actual dimensions in the instructions.
Drilling too close to the slab edge
Anchors placed near the edge can split the concrete, especially expansion anchors. If the base is too small, the answer is not to angle the drill or use smaller fixings without thought. Correct the base or seek a fixing detail that is suitable.
Bolting down onto an uneven slab
Anchors can pull a flexible metal frame into the shape of the slab. If the slab is uneven, the shed may become twisted, making panels difficult to fit and doors hard to align.
Choosing indoor or mild-steel fixings
Garden sheds are exposed to damp air, condensation and rain splash. Use corrosion-resistant fixings suitable for external concrete applications. Poor fixings can rust, stain the base and become difficult to remove later.
Skipping hole cleaning
Concrete dust left in the hole can stop anchors seating fully and reduce grip. Cleaning takes only a short time and improves reliability.
Over-tightening the fixings
More force is not always better. Over-tightening can deform the metal base rail, crack concrete or strip the fixing. Tighten evenly and stop when the frame is secure.
When an existing concrete base may not be suitable
Many sheds are installed on existing concrete, such as an old greenhouse base, garage apron or patio slab. This can work well, but inspect it carefully. Cracks, hollow-sounding areas, loose surface layers and severe slopes all affect fixing performance. Thin paving slabs are not the same as a poured concrete base and may not hold anchors reliably.
If you are unsure about the slab thickness, drill a small test hole in a non-critical area or consult a competent installer. A shed that is only fixed into thin, loose or broken concrete may appear secure in calm weather but fail under wind load.
Short FAQ
Do all metal sheds need to be bolted down?
Many metal sheds do, and some manufacturers specifically require bolting to a concrete base. Even where it is not stated, anchoring is strongly advisable because metal sheds are relatively light and can be affected by wind uplift and movement.
Can I anchor a metal shed to paving slabs?
It depends on the slabs, bedding and shed instructions. Loose-laid paving slabs are usually a poor fixing base because individual slabs can move or lift. A continuous concrete slab is normally a better option for reliable anchoring.
Should the concrete base be bigger than the shed?
It should be large enough to support the shed and allow safe anchor positions, but not so large that it creates a water-catching ledge around the walls. Use the actual shed footprint and manufacturer’s base guidance.
Can I use ordinary wall plugs and screws?
Ordinary plastic wall plugs are generally not the best choice for anchoring a shed to concrete. Use fixings designed for concrete and suitable for outdoor structural restraint, such as appropriate concrete screws, sleeve anchors or expansion bolts.
Do I need to seal under the base rail?
Only if the shed manufacturer recommends it or the base detail requires it. Sealant can help prevent wind-driven rain entering under some frames, but incorrect sealing can trap water. Follow the supplied instructions.
Conclusion
Anchoring a metal garden shed to a concrete base is a straightforward job when it is planned properly. The important steps are to confirm the actual shed footprint, prepare a flat and sound concrete slab, mark the fixing holes accurately, choose outdoor-rated concrete fixings and tighten them without distorting the frame. Do not treat the concrete base and the anchors as separate issues: they work together to keep the shed square, secure and weather-resistant.
If you are installing a shed that the manufacturer says must be bolted to concrete, make that requirement central to your preparation. A well-laid slab and correctly fitted anchors will improve door alignment, reduce movement in windy weather and help the building perform as intended for years to come.