Siting a Timber Compost Bin Within a Working Garden
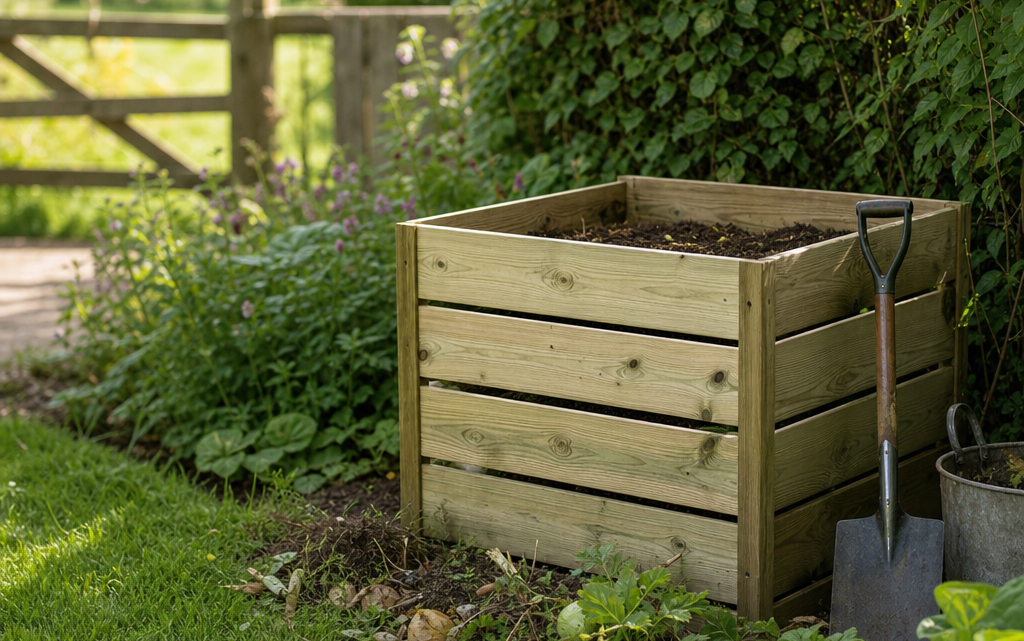
You have a productive garden, a steady stream of grass clippings, prunings, spent plants and kitchen peelings, and you want to turn that material into useful compost rather than send it away in a bin. The question is not simply which compost bin to buy or build, but where it should sit so that it works well, remains accessible and does not get in the way of day-to-day gardening. A timber compost bin can look attractive in a working garden, but it still needs careful siting if it is to be practical through wet winters, busy spring sowing and summer lawn cutting.
This guide explains how to plan the position of a timber compost bin for home and garden waste. It covers access, drainage, shade, capacity, neighbourly considerations, maintenance space and common mistakes. A compact beehive-style timber composter is used as a practical example, but the principles apply whether you are buying a ready-made bin, building one from timber, or reorganising an existing composting area.
Inhaltsverzeichnis
Start With How Your Garden Actually Works
The best place for a compost bin is rarely the prettiest empty corner. It is the place that fits naturally into the way you use your garden. Before choosing a site, think about the regular journeys you make: from the kitchen door with vegetable peelings, from the lawn with grass clippings, from the greenhouse with spent tomato plants, and from borders with prunings and weeds.
If the compost bin is too far away, you are less likely to use it consistently. If it is too close to a seating area or main entrance, it may feel intrusive. A good position balances convenience with discretion. In a working garden, a compost bin often sits well near a potting area, vegetable beds, greenhouse, shed or utility path, where organic waste is already being generated and finished compost will be used.
Key Siting Criteria for a Timber Compost Bin
1. Choose a Convenient but Unobtrusive Position
You should be able to reach the bin easily in ordinary gardening conditions, not only on a dry summer afternoon. A position close to a path is usually better than one tucked behind planting that becomes awkward in wet weather. If you regularly carry kitchen waste out after dark, consider whether the route is safe, direct and not slippery.
At the same time, the compost bin does not need to dominate the garden. Timber bins can be attractive, but they are still working features. Place them where they sit comfortably within the garden layout, perhaps beside a shed, behind low screening, near a vegetable plot or at the edge of a utility area.
2. Allow Space Around the Bin
A compost bin needs more than its own footprint. You need room to lift the lid, tip in material, use a fork, remove finished compost and clean up any spills. If the bin has a lower access flap, you also need kneeling or crouching space in front of it.
As a practical rule, allow at least 60 cm of clear working space in front of the access side, and more if you will use a fork, trug or wheelbarrow. If the bin sits against a fence or wall, ensure the lid can still open properly and that the timber has some airflow around it.
3. Put It on Soil, Not a Sealed Surface
For most home composting, a bin performs best when it stands directly on bare soil or a prepared permeable base. Contact with the ground allows worms, insects and micro-organisms to move into the heap, and it helps excess moisture drain away. A sealed concrete or paving surface can work if managed carefully, but it is less forgiving and may lead to liquid collecting beneath the bin.
If you only have paving available, consider placing the bin on a layer of coarse twigs, woodchip or a removable tray system, depending on the design. However, for a working garden, a level patch of soil is usually the simplest and most effective base.
4. Aim for Partial Shade
Compost needs warmth, moisture and air. A site in partial shade is often ideal because it avoids the extremes of full summer sun and deep cold shade. Full sun can dry out a small timber bin quickly, especially if it contains dry stems, leaves or shredded paper. Very deep shade, particularly under dense evergreen trees, may keep the heap too cool and wet.
Look for a position that receives some light but is sheltered from drying winds. The side of a shed, a lightly shaded corner near a vegetable plot, or a spot beside deciduous planting can work well.
5. Consider Drainage and Winter Access
A compost bin should not sit in a hollow where water collects. Persistent waterlogging can make compost slimy, airless and unpleasant. Check the site after rain: if the soil stays soggy, choose a slightly higher area or improve the base with coarse twiggy material before positioning the bin.
Winter access matters too. A composting area that is easy to reach in July may be muddy and inconvenient in January. A simple stepping-stone path, compacted gravel strip or bark path can make the bin much more usable all year round.
Match the Bin Size to Your Waste Stream
The right size depends on what you compost and how often. A small household with modest kitchen scraps and occasional deadheading needs less capacity than a garden with lawns, hedges, vegetable beds and autumn leaves. Timber compost bins can be compact and decorative, but you still need enough volume for the material to heat and break down.
If you produce large amounts of grass clippings or hedge trimmings, one small bin may fill too quickly. In that case, consider a two-bin or three-bin system: one for fresh material, one maturing, and one ready to use. If your garden is smaller, a single compact timber bin may be enough, provided you chop material, balance green and brown waste, and empty it regularly.
Estimating the Working Footprint
When planning space, look beyond the nominal footprint of the bin. For example, a compact square bin measuring about 0.74 m by 0.74 m occupies roughly 0.55 m² of ground before allowing for access. In practice, the working area may be closer to 1.2 m by 1.2 m once you include room to open the lid, stand comfortably and retrieve compost from the front or base.
This distinction is important in narrow side gardens, small courtyards and tightly planted cottage gardens. A bin may physically fit into a gap, but if you cannot open it or empty it easily, the position will soon become frustrating.
Plan the Composting Area, Not Just the Bin
A well-sited compost bin becomes part of a small working zone. This might include a bucket for kitchen scraps, a trug for weeds, a pile of dry leaves or shredded prunings, and space to store a fork or compost aerator. Planning this area properly will make composting quicker and cleaner.
Useful Additions Near the Bin
- A source of brown material: Keep dry leaves, shredded cardboard, woodchip or small prunings nearby to balance wet green waste.
- A firm standing area: A small paved, gravelled or barked section helps you work without churning up soil.
- Tool storage: A fork, hand fork or compost aerator should be close enough to use regularly.
- Water access: Compost should be moist, not soaked. A nearby tap or water butt is useful during dry spells.
- Screening: Trellis, shrubs or a low fence can hide the working area without blocking airflow.
Do not over-screen the bin. Composting relies on air movement, and a cramped, damp corner can encourage rot in surrounding timber structures and make the area unpleasant to maintain.
Checklist: Before You Fix the Site
Use this checklist before you install or assemble a timber compost bin:
- Is the site easy to reach from the kitchen, lawn, vegetable beds and borders?
- Can you access it safely in wet weather and winter?
- Is the bin standing on soil or another permeable, well-drained base?
- Is there enough space to open the lid fully?
- Can you remove compost from the bottom or front without obstruction?
- Is the position away from hollows where rainwater collects?
- Does the site have partial shade rather than harsh sun or deep shade?
- Is it far enough from seating areas, doors and windows to remain discreet?
- Will the position avoid nuisance to neighbours?
- Is there room nearby for dry brown material and basic tools?
If you answer “no” to several points, adjust the position before you commit. Moving a full compost bin later is far more difficult than changing the plan at the start.
Using a Compact Timber Beehive Bin as a Planning Example
A compact timber composter, such as a beehive-style wooden bin measuring 74 cm wide by 74 cm deep and 86 cm high, shows why siting details matter. Its small footprint can suit patios, cottage gardens, vegetable plots and utility corners, while the timber construction can look more at home in a planted setting than a plastic bin. The stated dimensions mean it can fit into a relatively modest space, but you still need working room around it.
Where a bin has a lid with a prop, leave enough overhead and rear clearance for the lid to open comfortably. Where it has a bottom opening flap for compost retrieval, keep the front clear and level so that you can remove compost without scraping around planting, pots or edging. Pressure-treated softwood can offer protection against rot and decay, but good siting still matters: avoid prolonged contact with standing water and do not bury the sides in damp soil or mulch.
Use this type of product as a scale reference when planning your own layout. In a small garden, one compact timber bin may handle kitchen peelings, light pruning waste and some seasonal garden material. In a larger working garden, it may be better used as one part of a wider system, perhaps for kitchen waste and softer garden material, with leaf mould or bulky prunings managed separately.
What to Compost in a Timber Bin
A timber compost bin can handle a broad mix of home and garden waste, but the balance is important. Composting works best when you combine nitrogen-rich “green” material with carbon-rich “brown” material. Too much green waste becomes wet and airless; too much brown waste breaks down slowly.
Good Green Materials
- Vegetable and fruit peelings
- Coffee grounds and tea leaves
- Fresh grass clippings in thin layers
- Soft green prunings
- Spent bedding plants and annual weeds before they set seed
Good Brown Materials
- Dry leaves
- Shredded cardboard and plain paper
- Small twigs and chopped stems
- Woodchip in modest amounts
- Straw or dry plant material
A simple working ratio is to add a handful or layer of brown material whenever you add wet kitchen waste or grass clippings. You do not need to be exact, but you should avoid thick, compacted layers of one material.
Practical Steps for Installing the Bin
Step 1: Mark Out the Footprint and Working Space
Use canes, string or a garden hose to mark the bin footprint. Then mark the working area around it. Open an imaginary lid, crouch where the access flap would be, and check whether you can stand comfortably with a bucket or fork. This simple test often reveals that the first chosen spot is too tight.
Step 2: Prepare a Level Base
Clear weeds and level the soil. A slight fall for drainage is acceptable, but the bin should not rock or lean. If the ground is heavy clay, add a base layer of coarse twigs or small woody material inside the bin to improve airflow and drainage. Avoid setting timber into a wet hollow.
Step 3: Provide Access
If the route to the bin crosses a lawn or border edge, consider stepping stones or a narrow path. Composting is a repeated task, not an occasional one. Good access prevents muddy tracks and makes you more likely to use the bin regularly.
Step 4: Start With a Mixed Layer
Begin with twiggy material at the bottom, then add alternating layers of greens and browns. Chop bulky stems before adding them. Smaller pieces break down faster and make better use of a compact bin.
Step 5: Maintain Air and Moisture
Check the bin every few weeks. The contents should feel like a wrung-out sponge: moist but not dripping. If it is dry, add water or more green material. If it is wet and smelly, add dry browns and loosen the heap with a fork or aerator.
Common Practical Mistakes
Putting the Bin Too Far Away
A compost bin hidden at the far end of the garden may look tidy on a plan, but if the journey is inconvenient, kitchen scraps and garden waste are less likely to reach it. Convenience is a major factor in successful composting.
Ignoring Retrieval Access
Many people plan for filling the bin but forget about emptying it. Finished compost is heavy and awkward to remove if the access side faces a fence, hedge or densely planted border. Always plan the emptying route before installation.
Letting Grass Clippings Dominate
Thick layers of fresh grass clippings can turn into a slimy, airless mat. Add them in thin layers and mix with dry leaves, shredded cardboard or twiggy material.
Choosing a Waterlogged Corner
A damp, unused corner may seem ideal because it is out of sight, but compost bins need drainage and air. Waterlogged conditions slow decomposition and can create odours.
Placing Timber Against Constant Damp
Even treated timber benefits from sensible siting. Avoid pushing soil, mulch or dense vegetation directly against the sides. Leave air gaps and prevent standing water from collecting around the base.
Expecting One Small Bin to Handle Everything
A compact bin is useful, but it has limits. Large seasonal flushes of leaves, hedge clippings or lawn mowings may need separate handling. Leaf mould cages, branch piles or additional compost bays can reduce pressure on the main bin.
Neighbourly and Safety Considerations
Composting should not cause nuisance if managed correctly, but siting still matters. Avoid placing the bin directly beside a neighbour’s seating area, open window or boundary path if another practical option exists. A well-balanced compost heap should not smell offensive, but wet food waste or poor aeration can cause temporary odours.
Do not add cooked food, meat, fish, dairy products or oily waste to a standard open garden compost bin, as these can attract pests. If you want to compost a wider range of food waste, investigate sealed food waste systems designed for that purpose.
For safety, keep the area stable underfoot. Composting often involves carrying buckets, using forks and bending to retrieve material. Good footing and clear access reduce the risk of slips, especially in winter.
Designing the Bin Into the Garden
A timber compost bin can contribute to the character of a garden if it is integrated thoughtfully. In a kitchen garden, it can sit beside raised beds or a potting bench. In a cottage garden, it may be softened by herbs, low shrubs or woven hazel edging. In a contemporary garden, a neat utility corner with gravel and simple screening may work better.
Planting around the bin should be practical. Choose plants that do not sprawl across the lid or access flap. Avoid thorny shrubs immediately beside the working area. If you want screening, use plants or structures that allow you to step in, open the bin and remove compost without wrestling with growth.
Short FAQ
Should a timber compost bin have a base?
For general garden composting, direct contact with soil is usually best because it allows drainage and access for worms and soil organisms. Some bins have open bases for this reason. If placing a bin on paving, you may need to manage drainage and moisture more carefully.
How close can I put a compost bin to the house?
There is no single distance that suits every garden, but avoid placing it directly against walls, doors or frequently opened windows. Choose a position that is convenient but not intrusive, with good ventilation and easy access.
Will a compost bin smell?
A healthy compost bin should smell earthy rather than unpleasant. Bad odours usually indicate too much wet green material, poor airflow or unsuitable food waste. Add dry brown material and loosen the contents to restore balance.
Can I put weeds in the compost bin?
Annual weeds that have not set seed are usually fine. Avoid persistent perennial weed roots, seed heads and diseased plant material unless you are confident your composting system gets hot enough to deal with them.
Is one timber bin enough?
One bin may be enough for a small garden and modest household waste. Larger gardens often benefit from two or more bins so that one can be filled while another matures. Seasonal waste such as autumn leaves may be better composted separately as leaf mould.
Conclusion
Siting a timber compost bin within a working garden is a practical design decision. The right position should be convenient, well drained, partly shaded and easy to use throughout the year. You need enough room not only for the bin itself, but also for opening, filling, aerating and emptying it.
Before installing a bin, observe how waste moves through your garden and where finished compost will be used. Plan access, allow working space, keep the base permeable and avoid wet, cramped corners. A compact timber bin can be an attractive and useful feature, but its success depends on thoughtful siting and regular management. With the right location and a balanced mix of materials, your compost bin will become a productive part of the garden rather than an awkward afterthought.