
Planning Roof Coverings and Drainage for Timber Garden Cabins
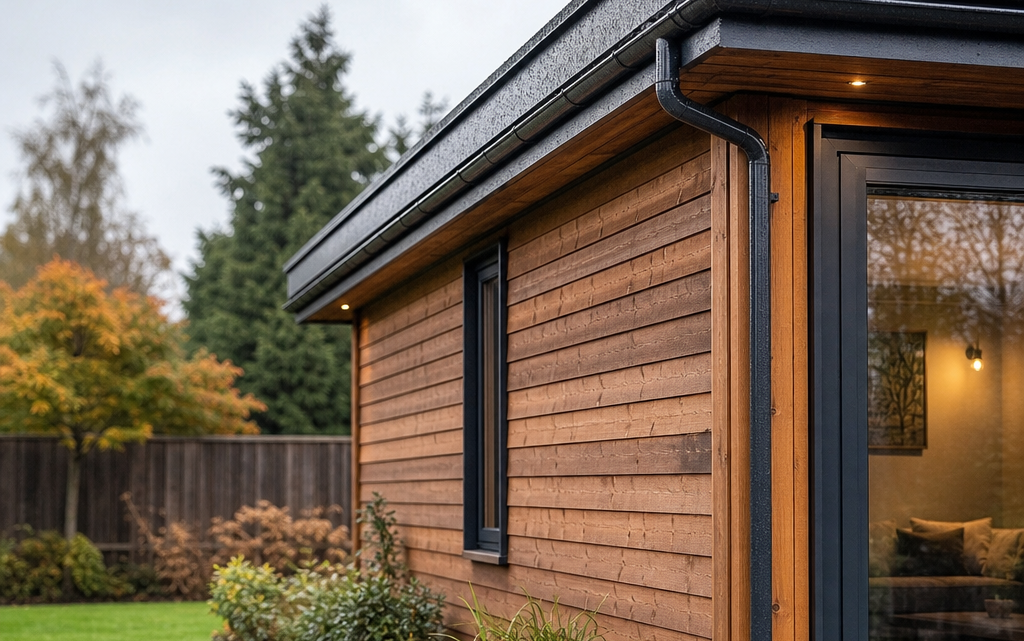
You have chosen a timber garden cabin, checked that it fits the space, and allowed for a suitable base. Then you notice an important line in the specification: the roof covering is not included. This is a common situation with larger log cabins and garden rooms, and it is not a minor detail. The roof covering and drainage plan will determine how well the building copes with rain, wind-driven water, leaf fall, standing moisture and long-term timber movement.
For a timber cabin, roof planning should be treated as part of the purchase decision, not as an afterthought on installation day. You need to decide what roof finish is suitable, how rainwater will be directed away, whether gutters and downpipes are needed, and how the roof edges, overhangs and surrounding ground will work together. This article explains the practical choices so you can plan a durable, weather-resistant installation before your cabin arrives.
Inhaltsverzeichnis
Why roof covering and drainage matter on a timber cabin
A timber garden cabin is continually exposed to moisture. Even when the walls are well designed and the roof boards are strong, untreated or poorly protected roof timber can suffer if water is allowed to linger. Rainwater must be shed quickly, directed away from vulnerable joints, and kept clear of the base.
The roof covering is the first line of defence. It protects the roof boards from direct weather, reduces the risk of water ingress, and helps manage wind-driven rain. Drainage is the second part of the same system. If water runs off the roof and splashes against the lower logs, pools around the foundation, or falls directly in front of doors, you can create problems even with a good roof finish.
Good planning should therefore answer four questions:
- What permanent roof covering will be fitted?
- How will water run off the roof and into gutters or clear ground?
- Where will downpipes discharge the water?
- How will roof edges, doors, windows, overhangs and the base be protected from splashback?
Start with the roof design and roof pitch
Before choosing materials, look at the roof shape, pitch and area. A small shed roof may be simple to cover, but a larger garden cabin has more roof surface, longer edges and greater water volume. A modest rainfall event can produce a surprising amount of water from a broad roof, so drainage must be sized and positioned sensibly.
Check the manufacturer’s roof details
Use the manufacturer’s installation manual and product specification as your starting point. Check whether the roof covering is included, whether the roof is supplied as boards or panels, and what covering options are recommended. Some cabins are supplied with tongue and groove roof boards but no external weatherproof finish. In that case, the roof is structurally present but not fully weatherproof until a suitable covering is fitted.
You should also check any instructions about fixing methods, edge trims, ventilation, permitted roof coverings and treatment requirements. If the guarantee depends on correct assembly, timber treatment or suitable roof protection, follow those instructions carefully and keep records of materials used.
Allow for roof overhangs
Overhangs are useful because they help keep rain away from walls, doors and windows. A front overhang can also create a sheltered area. However, an overhang does not remove the need for a proper roof covering or drainage. Water still has to leave the roof somewhere, and the drip line may fall onto paving, decking, soil or the cabin base.
When planning the layout, mark where water will fall from the roof edges if no gutters are fitted. If that line is close to the timber base, a path, a door threshold or a seating area, you should consider guttering or a drainage channel.
Choosing a roof covering
The best roof covering depends on the roof pitch, your budget, the appearance you want, your DIY skills and how long you expect the building to last. For a cabin used as a garden office, hobby room or year-round retreat, a permanent roof covering is usually worth choosing at the outset.
Roofing felt and underlay felt
Basic roof felt is commonly used on small garden buildings because it is economical and straightforward to fit. However, there is an important difference between a temporary underlay and a durable final roof finish. Underlay felt may be useful beneath another covering, or as a short-term measure during assembly, but it should not normally be treated as the long-term weatherproof roof on a substantial cabin unless the supplier specifically states that it is suitable for that purpose.
If you use temporary felt, plan how soon the permanent covering will be installed. Leaving a roof in a temporary state through winter or during repeated storms can increase the risk of leaks and timber staining.
Felt shingles
Felt shingles are a popular choice for cabins because they are more decorative than plain felt and can suit traditional timber designs. They are usually fixed in overlapping courses, creating a tiled appearance. They can be practical for competent DIY installers, provided the roof pitch, fixing pattern and underlay requirements are followed.
When choosing shingles, check the recommended minimum roof pitch, the fixing instructions, the need for starter strips, and how ridges and verges are finished. Poor detailing at edges and ridges is a common cause of water ingress.
SBS and more robust felt systems
SBS-modified felt systems are generally thicker and more durable than simple shed felt. Some versions are torch-on products and can have a long service life when correctly installed. However, torch-on application involves heat, risk and skill. It should only be carried out by someone with the right experience, tools and safety precautions, or by a professional installer.
A more robust system can be a sensible choice for a larger or higher-value cabin, particularly if you intend to use it regularly throughout the year. The extra cost may be modest compared with the inconvenience and damage caused by a leaking roof.
Other possible coverings
Depending on the cabin design, local conditions and manufacturer’s guidance, some owners consider metal sheeting, EPDM rubber membranes or lightweight tile-effect systems. These can be effective, but you must confirm that they are compatible with the roof structure and pitch. Do not add a heavy roof covering unless the building has been designed for it. Excessive roof load can affect the structure, doors, walls and settlement of a log cabin.
Decision criteria: how to choose the right option
Use the following criteria before you buy the roof covering:
- Roof pitch: Check that the covering is suitable for the angle of the roof. Some materials need a minimum pitch to shed water properly.
- Cabin value and intended use: A year-round office or family room justifies a more durable roof than a light-use storage shed.
- Installation skill: Choose a product you can fit correctly, or budget for professional installation.
- Weather exposure: Exposed gardens, coastal areas, open fields and sites under trees may need stronger detailing and more maintenance.
- Appearance: The roof can dominate the look of the building, especially on a large cabin.
- Maintenance: Consider how easily you can inspect, clean and repair the covering.
- Drainage compatibility: Make sure the covering works with gutters, edge trims and drip details.
As a practical example, a large log cabin such as the Palmako Helena 5.4m x 5.4m Log Cabin Garden Building is supplied with a 19mm tongue and groove roof and a large overhang, but the roof covering is not included. The product information lists optional roof coverings including SBS, charcoal felt shingles and roof underlay felt, with underlay felt described as temporary or as an underlay to a permanent upgrade. This is exactly the sort of situation where you should decide on the final roof covering before installation starts, rather than waiting until the roof boards are exposed to the weather.
Planning rainwater drainage
Once you have chosen the roof covering, plan where the water will go. Drainage does not have to be complicated, but it must be deliberate. Water running off a roof should not be allowed to collect around the base, soak into the underside of the floor, or splash repeatedly against untreated timber.
Gutters and downpipes
For many cabins, gutters are a sensible addition. They collect water at the eaves and direct it through downpipes to a chosen discharge point. This helps protect walls, doors, windows, paths and the base.
When planning gutters, consider:
- which roof edges receive the most water;
- whether the roof has one main fall or several roof planes;
- where downpipes can be fitted without obstructing doors or windows;
- how downpipes will be secured to timber while allowing for normal movement;
- whether leaf guards are needed if the cabin sits near trees.
Guttering should be installed with a slight fall towards the outlet. Too little fall can leave water sitting in the gutter; too much can look poor and reduce capacity at the wrong points. Make sure the front edge of the roof covering has a proper drip detail so water enters the gutter rather than running back underneath the roof edge.
Where should downpipes discharge?
Do not simply let downpipes empty at the cabin corner if the ground falls back towards the building. Discharging water next to the base can undermine the ground, increase dampness and cause splashback onto the lower logs.
Better options include:
- directing water to a water butt, with an overflow led away from the building;
- running water to a gravel-filled soakaway where ground conditions allow;
- discharging onto a sloped hard surface that falls away from the cabin;
- connecting to an existing suitable surface water drainage system, where permitted and practical.
If you are considering a soakaway, check that the soil drains adequately and that it is positioned far enough from the cabin and neighbouring boundaries. Heavy clay soil may not absorb water quickly, especially in winter. In that case, a water butt with a controlled overflow or another drainage solution may be more reliable.
Water butts and rainwater harvesting
A garden cabin roof can be a useful source of rainwater for watering plants. A water butt connected to a downpipe is simple and practical, but it must have an overflow. Once the butt is full, rainwater still needs somewhere safe to go.
Place the water butt on a stable, level stand. A full water butt is heavy, so it should not lean against the cabin wall or sit on soft ground that may settle. Keep it accessible for cleaning and for checking the overflow after storms.
Protecting the base and lower walls
Roof drainage only works properly if the base and ground levels are also right. Timber cabins should normally sit on a firm, level base that keeps the floor structure clear of persistent ground moisture. The ground around the building should fall away rather than towards it.
A common mistake is to install a cabin on a good slab or timber subframe, then allow soil, mulch, gravel or paving to sit too high around the walls. This can trap moisture at the lower logs and reduce airflow. Keep external ground levels below the timber, and avoid piling material against the cabin.
Where water falls from an overhang, use gravel strips, paving with a fall, or gutters to prevent muddy splashback. If doors are positioned beneath a roof edge, make sure water is not discharged directly onto the threshold or the main access route.
Practical installation sequence
A good sequence prevents delays and avoids exposing the roof unnecessarily. Before delivery, decide the roof covering, order all trims and fixings, and confirm whether you need an installer. Do not assume the installer bringing the cabin will also fit upgraded roof coverings unless this has been agreed.
- Confirm the roof specification: Check roof board type, roof pitch, covering options and any warranty conditions.
- Choose the final roof covering: Select a material suited to the pitch, exposure and intended use.
- Order accessories together: Include underlay, ridge pieces, verge trims, adhesive, nails, fixings, gutter brackets and downpipes as required.
- Prepare the base: Ensure it is level, stable and drains away from the cabin.
- Plan safe access: Arrange ladders, platforms or scaffolding as needed for safe roof work.
- Fit the roof covering promptly: Ideally complete weatherproofing as soon as the roof boards are installed.
- Install gutters and drainage: Fit gutters after the roof edge detail is complete, then test the flow with water.
- Inspect after the first heavy rain: Check for leaks, overflowing gutters, splashback and pooling near the base.
Roof and drainage planning checklist
- Have you confirmed whether the roof covering is included or optional?
- Is the chosen covering suitable for the roof pitch?
- Have you allowed for underlay, ridge details, verge trims and fixings?
- Will the roof be permanently covered immediately after assembly?
- Are gutters needed on one or more sides?
- Do downpipes discharge away from the cabin base?
- Is there an overflow route from any water butt?
- Does the surrounding ground fall away from the building?
- Are lower logs protected from splashback?
- Can you safely inspect and maintain the roof each year?
Common practical mistakes to avoid
Using temporary felt as a permanent solution
Temporary roof underlay is not the same as a long-term roof covering. If the product information describes it as temporary or as an underlay, treat it accordingly. Plan and budget for the permanent finish from the start.
Leaving roof boards exposed
Tongue and groove roof boards are part of the structure, but they are not a finished external roof covering. If rain reaches them before the roof is protected, the timber can swell, stain or become harder to finish neatly. Monitor the weather forecast and cover the roof promptly.
Ignoring the roof edge
Leaks often start at edges, ridges, corners and penetrations rather than in the middle of the roof. Use the correct overlap, drip detail and trim. Water should be encouraged off the roof, not allowed to curl underneath the covering.
Letting water fall onto the base
A neat roof is not enough if all the water lands beside the foundation. Repeated wetting around the perimeter can create damp conditions and splash dirt onto the timber. Direct water away using gutters, gravel strips or properly sloped hard landscaping.
Forgetting future maintenance
Leaves, moss and debris can block gutters and hold moisture against roof coverings. If the cabin is close to trees, plan for regular cleaning. Make sure you can reach gutters safely and inspect the roof after storms.
Maintenance after installation
Once the roof and drainage system are installed, inspect them regularly. A practical routine is to check the roof after the first heavy rain, again after a windy storm, and then at least twice a year. Autumn and spring are good times because leaf fall and winter weather can reveal weaknesses.
Look for lifted edges, missing fixings, damaged shingles, cracked felt, blocked gutters, overflowing outlets and signs of water tracking down the walls. Clear leaves before they become compacted. If timber treatment is required by the manufacturer, keep up with the recommended schedule, especially around exposed edges, bargeboards, doors and windows.
FAQ
Do I always need gutters on a garden cabin?
Not always, but they are often worthwhile on larger cabins or where water would otherwise fall near the base, doors, paths or seating areas. Gutters give you control over where rainwater goes.
Can I fit the roof covering myself?
That depends on the covering and your skill level. Felt shingles may be suitable for competent DIY installation if instructions are followed. Torch-on systems should only be fitted by people with advanced skills or by professionals because of the safety risks and detailing requirements.
Is a large roof overhang enough to protect the cabin?
No. An overhang helps protect walls and creates shelter, but the roof surface still needs a suitable weatherproof covering. You also need to manage the water that runs off the overhang.
Where should I put the water from the downpipe?
Direct it away from the cabin. A water butt with an overflow, a suitable soakaway, or a sloped surface leading away from the building can all be practical options, depending on your site.
What should I check before ordering a roof covering?
Check the roof pitch, roof area, manufacturer’s recommendations, fixing method, edge details, expected lifespan, appearance and whether the work requires a professional installer.
Conclusion
Roof covering and drainage planning is essential for a durable timber garden cabin. Before installation, confirm whether the roof covering is included, choose a permanent finish suited to the roof pitch and exposure, and plan how rainwater will be collected and discharged. Pay particular attention to roof edges, gutters, downpipes, base levels and splashback. By making these decisions early, you protect the cabin, reduce maintenance problems and give the building the best chance of performing well for years.

